










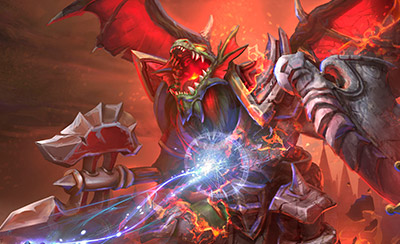

Dragon Shire
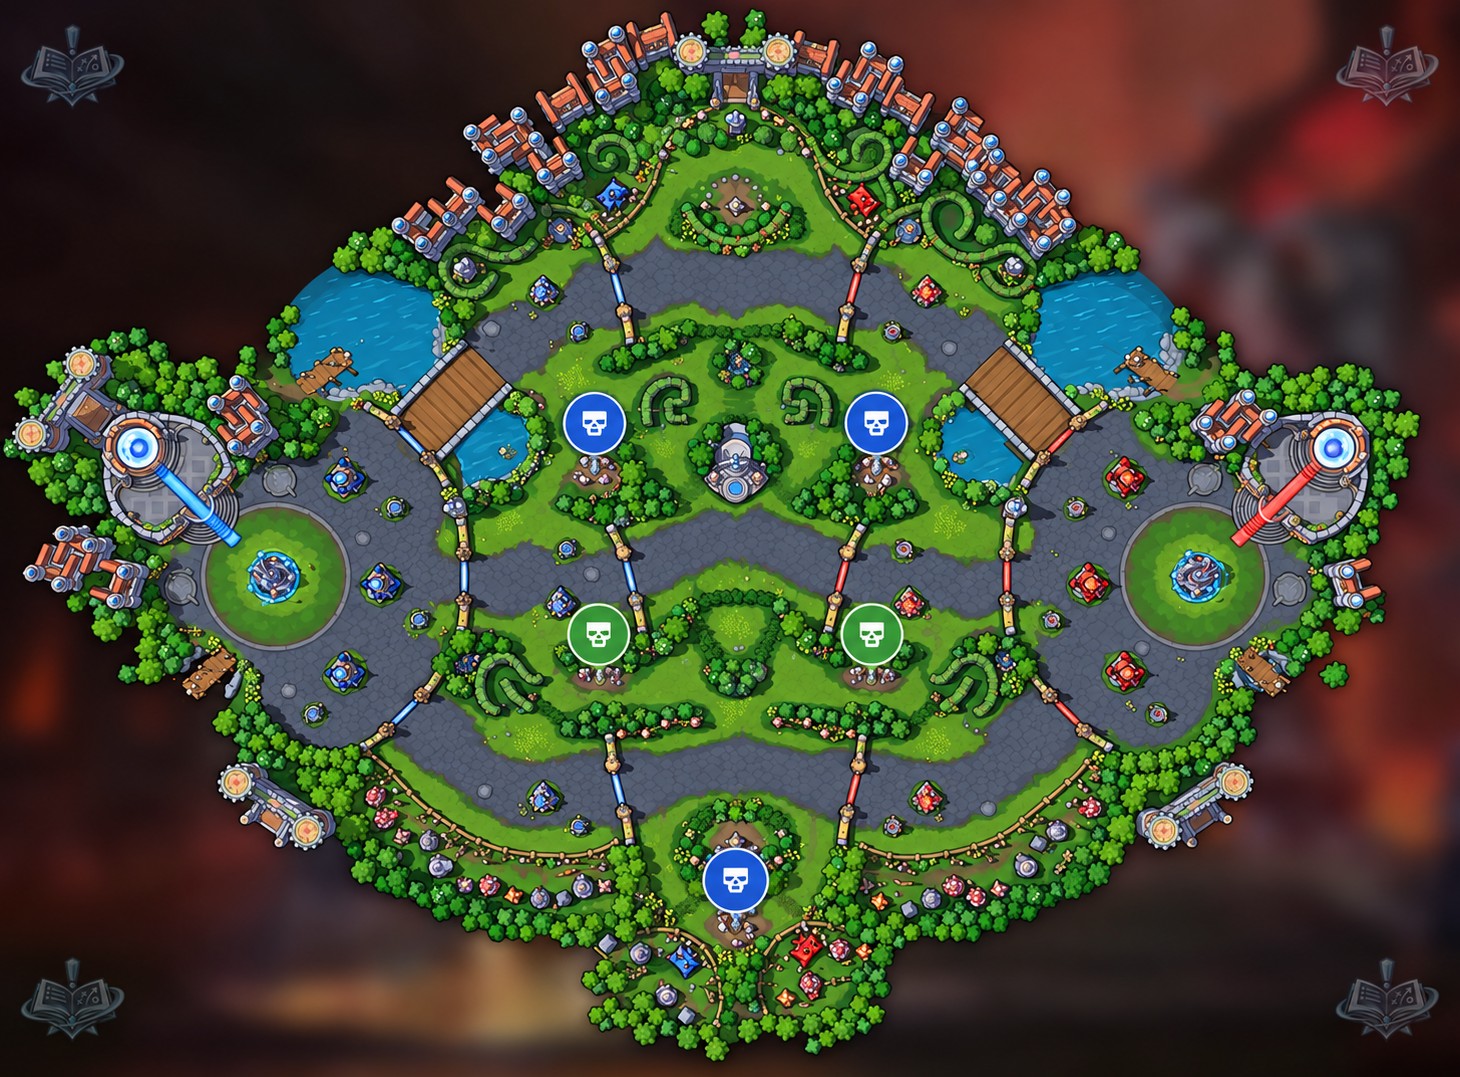
Dragon Shire is a three-lane map with a shrine above the top lane, a shrine below the bottom lane and the Dragon Altar in the middle. The objective starts at 1:30 and keeps cycling every 2:00 after each Dragon Knight dies, so the tempo is set by two small point-control fights instead of one big brawl. A team that can hold a point one-on-one, rotate quickly between the shrines and clear camps between phases owns the map. Late-game strength matters: the Knight lasts longer the later it comes, and a late one plus a siege and a bruiser camp is a game-ending push.
- Rotas
- 3 rotas
- Duração típica
- ~20 min
- Primeiro objetivo
- First at 1:30
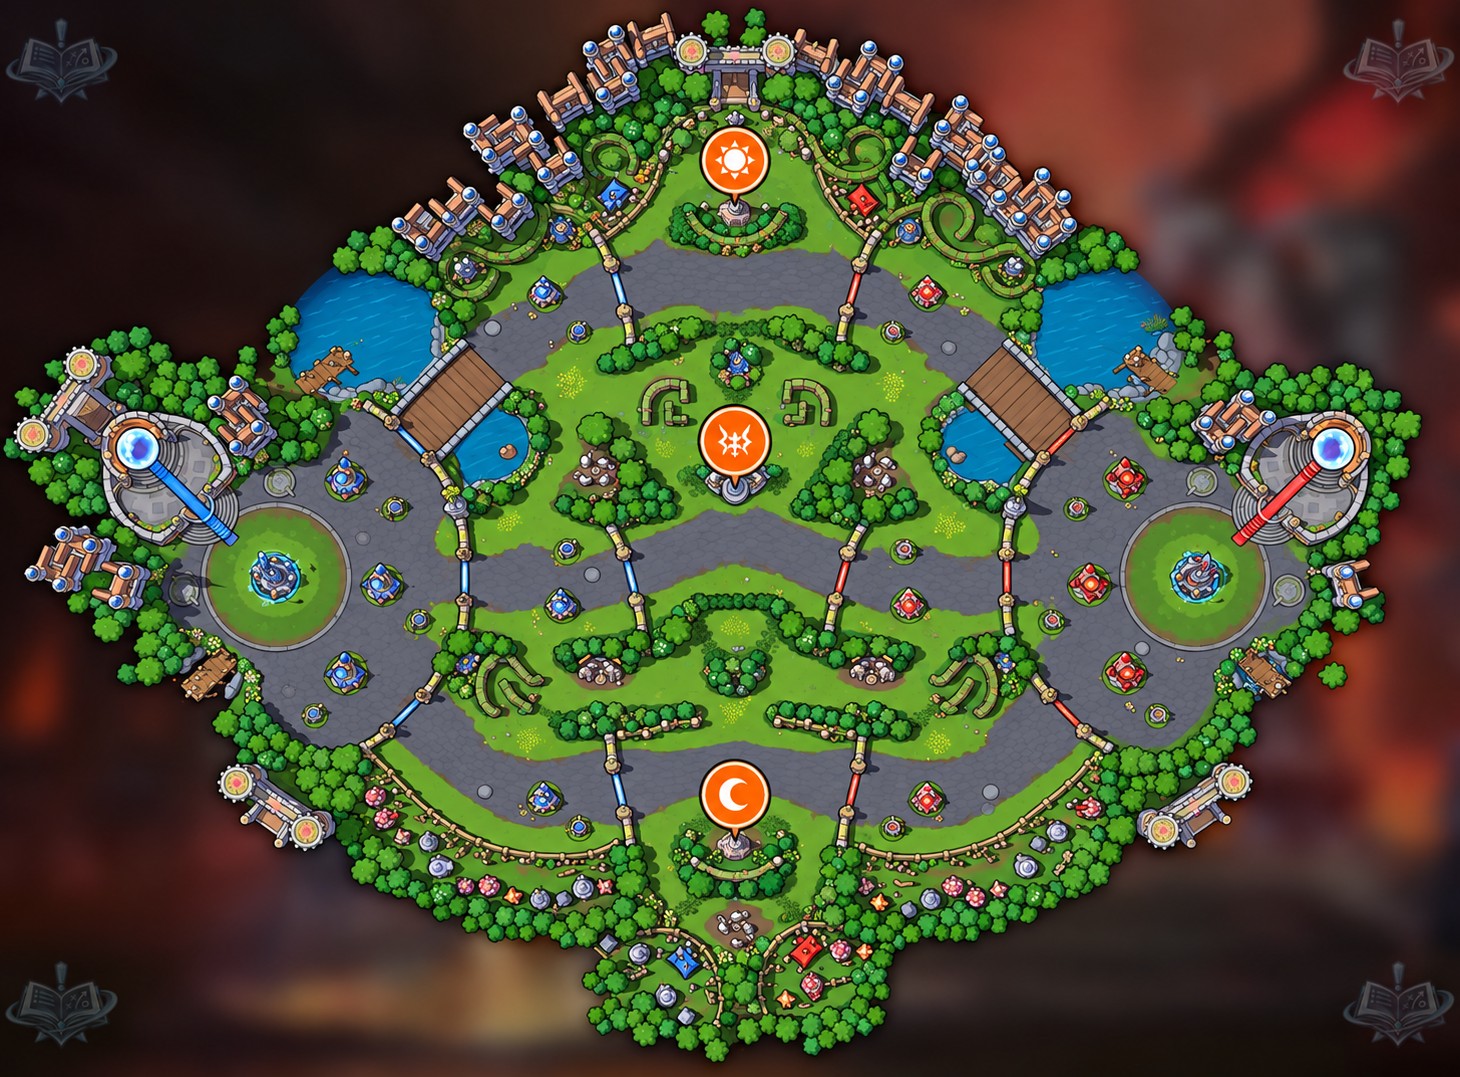
Imagem do campo de batalha: Icy Veins. Objetivos marcados sobre o mapa do jogo.
Objetivos



Sun and Moon shrines
First at 1:30. Then 2:00 after the Dragon Knight dies.Stand in a shrine to capture it: 4 seconds if it is neutral, 8 if the enemy owns it. Holding both at once unlocks the Dragon Altar in the middle lane; holding one keeps it locked for the enemy. Mercenary camps disappear as soon as a Knight is activated (unless already in combat) and only return once it dies.
Dragon Knight
First at 1:30 at the earliest, as soon as one team holds both shrines. Summoning takes 3 seconds; the Knight lasts 55 seconds plus 2 seconds per minute of game time.Any hero channels the altar for 3 seconds to become the Knight, an Unstoppable vehicle. Flame Breath (Q, 6-second cooldown) burns a cone and the ground under it, Savage Charge (W, 10-second cooldown) charges a hero and knocks them back, and its trait doubles damage to structures and minions, cuts damage from structures by 60% and explodes on death, knocking nearby enemies back.
Plano de partida
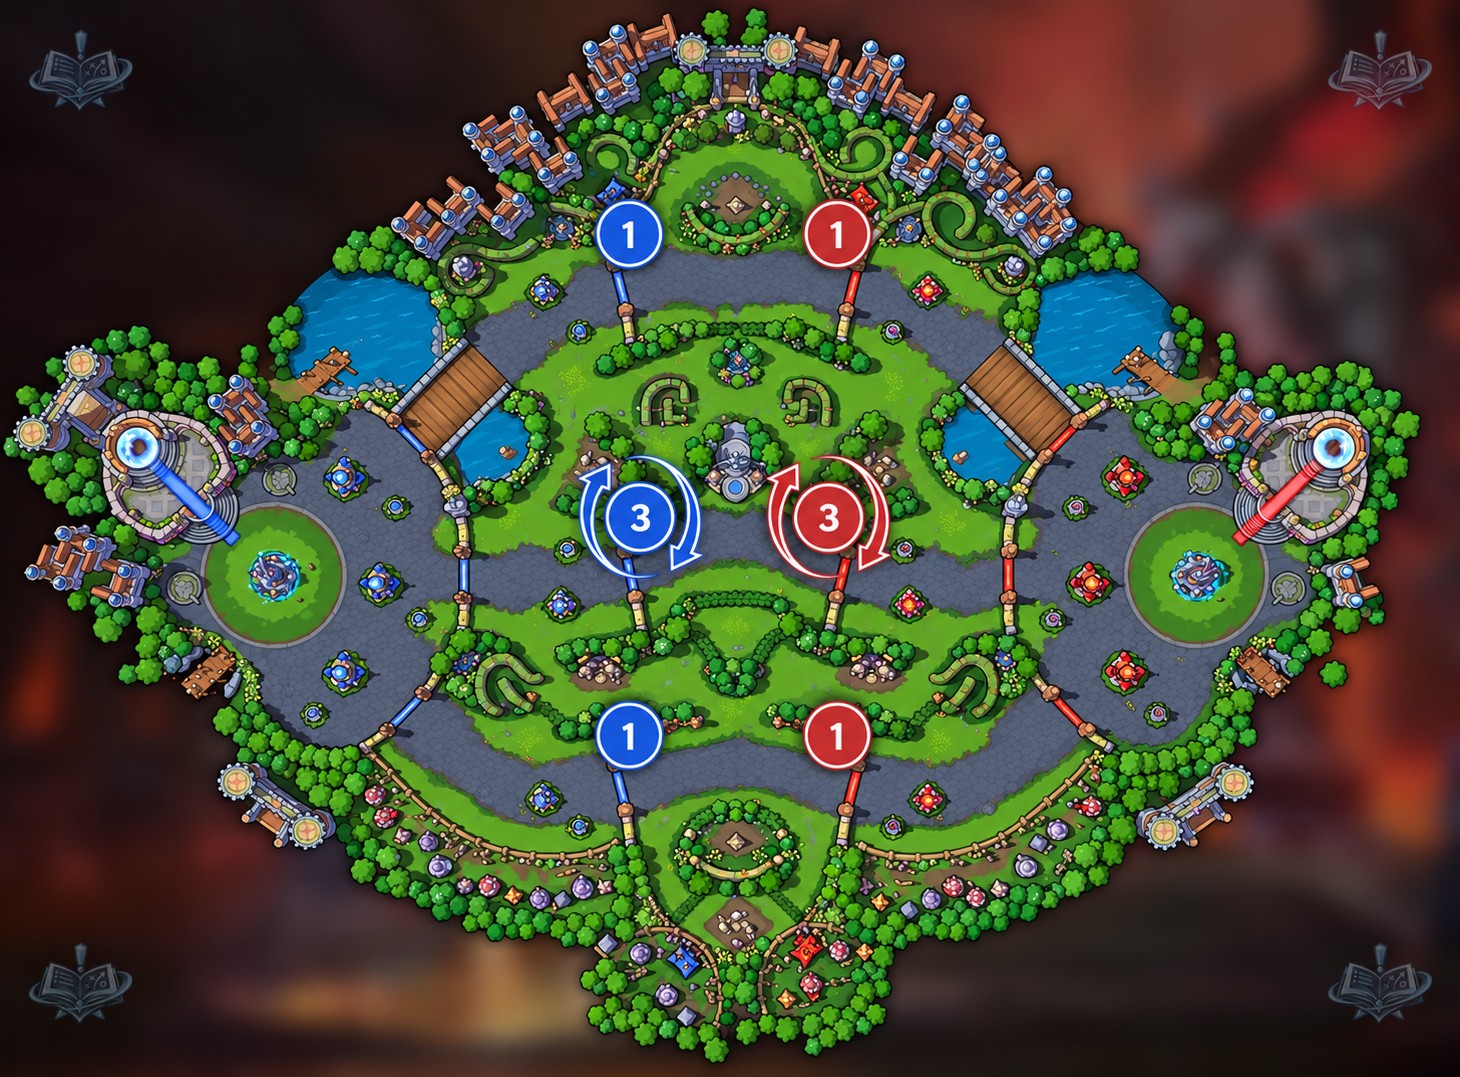
Lane assignments
The standard formation is 1-3-1. A self-sufficient offlaner takes the top lane and the shrine above it; an anchor, a hero who can hold a point alone for a long time, takes the bottom lane and the shrine below it. The three heroes in the middle soak the mid wave, take camps and rotate to whichever shrine needs help. Because the shrines sit next to the side lanes, the side laners double as your shrine holders: pick heroes for those slots who win, or at least survive, a 1v1.
- Top: the offlaner, ideally with sustain or an escape, since the top shrine fight is often a duel.
- Bottom: the anchor; this lane also has your siege camp and the neutral bruiser camp, so a hero who clears camps is a bonus.
- Middle: tank, healer and a damage dealer, ready to rotate to a shrine within seconds of the 1:30 activation.
Early game
Everything happens fast because the first shrines come at 1:30. At 0:30 start your siege camp in the bottom lane and capture it as soon as it is down; if you can finish it at 0:42, twelve seconds after a wave spawns, the giants walk in behind your minions. Move straight to your bruiser camp in the top lane around 0:50 and try to capture it at 1:30, right as a wave spawns, so the knights lead the wave into the enemy Fort while the shrines activate. Watch for invades on both camps: the enemy knows exactly when you will be there. At 1:30 have a durable hero standing on each shrine, secure at least one, and only push for the second when you have a numbers or health advantage there.
- 0:30 - siege camp (bottom lane); capture at 0:42 so the giants join behind your minions.
- 0:50 - bruiser camp (top lane); capture at 1:30 so the knights arrive with the wave.
- 1:30 - one durable hero per shrine, the rest of the team positioned to swing to whichever fight tips.
Playing the objective
Treat the two shrines as separate fights and pick the one you can win. If the enemy commits hard to the top shrine, take the bottom one and hold it: as long as you own one, their altar stays locked. When you have an edge, flip the second shrine (8 seconds if they own it), clear the middle and send a healthy hero to channel the 3-second summon; the channel breaks if the hero is hit or moves. Pilot the Knight with a plan: the first one should take two Towers and ideally a side-lane Fort, the second a Fort in the other side lane, later ones a Keep or the Core. Keep its health and its duration roughly in step: timing out at full health means you played too safe, dying with a minute left means you dove too deep. If you lose the shrines, do not fight the Knight in the open; fall back to structures, focus it down (percent-damage heroes are ideal) and match the enemy split if they push several lanes, while the offlaner keeps soaking in the early game.
- Flame Breath first on minions, then on as many structures as possible; Savage Charge on the best defender, to peel, or to interrupt a channel.
- Never Savage Charge a mobile hero: the Knight follows them and can end up stuck or out of position.
- Defending? Unstoppable cancels Savage Charge, and dashes can drag the Knight deeper under your Towers.
- In the early game a Knight also works as a distraction: it threatens one lane while your team pushes another.
Mercenary camps
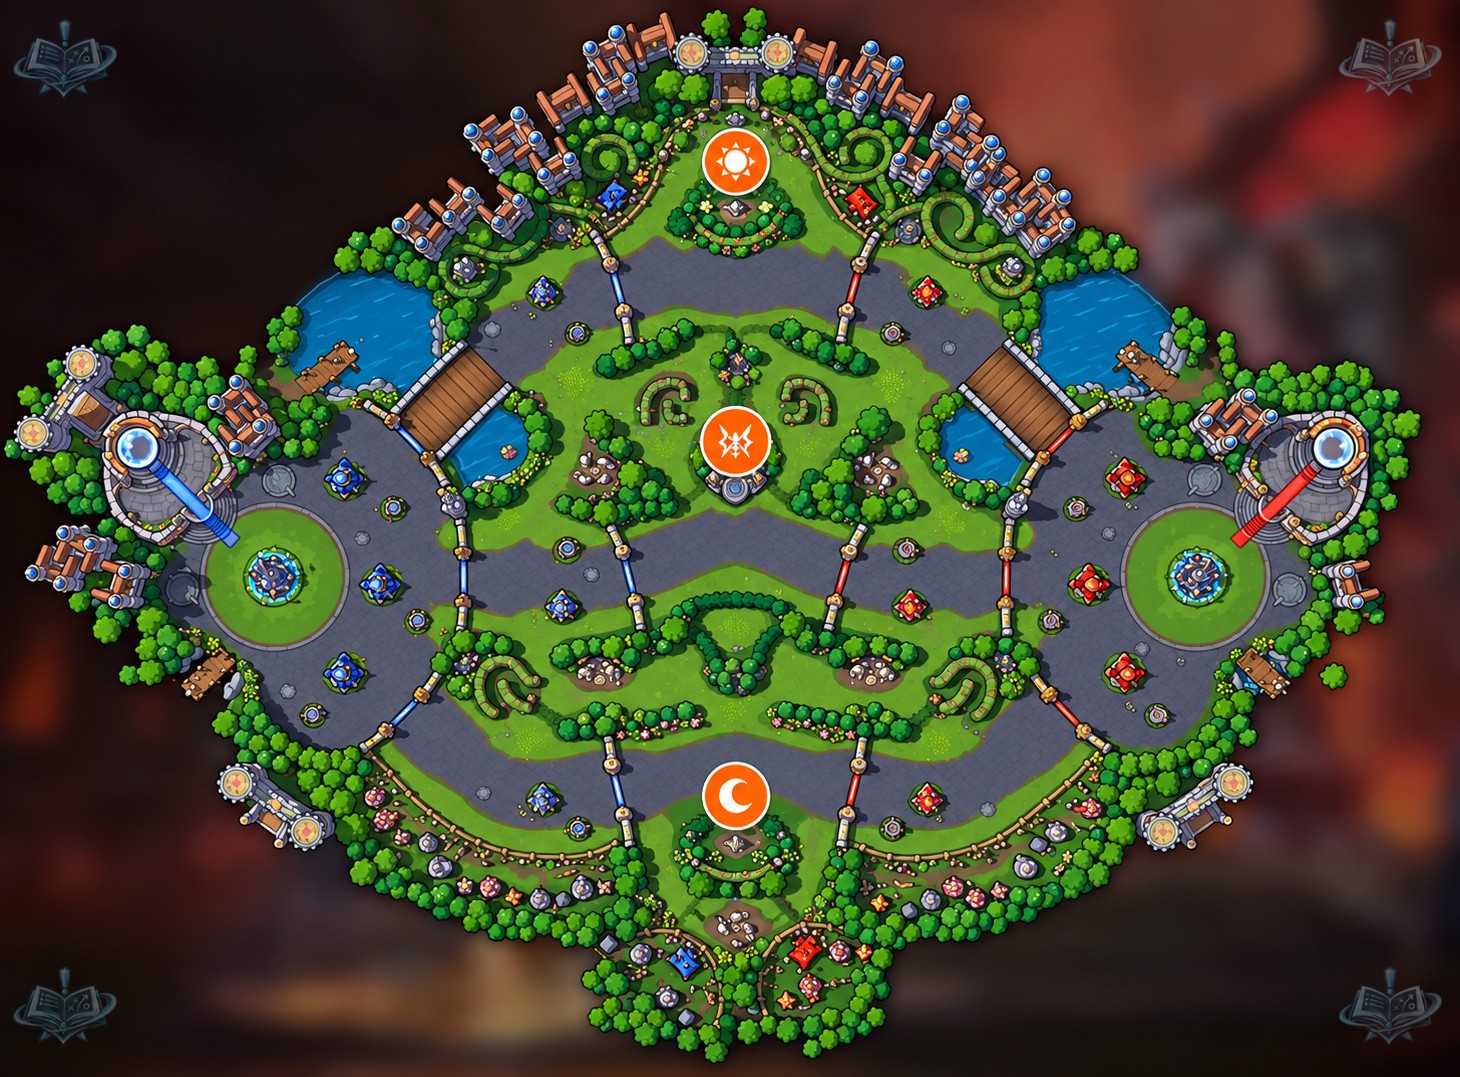
Five camps: two bruiser camps in the top lane, two siege camps in the bottom lane and one neutral bruiser camp, also in the bottom lane. All of them vanish the moment a Dragon Knight is activated (unless their mercenaries are already fighting) and only come back after it dies, so camp work belongs in the 2:00 window between Knights. Take the neutral bruiser camp when you have an edge with no shrine to contest, or right after a Knight dies. Chaining your siege camp, the neutral bruiser camp and then the enemy siege camp in the bottom lane is as strong as a boss on other maps.
- Siege camp (2 giants): 0:30, respawns 3:00 after capture. They lob rocks you can sidestep, outrange structures and deal 100% bonus damage to buildings.
- Bruiser camp (3 knights + 1 wizard): 0:30, respawns 4:00 after capture. The wizard's Spell Armor field protects nearby minions, mercenaries and heroes; do not fight into it while it is up.
- Neutral bruiser camp (bottom lane): same units and timers, contested by both teams; take it when you win the bottom shrine or when the enemy is dead.
- No boss on this map: the siege plus bruiser combo in the bottom lane is your equivalent.
Late game and win conditions
There is no boss to swing the game, so the late game is decided by the Knight and by mercenary chains. A Knight at 20:00 lasts 95 seconds, long enough to walk from a Keep to the Core if your team cleans up around it. Three ways to close: win the shrines and take a Keep with the Knight, chain siege camp plus bruiser camp into a lane the enemy cannot defend, or split-push while a duelist holds the far shrine. The Core throws 2 Boulders every 6 seconds at a nearby hero, dealing 5% of maximum health and stunning for 1.75 seconds, so do not go in with low-health heroes leading. Late shrine fights tend to become 5v5 at one shrine; pick the shrine where your team has the better escape route and remember that a single won shrine still locks the altar.
O que buscar no draft
O que buscar no draft
- Prefer an anchor who can hold a shrine alone for a long time (sustain, self-healing or a shield).
- Prefer heroes with global presence or high mobility to swing between the two shrines.
- Prefer camp clearers: the siege plus bruiser chain in the bottom lane is a win condition.
- Prefer abilities that use impassable terrain and vision tools; the shrines are enclosed and the bushes around them hide rotations.
- Prefer a strong late game: Knights get longer and the game rarely ends before they matter.
- Avoid drafts that fall off late or that need five heroes together to function.
Erros típicos
- Sending all five to one shrine and handing the other one over for free.
- Giving the Knight to your main damage dealer, then losing the fight around it.
- Chasing heroes with the Knight instead of hitting Towers and Forts while the timer runs.
- Fighting the enemy Knight in the open instead of falling back to your structures and focusing it.
- Farming a camp while a Knight activates: the camp vanishes and you arrive late to the defense.
Dicas
- 1Capturing a neutral shrine takes 4 seconds; flipping an enemy one takes 8. Plan the fight around that gap.
- 2The summon channel is 3 seconds and breaks on damage or movement: clear the altar area before anyone clicks it.
- 3The Knight lasts 55 seconds plus 2 seconds per minute of game time; a 10:00 Knight is 75 seconds, a 20:00 Knight is 95.
- 4Camps disappear when a Knight is active and return when it dies: clear them in the 2:00 window between Knights.
- 5Abilities that hop over terrain let you enter or leave a shrine instantly: use them to steal a capture or escape a losing 1v1.
- 6Cursed Bullet and Sleep Dart cannot hit vehicles; percent-damage abilities like Drain Hope are the best Knight killers.
- 7The objective is slow to resolve, so use the Healing Fountain on cooldown instead of saving it for the event.
- 8If your team has a quest that stacks on enemy heroes, an early enemy Knight can be a free stacking session while you defend.