












Hanamura Temple
Hanamura Temple is a two-lane map with a wide middle area, two Recon camps that act as capturable Watch Towers and a hole in the center where the Payload spawns. The Payload cycle is slow (first at 3:00, then 3:00 after each delivery) and a delivery only shaves structures, so the tempo here comes from the mercenaries: Sentinels, Turrets and Recon vision are always available and hit hard. Each delivery also upgrades your path to a longer, deeper route, which makes the third Payload far harder to push than the first. Teams that clear camps on cooldown, keep two lanes soaked with a 1-4 split and pick fights around the cart rather than for the cart do best; at high level it is common to ignore the Payload entirely and push instead.
- Rotas
- 3 rotas
- Duração típica
- ~20 min
- Primeiro objetivo
- First at 3:00
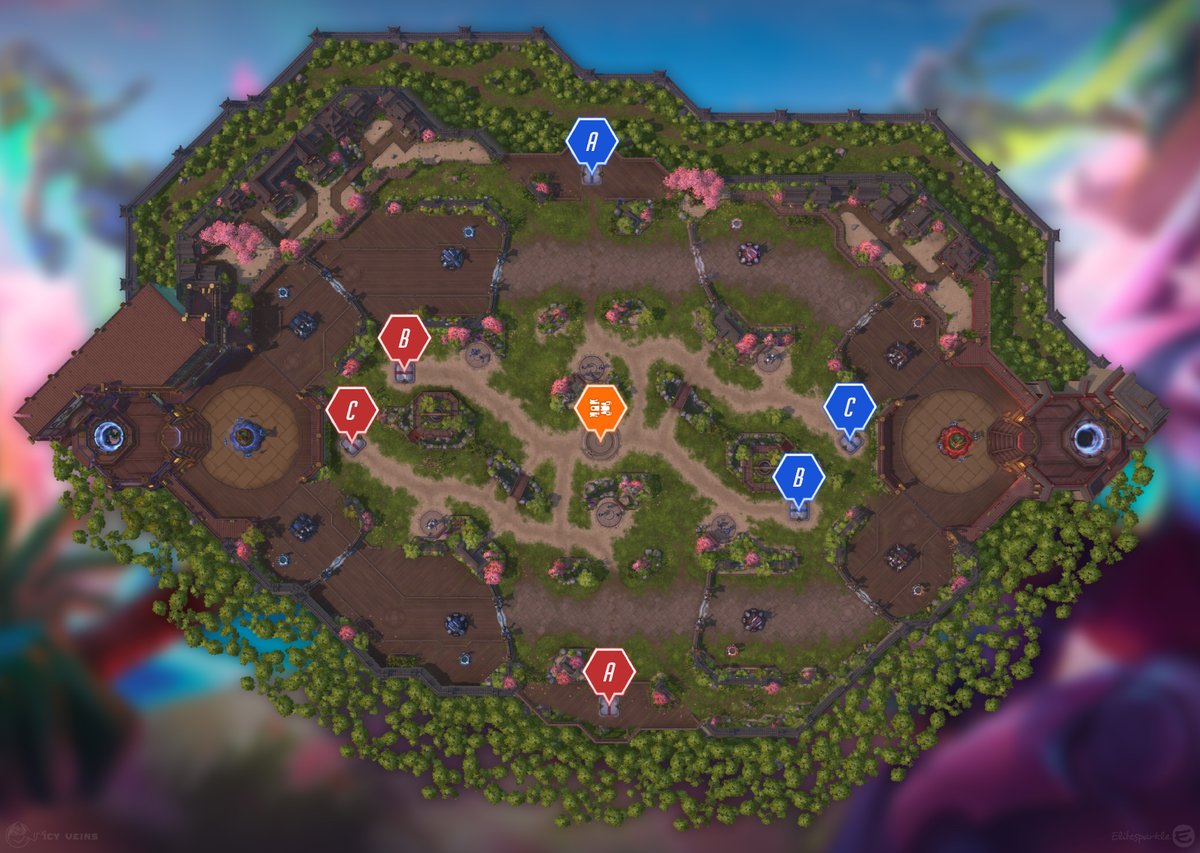
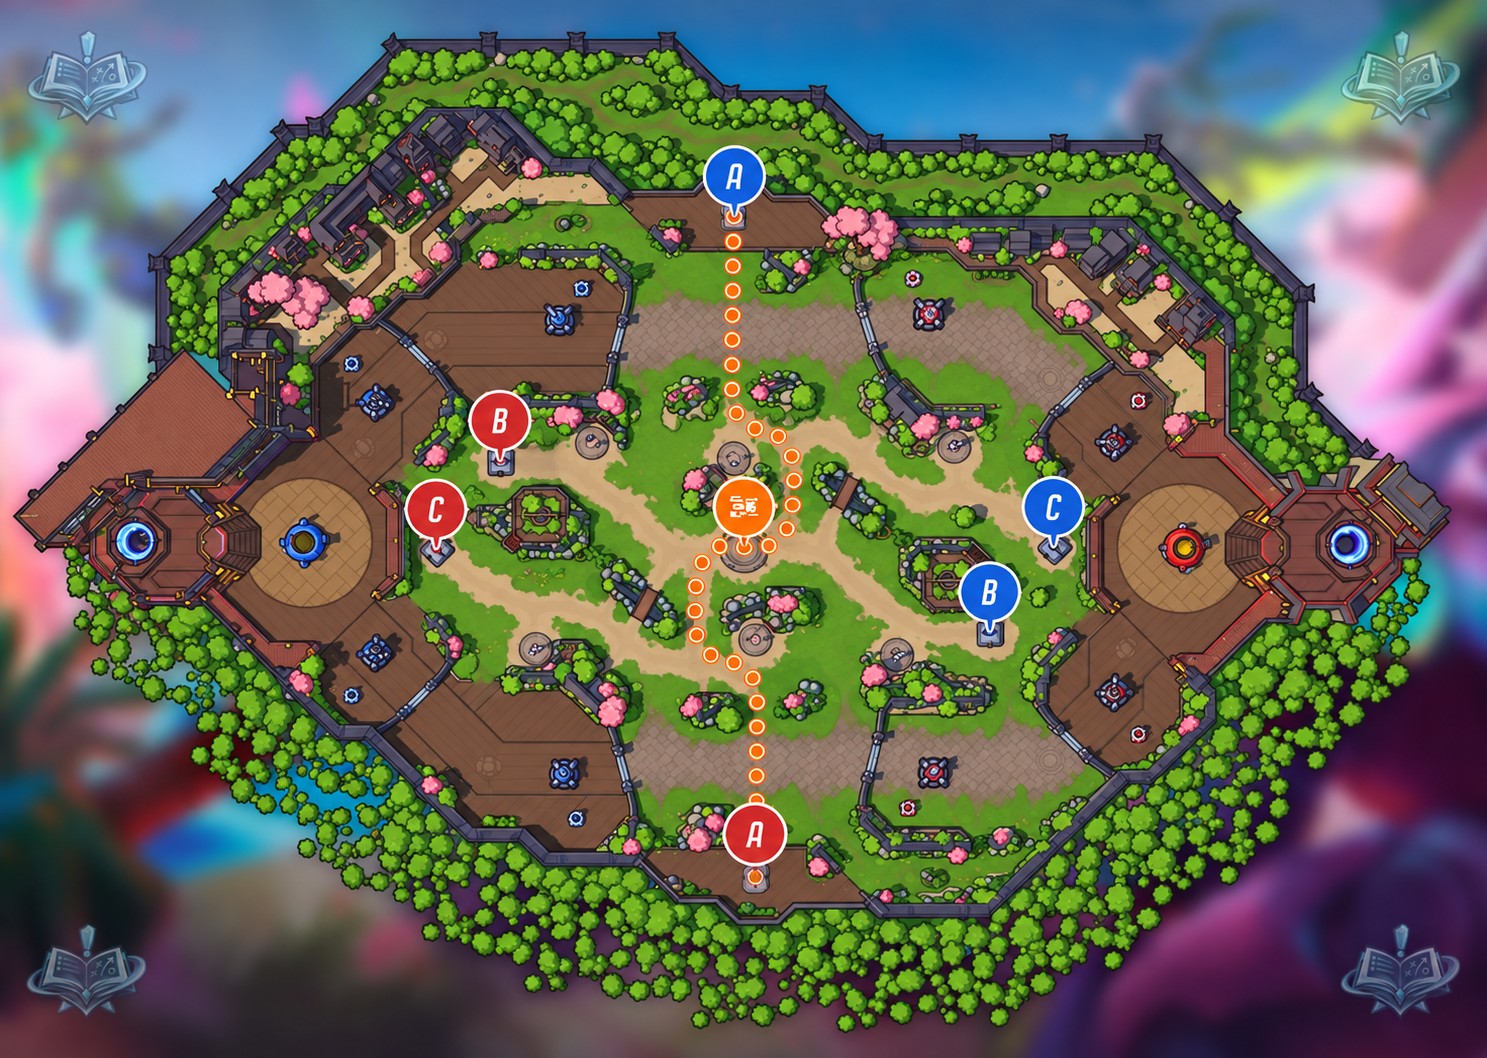
Imagem do campo de batalha: Icy Veins. Objetivos marcados sobre o mapa do jogo.
Objetivos



Payload
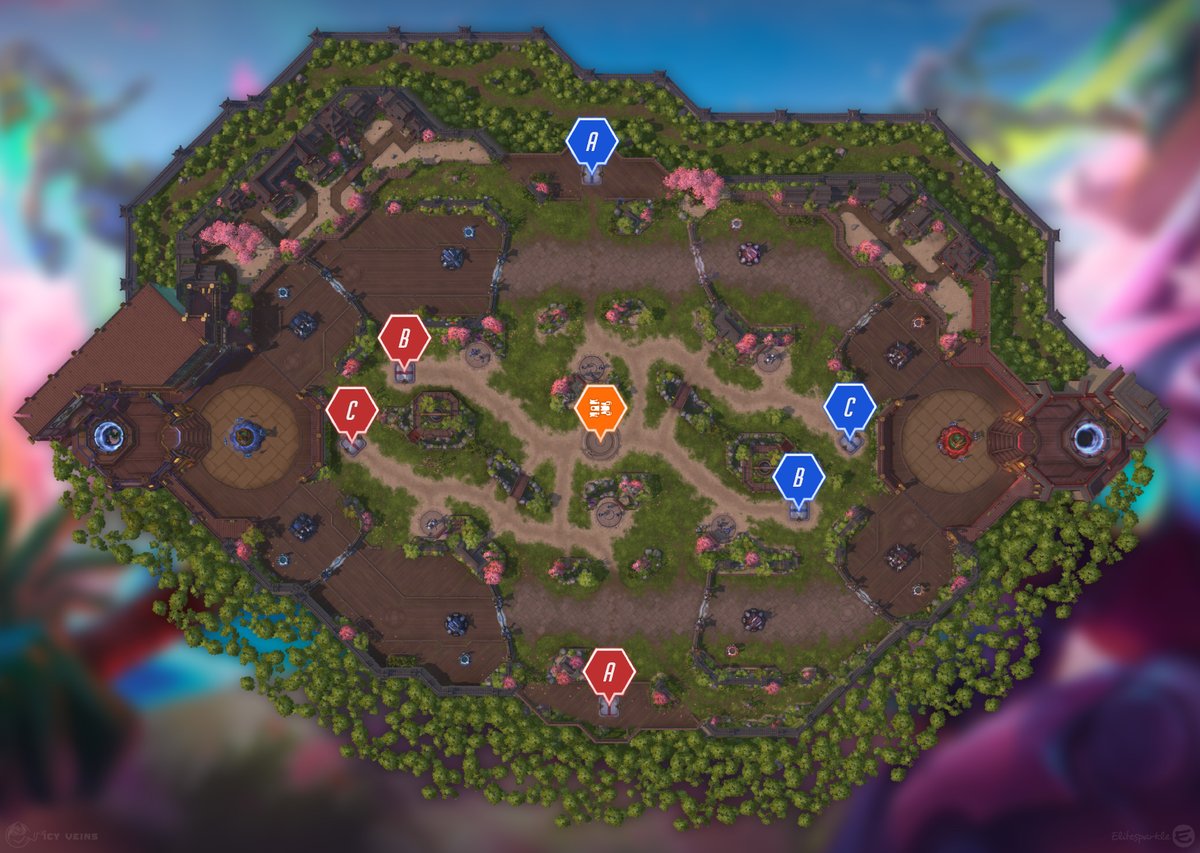
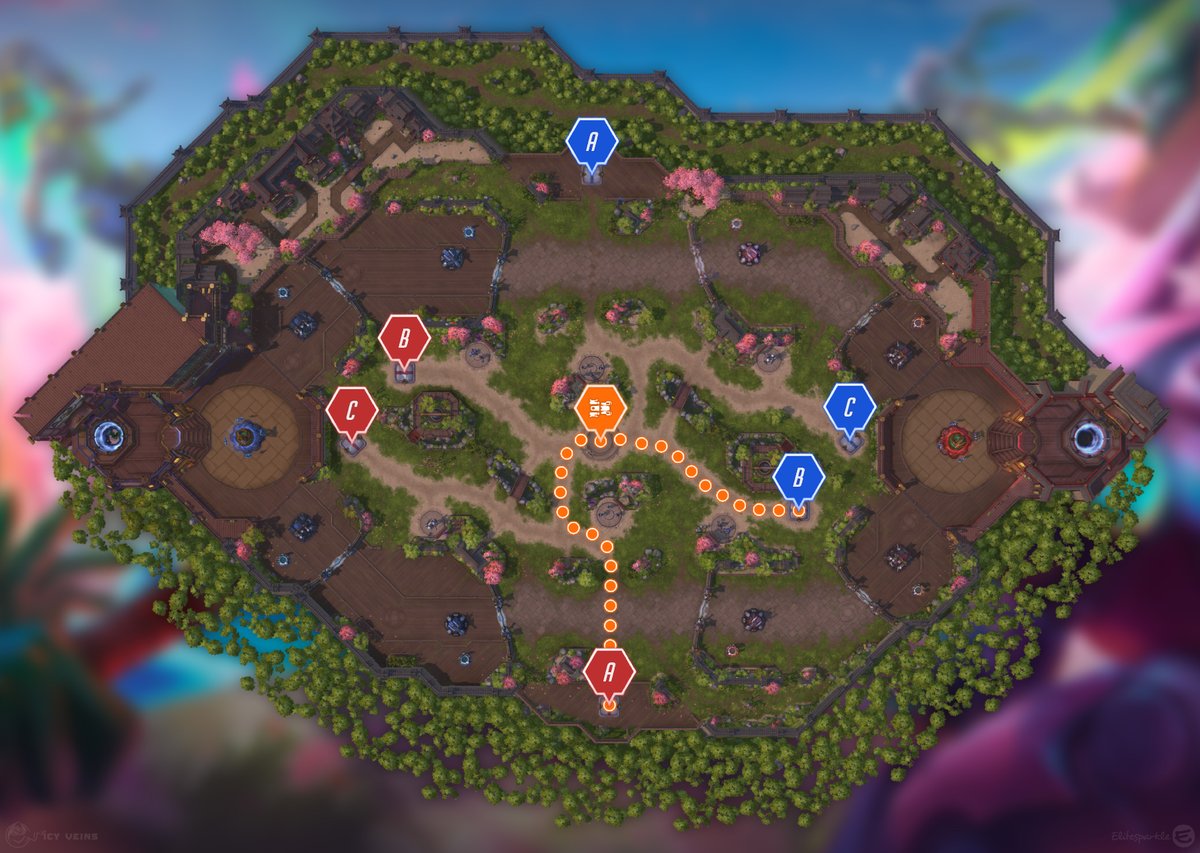
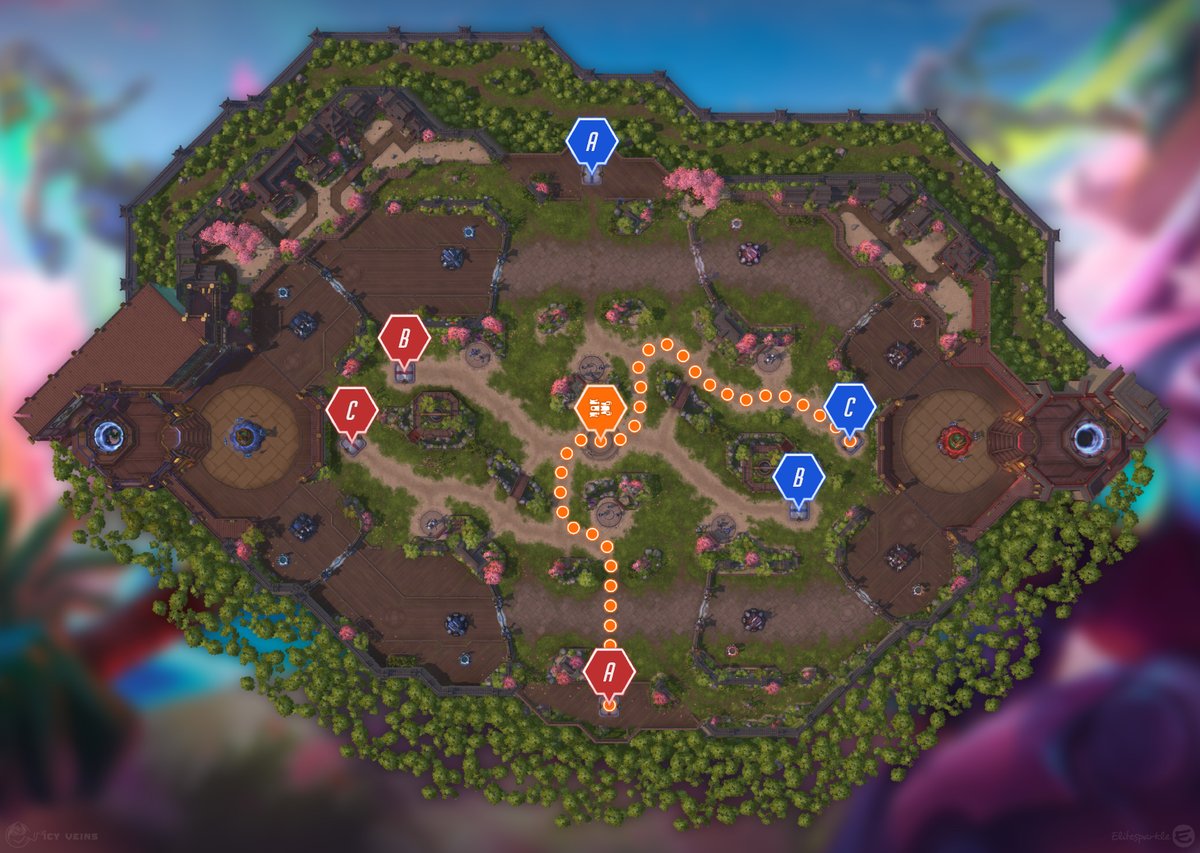
First at 3:00. Then 3:00 after the previous delivery, counted from the last shot of its barrage.Both teams push the same cart toward their own destination. One escort moves it at 50% speed, two at 60%, three at 70%; extra heroes add nothing (Misha counts as one, Gall does not). Leaving the area stops it, but it only rolls back if the enemy escorts it uncontested. Your path upgrades after every delivery: path A runs through a side lane past a Recon camp and ends where the enemy Sentinel goes (33/27/23 seconds with 1/2/3 escorts); path B bends into enemy territory past their Fortification camp (23/19/16 seconds); path C passes a Recon camp and the enemy Sentinel camp to end between their Keeps (36/29/25 seconds), then the cycle resets to A.
Barrage
First right after the first delivery (3:00 plus the escort time at the earliest). 12 shots over 15 seconds; the next Payload spawns 3:00 after the last shot.Each missile deals 2280 damage to structures (no scaling) and the Core takes 20% less. Shots target the lane whose structures have taken the least total damage, and a Fort or Keep is only hit once its Towers and Gate are down; the Core is only hit once every other structure is gone. A late barrage on a full-health, full-shield Core leaves it around 50%. The delivering heroes nearby also get a Regeneration Globe.
Plano de partida
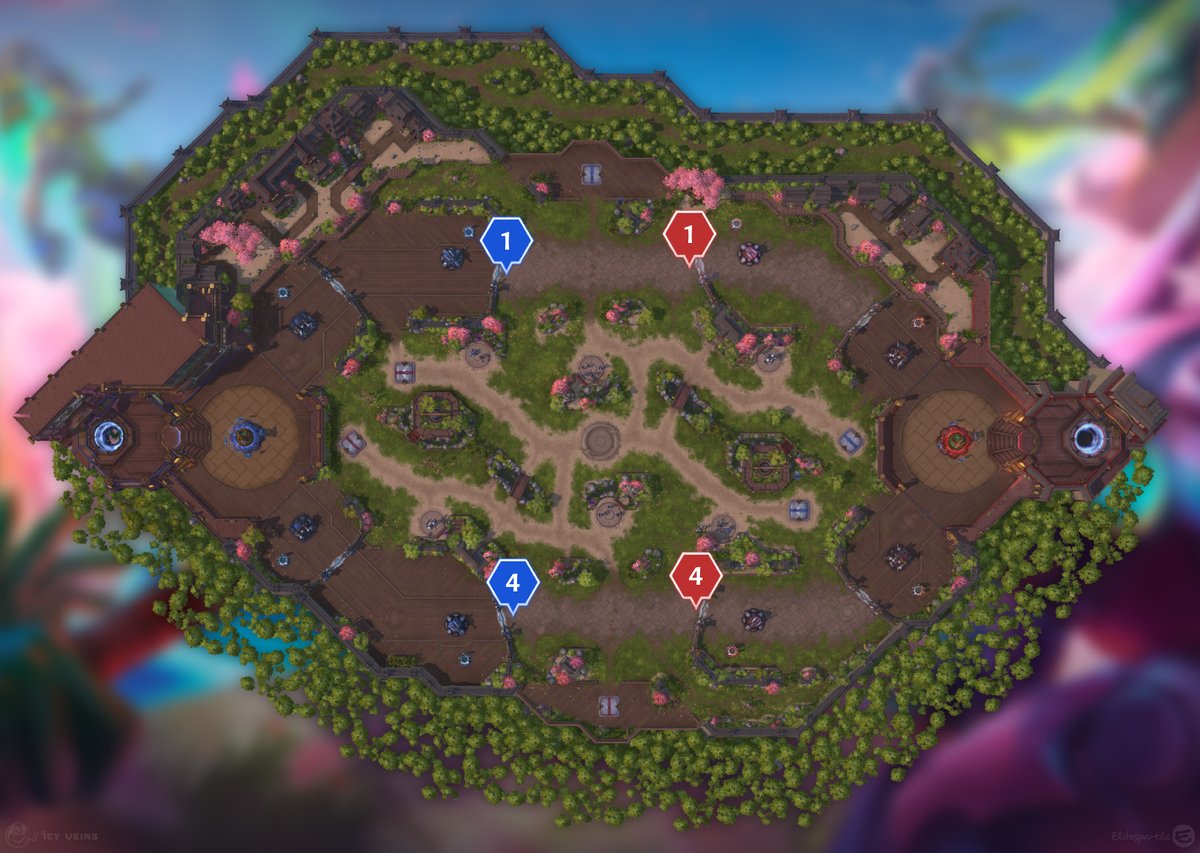
Lane assignments
The go-to formation is 1-4: the offlaner covers the top lane while four heroes play the bottom lane, its Sentinel camp and the center. The offlaner should be a hero who clears waves, survives a gank and can help kill or defend a Sentinel, because the enemy Samurai will regularly walk into that lane. The four-man rotates between the bottom wave, the Sentinel camp, the Fortification camp and the Recon camp, and moves to the Payload only when the camps are done. Global or highly mobile heroes suit the solo lane: they soak and still reach the center for a fight.
- Top: offlaner with waveclear and an escape; expect the enemy Samurai in this lane.
- Bottom: tank, healer and two damage dealers who can clear the Samurai camp quickly.
- Swap the split if the enemy stacks four on top: match the numbers, not the lane.
Early game
At 0:30 start your Samurai (Sentinel) camp and capture it as soon as it is down; it goes into lane and starts trading structures right away. At 0:45 move to your Fortification camp: kill the Mechanic first, because it repairs the Turret whenever it drops below 80% health, then pick up the Turret it leaves behind. With both taken, contest whichever Recon camp is neutral or enemy-held to lock down movement through the middle. Use your first Healing Fountain before 1:00 so its 2-minute cooldown brings it back for the 3:00 Payload. If the enemy Samurai reaches your structures, send enough heroes to kill it or counter-push the other lane with yours.
- 0:30 - Samurai camp; capture immediately and push behind it.
- 0:45 - Fortification camp; Mechanic first, then grab the Turret.
- Before 1:00 - use the Healing Fountain once.
- After both camps - flip a Recon camp for vision of the center before 3:00.
Playing the objective
Do not treat the cart as a five-man commitment. One escort is the most efficient use of bodies, three is the fastest; pick the number based on how dangerous the route is and what the rest of the team can take elsewhere. Your priority when the enemy is pushing is to stop them near the end of their path, because a delivery on their side deals as much damage as one on yours and losing the trade costs structures. When you are escorting and the enemy has the advantage, back off even a few meters from the destination and try again later, unless it is the Payload that would win them the game. After a delivery, your next path is longer and deeper: on path B the enemy has one or two Healing Fountains next to the route and you have none, and on path C the destination sits between their Keeps. Remember the cart never rolls back while an ally is near it, so a single contester buys time for the team.
- Escort with 1 when the route is safe and camps are up; escort with 3 only to beat a clock.
- Contest their cart hardest in its last stretch, where a stop actually denies the barrage.
- Place your stored Turret on the route before a fight, or on the ground before you die so it is not stolen.
- Winning the fight but not the cart is fine: take a Fort while they respawn.
Mercenary camps
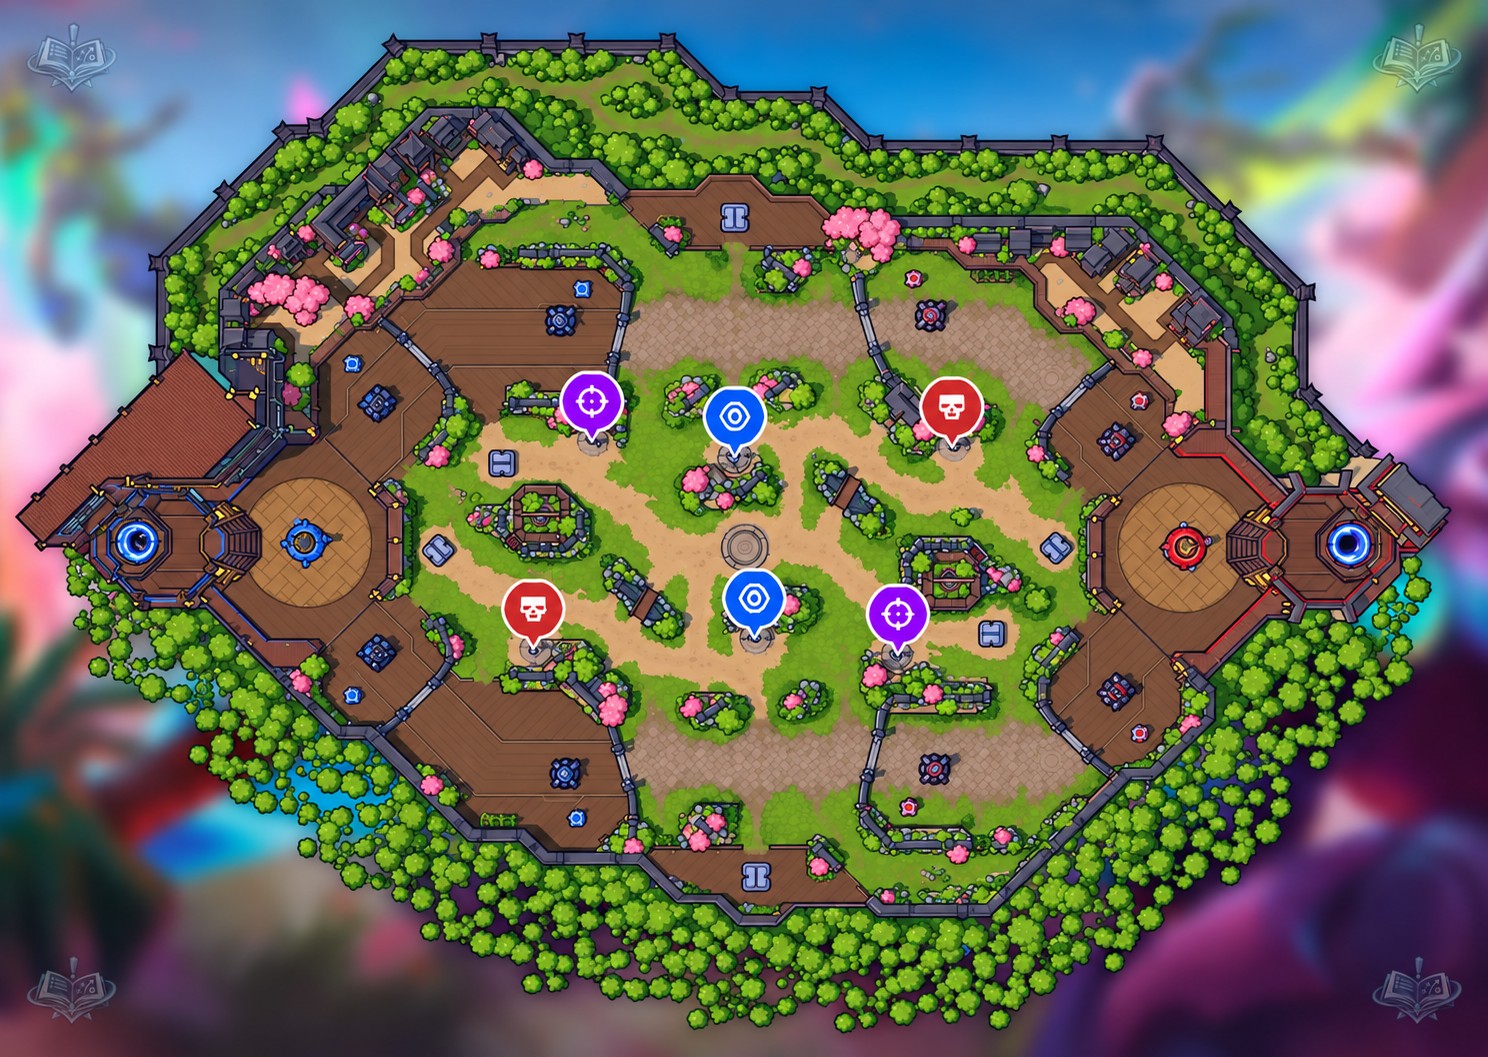
Six camps, and all of them stay active during the Payload and the barrage. Each side has a Fortification camp (top-left and bottom-right), a Samurai camp (top-right and bottom-left), and there is a Recon camp near the center of each lane. The Samurai camps are elite and immune to Bribe. When the Samurai and Fortification camps are both up, take the Samurai first so its cooldown starts earlier. Recon camps give no net experience if you just trade them back and forth; to profit, let the enemy clear the Henchmen and steal the capture at the last second.
- Samurai camp (1 Sentinel): 0:30, respawns 2:30 after capture. Pushes its lane with a frontal Horizontal Slash every 8 seconds; ranged heroes step back on the indicator, melee walk through it.
- Fortification camp (1 Mechanic + 1 Turret): 0:30, respawns 2:30 after capture. Leaves a Turret item anyone can pick up: 90 damage per second for 45 seconds, prioritizes heroes, double damage to minions, counts as a mercenary.
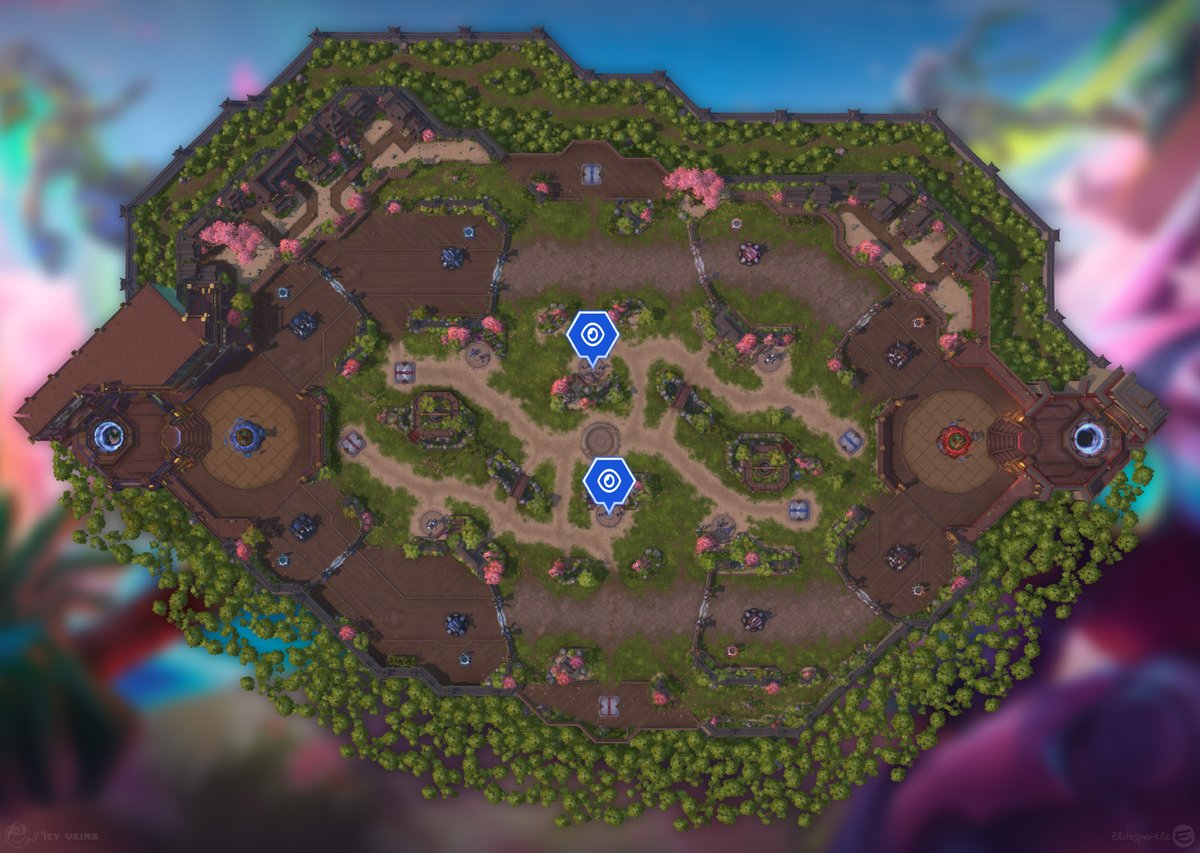
- Recon camp (3 Henchmen): 0:30, respawns 1 second after capture. Works as a Watch Tower that never goes neutral; holding both makes the center impossible to cross unseen.
- Sentinels are immune to Bribe effects; Turrets can be buffed by mercenary talents.
Late game and win conditions
There are two realistic win conditions: the Payload and the Sentinel camp. Late barrages do real work because most Towers and Gates are down, so shots reach Forts, Keeps and eventually the Core, and a full 12-shot barrage takes a fresh Core to about half. Store Turrets during calm stretches and drop them all in the deciding fight or under the enemy Keep. The Core fires two volleys of missiles every 8 seconds that deal 5% of maximum health and slow by 70% for 1.25 seconds, so finish with a Sentinel or a barrage tanking attention instead of diving heroes in first. If the Payload is not worth the escort time, push the lane opposite the cart with a Sentinel and let the enemy choose between saving a Keep and delivering.
O que buscar no draft
O que buscar no draft
- Prefer fast camp clearers: Sentinel, Fortification and Recon camps are the real economy of this map.
- Prefer gankers and heroes with strong siege damage to punish escorts and convert barrage windows into Forts.
- Prefer quests that stack on enemy heroes; the long fights around the cart feed them.
- Prefer sustain damage and sustained healing over burst: Payload contests are drawn-out zone fights.
- Prefer a solo laner who can duel and clear a Sentinel alone.
- Avoid abilities that rely on impassable terrain; the middle of the map is wide open.
Erros típicos
- Escorting with all five while your Sentinel camp sits ready and a lane goes unsoaked.
- Contesting the enemy cart at the start of its path instead of at the end, where a stop actually matters.
- Killing the Turret before the Mechanic and watching it get repaired.
- Trading Recon camps back and forth for zero net experience.
- Pressing a near-finished escort into a losing fight because the destination was right there.
Dicas
- 1Escort speed: 50% with one hero, 60% with two, 70% with three; nothing beyond that.
- 2Path times with 1/2/3 escorts: A 33/27/23 s, B 23/19/16 s, C 36/29/25 s. Path A ends where the enemy Sentinel goes.
- 3Each missile deals 2280 to structures and targets the lane that has taken the least damage; Forts and Keeps only get hit after their Towers and Gate.
- 4Bait the Samurai's Horizontal Slash toward a wall when clearing it: it targets the closest hero.
- 5Kill the Mechanic first; it repairs the Turret below 80% health.
- 6Recon camps respawn 1 second after capture and never go neutral; steal the capture at the last second for net experience.
- 7Sentinels are immune to Bribe, so Covert Mission-style talents will not take them.
- 8Use the first Healing Fountain before 1:00; it is back for the 3:00 Payload.