











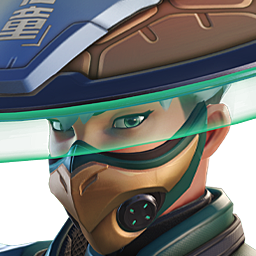
Mizuki · Support
Mizuki abilities, perks and Stadium powers
Mais guias de Mizuki
Este guia é montado pelo site com dados de partidas e do próprio jogo: ninguém o escreveu à mão. Se houver guias oficiais ou da comunidade, eles aparecem ao lado.
Introdução
Mizuki is a survivor support hero in Overwatch with 250 health. In competitive this season (PC, Americas, Europe and Asia averaged) it wins 50.7% of its games, is picked by 13.2% of teams and banned in 5.6% of matches: tier B on our ladder. Mizuki has 4 perks and 0 Stadium powers; below, each one is listed under the ability it changes.
Pontos fortes
- Mobility: Katashiro Return gets it in and out of fights.
- Healing: Healing Kasa and Kekkai Sanctuary keep allies (or itself) alive.
Cola de builds
Escolha a build de acordo com o que você quer fazer na partida.
- Mizuki · recommended perksEquilibradoRecomendadaOne minor and one major perk, chosen by what each one's text adds to a support hero. Blizzard doesn't publish how often each perk is picked, so this is a reading of the perks, not a pick rate.
- Mizuki · alternative perksUtilidadeSituacionalThe other option of each perk level. Perks are chosen during the match, so switch to these when the enemy composition or the map asks for what they do.
Builds
Mizuki · recommended perks
Quando usar
One minor and one major perk, chosen by what each one's text adds to a support hero. Blizzard doesn't publish how often each perk is picked, so this is a reading of the perks, not a pick rate.
Vantagem menor
 ManancialGeração da Aura Medicinal aumenta em 25%.
 Alma ExpostaAcertar um inimigo com a Corrente Paralisante aumenta em 30% seu dano causado a ele por 2 s.
Picked for more damage: Hitting an enemy with Binding Chain increases your damage dealt to them by 30% for 2 seconds.
Vantagem maior
 Retorno RessonanteO Kasa Medicinal ricocheteia mais uma vez. Cada ricochete aumenta em 10 a cura realizada.
 Passo LigeiroEnquanto Retorno ao Katashiro está ativo, os aliados dentro da Aura Medicinal ganham 20% a mais de velocidade de movimento.
Picked for more damage: Healing Kasa bounces one additional time. Each bounce increases its healing by 10.
Mizuki · alternative perks
Quando usar
The other option of each perk level. Perks are chosen during the match, so switch to these when the enemy composition or the map asks for what they do.
Vantagem menor
ManancialGeração da Aura Medicinal aumenta em 25%.Alma ExpostaAcertar um inimigo com a Corrente Paralisante aumenta em 30% seu dano causado a ele por 2 s.When the situation calls for it: Remedy Aura generation is increased by 25%.
Vantagem maior
Retorno RessonanteO Kasa Medicinal ricocheteia mais uma vez. Cada ricochete aumenta em 10 a cura realizada.Passo LigeiroEnquanto Retorno ao Katashiro está ativo, os aliados dentro da Aura Medicinal ganham 20% a mais de velocidade de movimento.When the situation calls for it: While Katashiro Return is active, allies within Remedy Aura gain 20% increased movement speed.
Habilidades
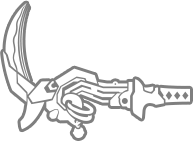 LMBGlaive EspiritualProjétil que ricocheteia e causa dano a inimigos.Key: primary fire
 RMBKasa Medicinal6sLança seu chapéu que ricocheteia entre aliados, curando-os.Key: secondary fire · cooldown 6 s. Perks: Resonant Return
 ECorrente Paralisante12sLança sua corrente contra o inimigo, detendo a movimentação dele.Key: E · cooldown 12 s. Perks: Exposed Soul
 ShiftRetorno ao Katashiro12sSalta para frente, aumentando a velocidade de movimento. Reative para se teletransportar de volta.Key: Shift · cooldown 12 s. Perks: Quickstep
 QSantuário KekkaiSupremaCria um santuário que cura aliados dentro dele e absorve projéteis inimigos que o atravessariam.Key: Q · ultimate
 Aura MedicinalPassivaCura aliados próximos. Fica mais forte ao causar dano e curar outros.passive. Perks: Wellspring
Estratégia
1Spirit Glaive
primary fire · Spirit Glaive: Bouncing projectile that damages enemies.
2Healing Kasa
secondary fire · Healing Kasa · 6 s: Throw your hat to bounce it between allies, healing them.
- Major perk · Resonant Return: Healing Kasa bounces one additional time. Each bounce increases its healing by 10.
3Binding Chain
E · Binding Chain · 12 s: Launch your chain at an enemy, hindering their movement.
- Minor perk · Exposed Soul: Hitting an enemy with Binding Chain increases your damage dealt to them by 30% for 2 seconds.
4Katashiro Return
Shift · Katashiro Return · 12 s: Leap forward, gaining increased movement speed. Reactivate to teleport back.
- Major perk · Quickstep: While Katashiro Return is active, allies within Remedy Aura gain 20% increased movement speed.
5Kekkai Sanctuary
Q · Kekkai Sanctuary · ultimate: Create a sanctuary that heals allies within and absorbs enemy projectiles that pass through it.
6Remedy Aura
Remedy Aura · passive: Heal nearby allies. Grows stronger when damaging and healing others.
- Minor perk · Wellspring: Remedy Aura generation is increased by 25%.
7Perks
During each match you unlock a minor perk and, later, a major perk: one of two options each time. ★ marks this guide's pick.
- ★ Exposed Soul: Hitting an enemy with Binding Chain increases your damage dealt to them by 30% for 2 seconds.
- Wellspring: Remedy Aura generation is increased by 25%.
- Quickstep: While Katashiro Return is active, allies within Remedy Aura gain 20% increased movement speed.
- ★ Resonant Return: Healing Kasa bounces one additional time. Each bounce increases its healing by 10.
Dicas
- Healing Kasa (secondary fire) heals: use it before an ally drops too low, not after.
- Katashiro Return (Shift) moves you: if you spend it to engage, you won't have it to escape.
- Kekkai Sanctuary (Q) is your ultimate: plan it with your team's ultimates instead of using it as soon as it's ready.
Confrontos
Combina bem com
Both do better than their average on the same maps, such as Antarctic Peninsula, Lijiang Tower and Nepal: a good pairing when the map suits them.
Both do better than their average on the same maps, such as Antarctic Peninsula, Nepal and Rialto: a good pairing when the map suits them.
Both do better than their average on the same maps, such as Antarctic Peninsula, Samoa and Lijiang Tower: a good pairing when the map suits them.
Both do better than their average on the same maps, such as Antarctic Peninsula, Rialto and Nepal: a good pairing when the map suits them.

Mudanças
- Guide created for patch Season 4.
Ele te ajudou?
Seu voto ajuda outros jogadores a encontrar os melhores guias.