












Vendetta · Damage
Vendetta guide
Mais guias de Vendetta
Este guia é montado pelo site com dados de partidas e do próprio jogo: ninguém o escreveu à mão. Se houver guias oficiais ou da comunidade, eles aparecem ao lado.
Introdução
Vendetta is a flanker damage hero in Overwatch with 175 health and 100 armor (275 in total). In competitive this season (PC, Americas, Europe and Asia averaged) it wins 54.3% of its games, is picked by 5.8% of teams and banned in 12.6% of matches: tier S on our ladder.
Pontos fortes
- Wins 54.3% of its competitive games (PC, all regions): #1 of 24 damage heroes.
- Rivals fear it: banned in 12.6% of competitive matches.
Pontos fracos
- Loses strength as the level rises: −2.4 pts of win rate from Bronze–Silver to Master–Grandmaster.
- None of its abilities is described as a dash, jump or teleport: position before the fight, not during it.
Cola de builds
Escolha a build de acordo com o que você quer fazer na partida.
- Vendetta · recommended perksEquilibradoRecomendadaOne minor and one major perk, chosen by what each one's text adds to a damage hero. Blizzard doesn't publish how often each perk is picked, so this is a reading of the perks, not a pick rate.
- Vendetta · StadiumEquilibradoStadiumFour of the 12 Stadium powers of Vendetta, chosen by what their text adds to a damage hero and spread over different abilities so no single one carries the build.
- Vendetta · alternative perksUtilidadeSituacionalThe other option of each perk level. Perks are chosen during the match, so switch to these when the enemy composition or the map asks for what they do.
Builds
Vendetta · recommended perks
Quando usar
One minor and one major perk, chosen by what each one's text adds to a damage hero. Blizzard doesn't publish how often each perk is picked, so this is a reading of the perks, not a pick rate.
Vantagem menor
 Gume EficienteGume Projetado custa 25% a menos de energia.
 Tempestade AvassaladoraInvestida Turbilhão gira por mais tempo, acertando mais 3 vezes para causar 30 de dano em uma área ampla.
Picked for more damage: Whirlwind Dash continues to spin, hitting 3 more times for 30 damage in a wide area.
Vantagem maior
 Fome da LupaOs ataques de golpe elevado ganham 40% de roubo de vida.
 ImplacávelMassacre pode acumular mais 3 vezes, aumentando em 5% a velocidade de ataque e em 3% a velocidade de movimento por acúmulo.
Picked for more utility: Onslaught can stack 3 more times, increasing attack speed by 5% and movement speed by 3% per stack.
Vendetta · Stadium
Quando usar
Four of the 12 Stadium powers of Vendetta, chosen by what their text adds to a damage hero and spread over different abilities so no single one carries the build.
Poderes do Stadium (4)
- 1
 Fúria ImortalPicked for more survival: If you would die, instead become Hindered and prevent ally healing, gain decaying Overhealth equal to your Max Life, and double your Onslaught stacks and Lifesteal. (90s Cooldown).
 - 2
 CataclismaProjected Edge: Projected Edge and Soaring Slice explode on enemy hit, dealing 30 damage to enemies within 4m.
 - 3
 Essência RebeldeWarding Stance: Warding Stance energy regenerates now even while blocking at 75% rate. For every Projected Edge fired, reduce Whirlwind Dash and Soaring Slice cooldown by 0.5s.
 - 4
 Disparada DuplaWhirlwind Dash: After Whirlwind Dash is finished, it can be reactivated within 3s for 75% damage.
Vendetta · alternative perks
Quando usar
The other option of each perk level. Perks are chosen during the match, so switch to these when the enemy composition or the map asks for what they do.
Vantagem menor
Gume EficienteGume Projetado custa 25% a menos de energia.Tempestade AvassaladoraInvestida Turbilhão gira por mais tempo, acertando mais 3 vezes para causar 30 de dano em uma área ampla.When the situation calls for it: Projected Edge costs 25% less energy.
Vantagem maior
Fome da LupaOs ataques de golpe elevado ganham 40% de roubo de vida.ImplacávelMassacre pode acumular mais 3 vezes, aumentando em 5% a velocidade de ataque e em 3% a velocidade de movimento por acúmulo.When the situation calls for it: Overhead strikes gain 40% Lifesteal.
Habilidades
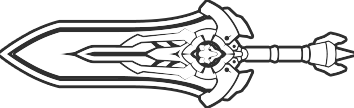 LMBPresa PalatinaMontante de luz sólida. Desfere uma sequência de cortes e encerra com um golpe elevado devastador.Key: primary fire
 RMBPostura de Proteção0.5sDefende com a espada, reduzindo o dano frontal e aparando ataques corpo a corpo. Defender dano reduz a energia.Key: secondary fire · cooldown 0.5 s
 ShiftInvestida Turbilhão10sFaz uma investida com um talho circular.Key: Shift · cooldown 10 s. Perks: Raging Storm
 ETalho Voador7sArremessa a espada para frente e depois voa até ela.Key: E · cooldown 7 s
 LMBGume ProjetadoDisponível durante a Postura de Proteção. Consuma energia para disparar um projétil amplo.Key: primary fire. Perks: Extra Edge
 QLâmina RetalhadoraSupremaAtravessa a maioria das defesas, causando dano altíssimo aos inimigos à frente.Key: Q · ultimate
Estratégia
1Your job
In Role Queue each team fields two damage heroes: you secure eliminations, pressure the enemy supports and turn the numbers advantage your tank creates into won fights.
2Abilities
- primary fire · Palatine Fang: Hard-light greatsword. Combo swings to end with a destructive overhead slash.
- secondary fire · Warding Stance · 0.5 s: Block with your sword, reducing frontal damage and deflecting melee attacks. Blocking damage depletes energy.
- Shift · Whirlwind Dash · 10 s: Rush forward into a circular slash.
- E · Soaring Slice · 7 s: Hurl your sword in the direction you are facing and then fly to it.
- primary fire · Projected Edge: Available while Warding Stance is active. Consume energy to fire a wide projectile.
- Q · Sundering Blade · ultimate: Cleave through most defenses, dealing severe damage to enemies in front of you.
3Perks
During each match you unlock a minor perk and, later, a major perk: one of two options each time. ★ marks this guide's pick.
- Extra Edge: Projected Edge costs 25% less energy.
- ★ Raging Storm: Whirlwind Dash continues to spin, hitting 3 more times for 30 damage in a wide area.
- ★ Relentless: Onslaught can stack 3 more times, increasing attack speed by 5% and movement speed by 3% per stack.
- Siphoning Strike: Overhead strikes gain 40% Lifesteal.
4Stadium powers
In Stadium you pick up to four powers over the match. These four fit Vendetta best by what their text does:
- Undying Fury: If you would die, instead become Hindered and prevent ally healing, gain decaying Overhealth equal to your Max Life, and double your Onslaught stacks and Lifesteal. (90s Cooldown).
- Cataclisma: Projected Edge and Soaring Slice explode on enemy hit, dealing 30 damage to enemies within 4m.
- Defiance Core: Warding Stance energy regenerates now even while blocking at 75% rate. For every Projected Edge fired, reduce Whirlwind Dash and Soaring Slice cooldown by 0.5s.
- Double Dash: After Whirlwind Dash is finished, it can be reactivated within 3s for 75% damage.
5In competitive
Blizzard's official stats for this season, division by division (PC, the three regions averaged).
- Bronze: 54.8% won, picked by 5.4% of teams
- Silver: 54.7% won, picked by 6.1% of teams
- Gold: 54.5% won, picked by 6.0% of teams
- Platinum: 54.5% won, picked by 5.8% of teams
- Emerald: 53.7% won, picked by 5.6% of teams
- Diamond: 53.3% won, picked by 5.5% of teams
- Master: 52.8% won, picked by 5.2% of teams
- Grandmaster: 51.9% won, picked by 4.6% of teams
6Best and worst maps
Win rate of Vendetta on each competitive map compared with its 54.3% overall.
- Aatlis: 55.8% won (8.2% pick rate)
- Colosseo: 55.8% won (6.6% pick rate)
- Suravasa: 55.8% won (7.3% pick rate)
- Circuit Royal: 52.5% won (4.4% pick rate)
- Blizzard World: 52.9% won (5.2% pick rate)
- Havana: 53.1% won (4.6% pick rate)
7Common mistakes
- Trading shots with the enemy tank while the enemy backline goes untouched.
- Staying on an angle after it's been found and focused.
Dicas
- Sundering Blade (Q) is your ultimate: plan it with your team's ultimates instead of using it as soon as it's ready.
- Pick your angle before the fight starts: a second line of fire splits the enemy's attention.
- Focus the same target as your team; spread damage gets healed.
Confrontos
Combina bem com
Both do better than their average on the same maps, such as Ilios, Aatlis and Dorado: a good pairing when the map suits them.
Both do better than their average on the same maps, such as Aatlis, New Junk City and Ilios: a good pairing when the map suits them.
Both do better than their average on the same maps, such as Ilios, Colosseo and Suravasa: a good pairing when the map suits them.
Both do better than their average on the same maps, such as Aatlis, New Junk City and Suravasa: a good pairing when the map suits them.




Mudanças
- Guide created for patch Season 4.
Ele te ajudou?
Seu voto ajuda outros jogadores a encontrar os melhores guias.