












Zarya · Tank
Safe Zarya guide
Mais guias de Zarya
Este guia é montado pelo site com dados de partidas e do próprio jogo: ninguém o escreveu à mão. Se houver guias oficiais ou da comunidade, eles aparecem ao lado.
Introdução
Zarya is a bruiser tank hero in Overwatch with 325 health and 225 shields (550 in total). In competitive this season (PC, Americas, Europe and Asia averaged) it wins 47.1% of its games, is picked by 4.6% of teams and banned in 41.6% of matches: tier C on our ladder. Zarya has 550 hit points: 325 health, 225 shields (they regenerate out of combat).
Pontos fortes
- Protection: Particle Barrier and Projected Barrier block or absorb damage.
Pontos fracos
- Only 47.1% of competitive games won (PC, all regions): #11 of 15 tank heroes.
- Struggles on Colosseo, Ilios and Esperança (down to 44.2% won).
- Fragile for its role: 550 hit points against an average of 632 among tank heroes.
Cola de builds
Escolha a build de acordo com o que você quer fazer na partida.
- Zarya · survival perksDefensivoRecomendadaThe perks whose text adds the most healing, health or protection: for games where you die before your cooldowns matter.
- Zarya · Stadium survivalDefensivoStadiumFour of the 12 Stadium powers of Zarya, chosen by what their text adds and spread over different abilities so no single one carries the build.
- Zarya · recommended perksEquilibradoSituacionalOne minor and one major perk, chosen by what each one's text adds to a tank hero. Blizzard doesn't publish how often each perk is picked, so this is a reading of the perks, not a pick rate.
Builds
Zarya · survival perks
Quando usar
The perks whose text adds the most healing, health or protection: for games where you die before your cooldowns matter.
Vantagem menor
 ImpulsosA auto-repulsão do Disparo Secundário é aumentada em 75%.
 VigilanteA Barreira Projetada ativa a regeneração de vida dos aliados e aumenta a velocidade de movimento deles em 20%.
Picked for more survival: Projected Barrier activates ally health regeneration and increases their movement speed by 20%.
Vantagem maior
 Aquele TchãCausar dano com o feixe do Canhão de Partículas com a Barreira ativa gera energia.
 Lança EnergéticaFeixe do Canhão de Partículas atravessa inimigos.
Picked for more damage: While a Barrier is active, dealing damage with Particle Cannon's beam generates energy.
Zarya · Stadium survival
Quando usar
Four of the 12 Stadium powers of Zarya, chosen by what their text adds and spread over different abilities so no single one carries the build.
Poderes do Stadium (4)
- 1
 Parceira de AcademiaProjected Barrier: +20% Projected Barrier Range. Projected Barrier pulls you to the targeted ally and heals you for 30% of Max Life over 3s.
 - 2
 Massa VitalParticle Barrier: +50% Particle Barrier Size. Increase Barrier Health by 50% of Bonus Max Life from Items.
 - 3
 SobreBarreirasPicked for more survival: When Barriers expire, grant Overhealth equal to 100% of remaining Barrier Health to the target for 2s.
 - 4
 Escudo de ContençãoPicked for more survival: Barrier heals the target for 5% of your Max Life every 1s and grants 20% Move Speed while active.
Zarya · recommended perks
Quando usar
One minor and one major perk, chosen by what each one's text adds to a tank hero. Blizzard doesn't publish how often each perk is picked, so this is a reading of the perks, not a pick rate.
Vantagem menor
ImpulsosA auto-repulsão do Disparo Secundário é aumentada em 75%.VigilanteA Barreira Projetada ativa a regeneração de vida dos aliados e aumenta a velocidade de movimento deles em 20%.Picked for more survival: Projected Barrier activates ally health regeneration and increases their movement speed by 20%.
Vantagem maior
Aquele TchãCausar dano com o feixe do Canhão de Partículas com a Barreira ativa gera energia.Lança EnergéticaFeixe do Canhão de Partículas atravessa inimigos.Picked for more damage: While a Barrier is active, dealing damage with Particle Cannon's beam generates energy.
Habilidades
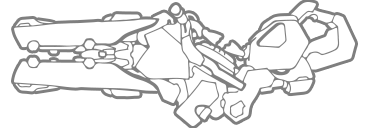 LMBCanhão de PartículasArma de raio linear de curto alcance. Lançador de granadas de energia.
 ShiftBarreira de Partículas12sCria uma barreira contra dano ao seu redor.Key: Shift · cooldown 12 s
 EBarreira Projetada9sCria uma barreira contra dano ao redor de um aliado.Key: E · cooldown 9 s. Perks: Spotter
 QSurto de GrávitonsSupremaLança um turbilhão de gravidade que puxa os inimigos para ele.
 EnergiaPassivaO dano bloqueado pelas barreiras aumenta o dano do Canhão de Partículas.
Estratégia
1Staying alive
The abilities that heal, protect or move you, by their own description:
- Shift · Particle Barrier · 12 s: Create a damage barrier around you.
- E · Projected Barrier · 9 s: Create a damage barrier around an ally.
2Survival perks
During each match you unlock a minor perk and, later, a major perk: one of two options each time. ★ marks this guide's pick.
- Jump-Ups: Secondary Fire's self-knockback is increased by 75%.
- ★ Spotter: Projected Barrier activates ally health regeneration and increases their movement speed by 20%.
- Energy Lance: Particle Cannon's beam pierces enemies.
- ★ Extra Oomph: While a Barrier is active, dealing damage with Particle Cannon's beam generates energy.
3Survival Stadium powers
The four powers whose text adds the most healing, health or protection:
- Here To Spot You
- Lifelift
- Barrier Benefits
- Containment Shield
4Where to be careful
The competitive maps where it wins least:
- Colosseo: 44.2% won (4.3% pick rate)
- Ilios: 44.7% won (4.0% pick rate)
- Esperança: 45.0% won (4.0% pick rate)
5Mistakes that get you killed
- Pushing into five enemies without your team behind you.
- Taking duels far from your supports.
Dicas
- You are the only tank: dying first usually loses the fight, so back off before you have to.
- Particle Barrier (Shift) protects: time it for the enemy's burst, not for chip damage.
- Projected Barrier (E) protects: time it for the enemy's burst, not for chip damage.
Confrontos
Combina bem com
Both do better than their average on the same maps, such as Antarctic Peninsula, Busan and Samoa: a good pairing when the map suits them.
Both do better than their average on the same maps, such as Antarctic Peninsula, Samoa and Oasis: a good pairing when the map suits them.
Both do better than their average on the same maps, such as Antarctic Peninsula, Busan and Oasis: a good pairing when the map suits them.
Both do better than their average on the same maps, such as Antarctic Peninsula, Nepal and Samoa: a good pairing when the map suits them.


Mudanças
- Guide created for patch Season 4.
Ele te ajudou?
Seu voto ajuda outros jogadores a encontrar os melhores guias.