










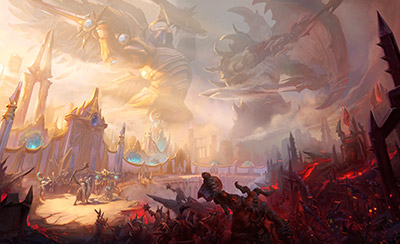

Battlefield of Eternity
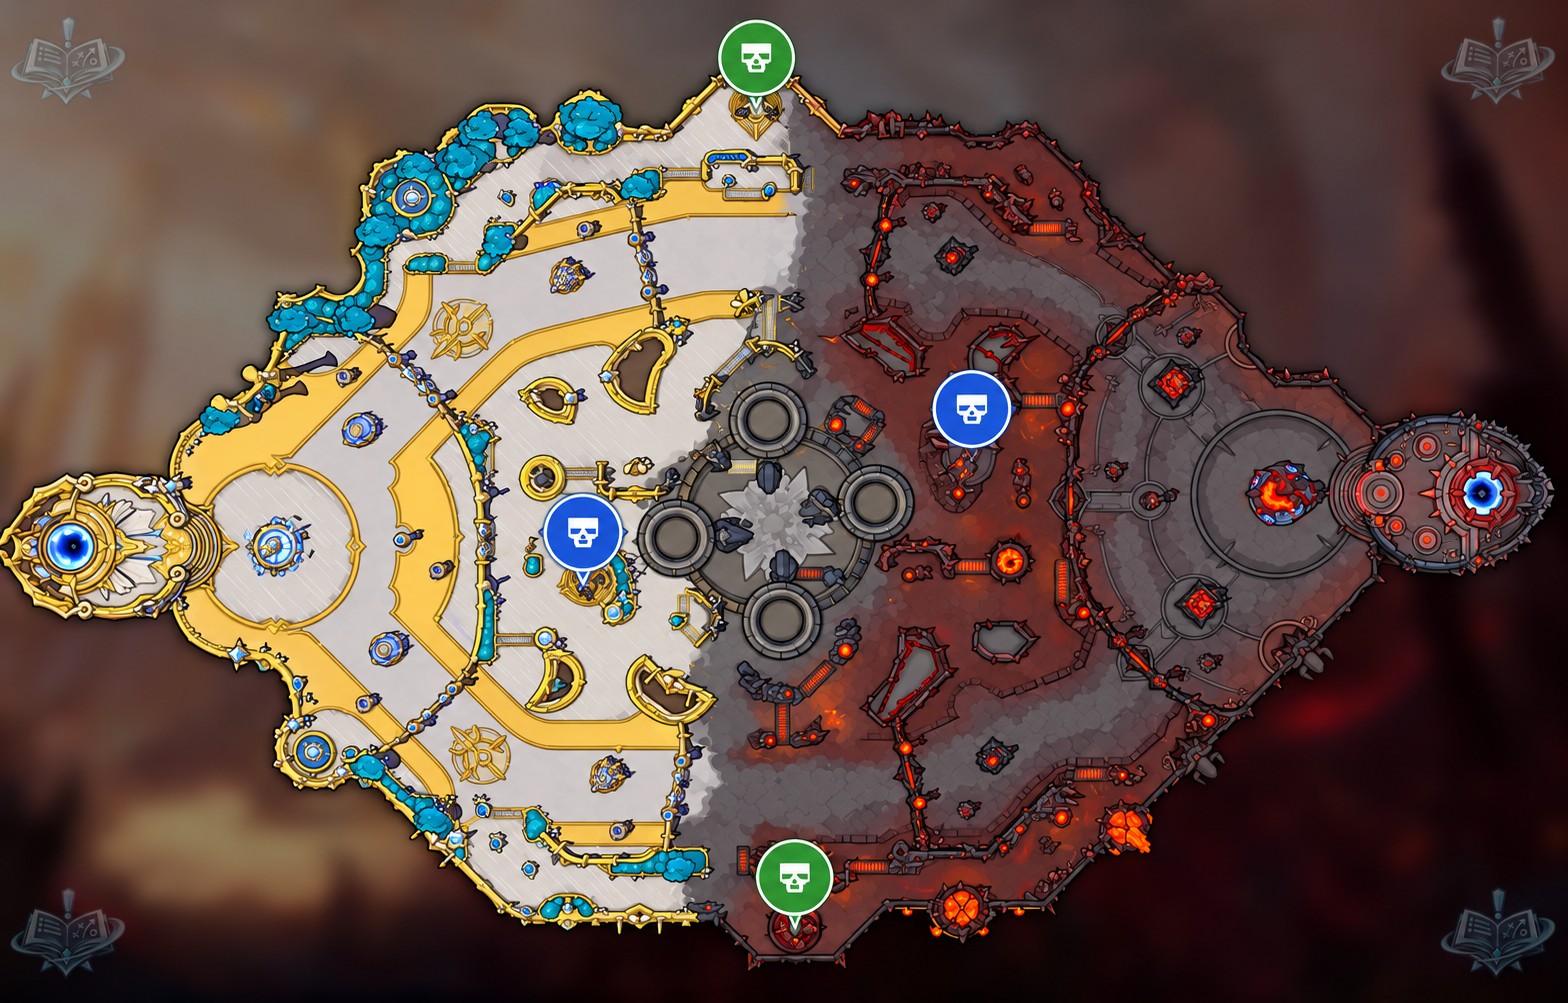
Battlefield of Eternity is a two-lane map that revolves around a damage race in the middle. Every cycle (3:00, then 1:45 after the laning Immortal dies) Ilarian (left team) and Beleth (right team) appear facing each other, and whoever kills the enemy one first gets a shielded siege monster in lane plus two regeneration globes. Fights are short and violent in a tight space, so strong early-game heroes, sustained damage and displacements that throw enemies into your Immortal's stuns win here. The objective is the only real win condition, which makes every race a swing of the whole game.
- Rotas
- 2 rotas
- Duração típica
- ~19 min
- Primeiro objetivo
- First at 3:00
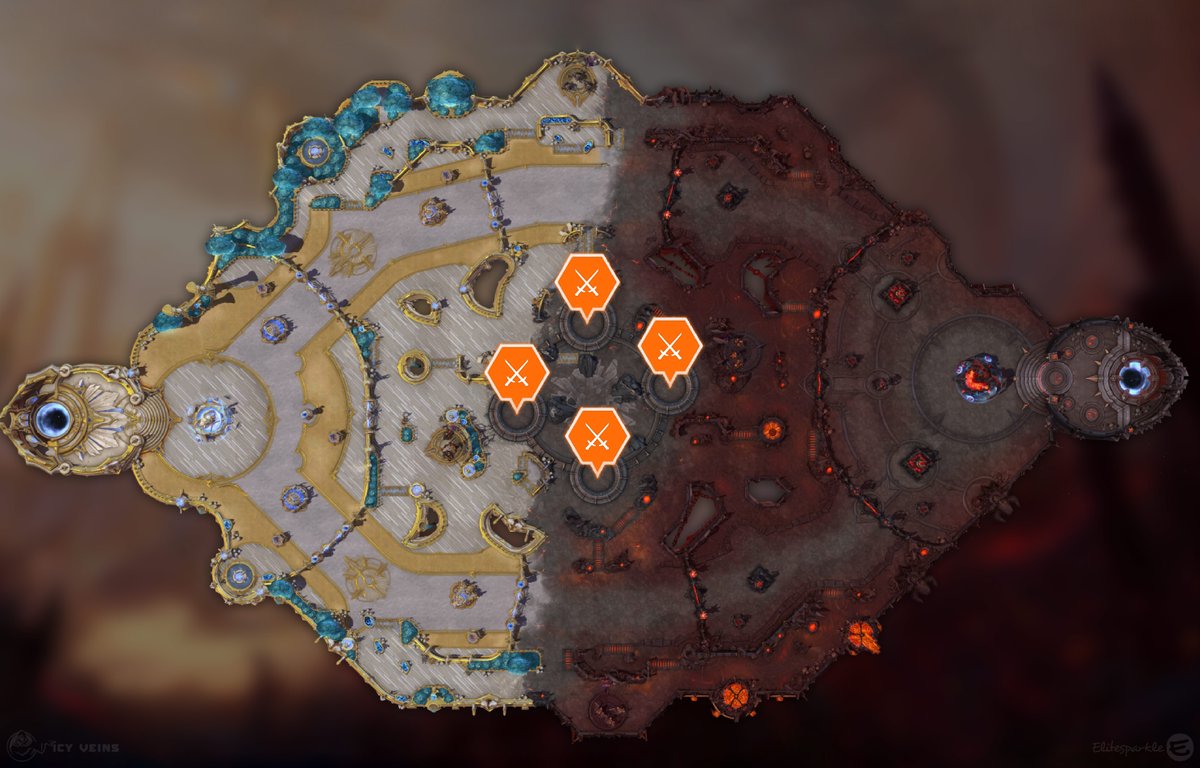
Imagem do campo de batalha: Icy Veins. Objetivos marcados sobre o mapa do jogo.
Objetivos



Immortal race
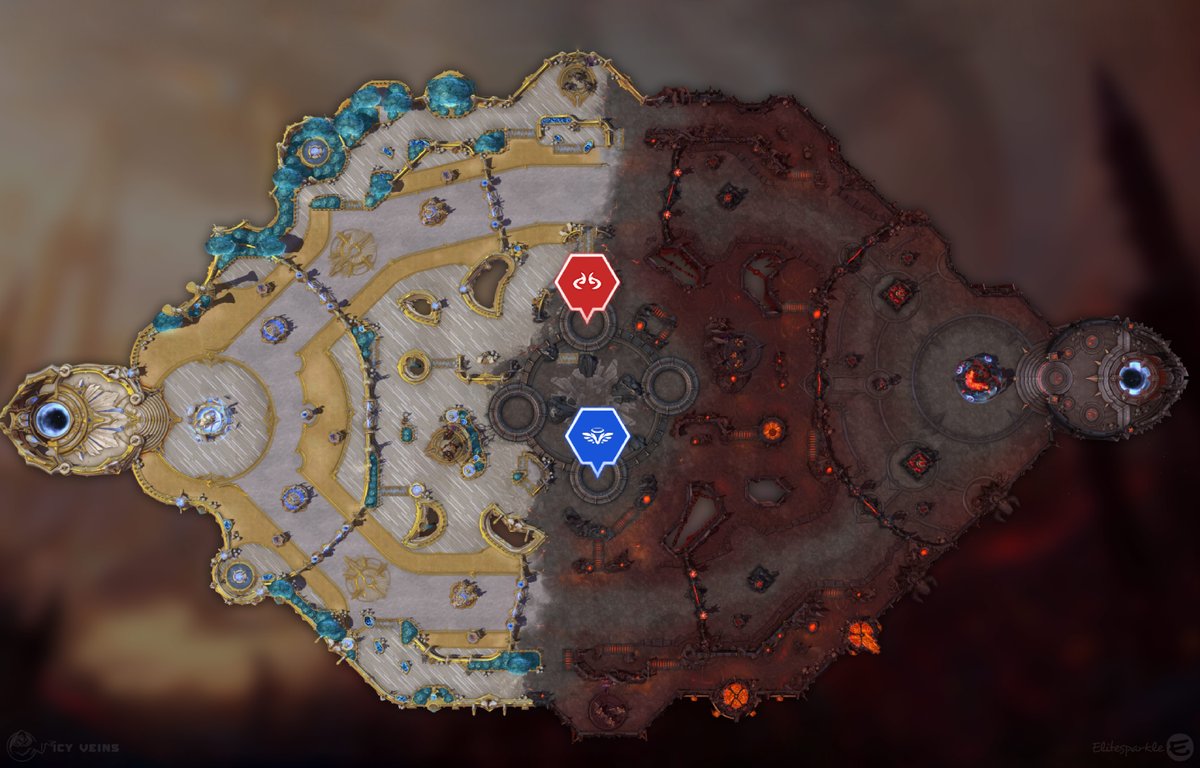
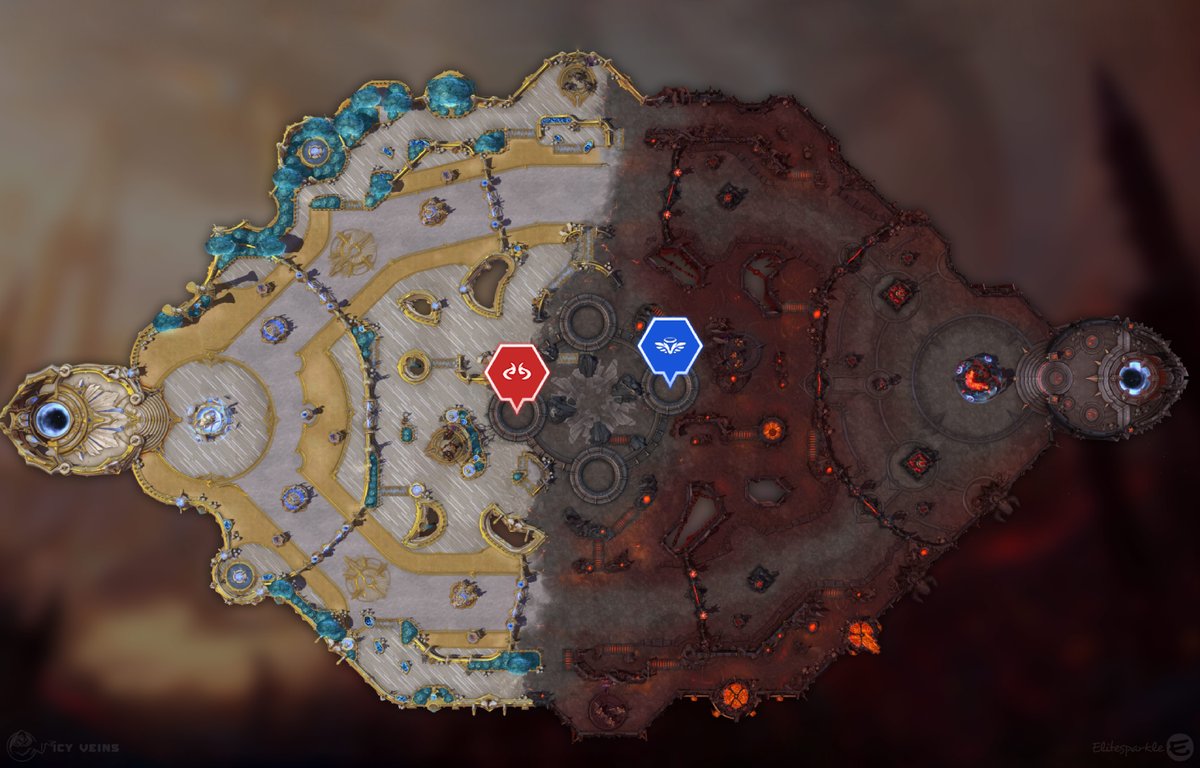
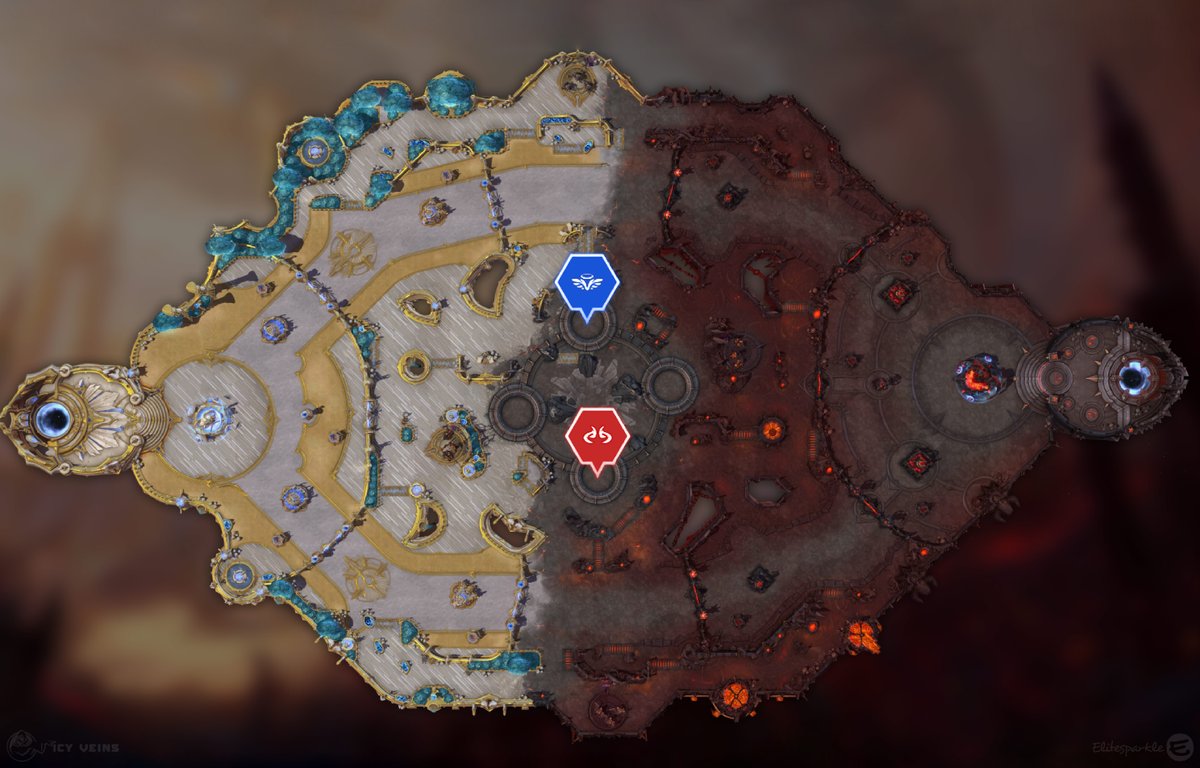
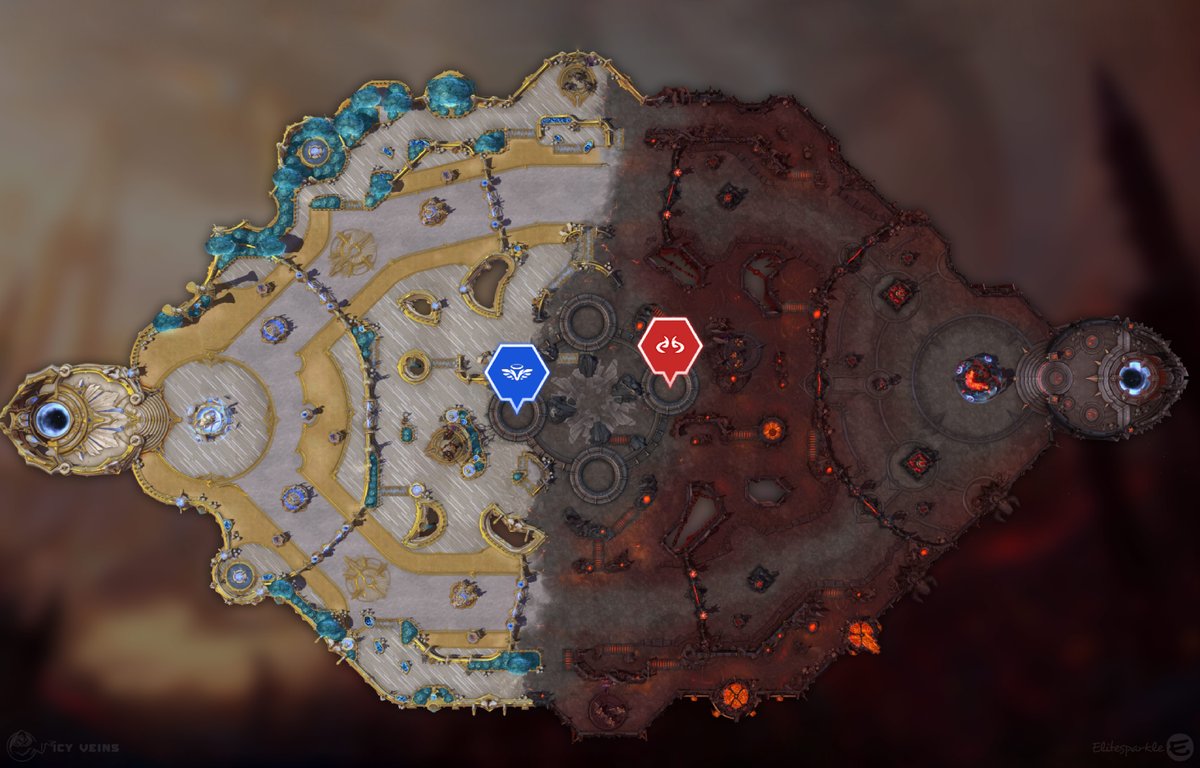
First at 3:00. Then 1:45 after the laning Immortal dies.Ilarian (left team) and Beleth (right team) appear in the center and never hurt each other: only enemy players deal damage. When either reaches half health, both swap positions over 10 seconds and are immune meanwhile; the first spawn always puts Ilarian south and Beleth north, then Ilarian east and Beleth west after the swap, and later spawns are random. Every 14 seconds each Immortal casts a cleave (2-second delay, knockback and 0.5-second stun) and a rain of blades (2-second delay, 2-second stun) that one-shot minions and only hit the opposing team. Camps disappear while an Immortal is in lane and return when it dies.
The laning Immortal
After the first race at 3:00 and every race after it; the next pair spawns 1:45 after the laning Immortal dies.The winning Immortal drops two regeneration globes for its team in the center, then walks down the lane whose enemy structures have taken the least total damage. It carries a shield equal to the health it had left when the race ended, and its abilities recharge 2 seconds slower in lane (16 seconds). A close race gives a small shield that a grouped team can burst quickly; a blowout gives a wrecking ball that needs five defenders.
Plano de partida
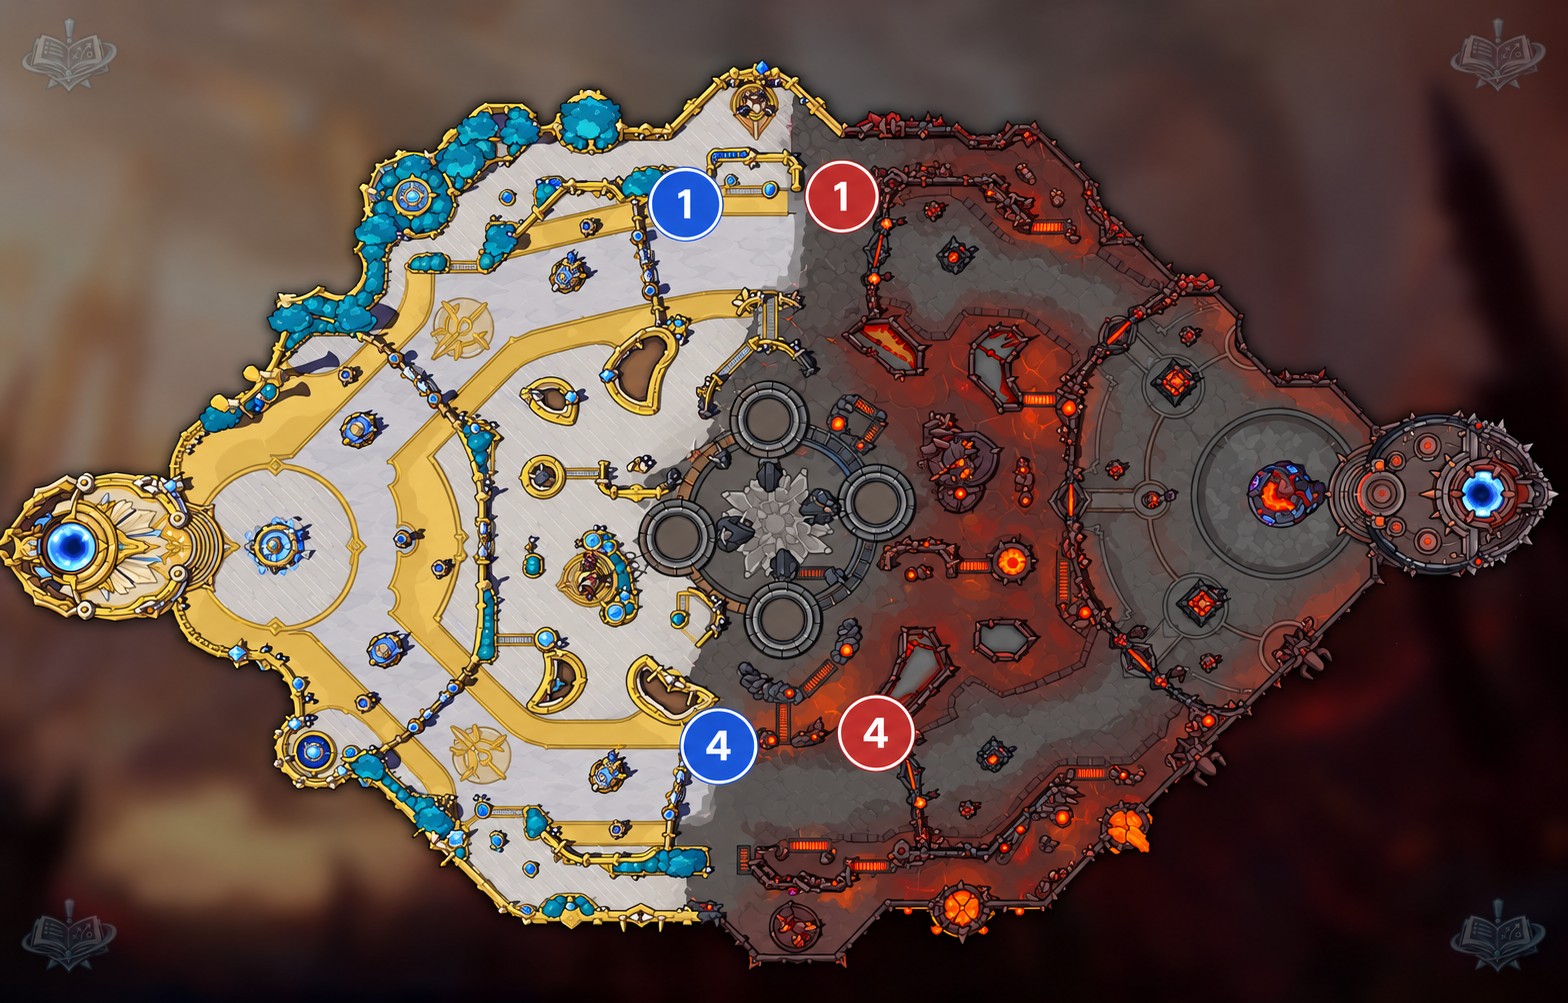
Lane assignments
The standard formation is 1-4: your offlaner holds the top lane alone while the other four play bottom together. Bottom is where the four-man Siege Camp and your Bruiser Camp sit, so the group can rotate between wave, camps and the center without losing experience. The offlaner should be someone who survives a 1v2 and can sneak the top Siege Camp with a helper; when nothing is left to soak, they join the group. With only two lanes and a central objective, rotations are short, so nobody should be more than a few seconds late to 3:00.
- Top (1): a durable offlaner who can double as a Siege Camp thief when a teammate drops by.
- Bottom (4): tank, healer and both damage dealers; they own the bottom Siege Camp and the team's Bruiser Camp.
- If the enemy sends two top, do not match them blindly: use the numbers advantage at bottom to take the Siege Camp instead.
Early game
Use the Healing Fountain before 1:00 so it is available again at 3:00. From 0:30, whenever your four-man has the upper hand in bottom, clear the Siege Camp there and capture it right away; the Impalers outrange towers and will chip a Fort while you rotate. If bottom is going badly, send a second hero top instead and sneak the top Siege Camp, but do not try for both. Around 2:20 start your Bruiser Camp and capture it at about 2:45, 15 seconds after a minion wave spawns, so the Fallen Shaman and hounds walk in with your minions just as the Immortals appear. Then move: at 3:00 you must already be in the center.
- 0:30: bottom Siege Camp if you have the advantage; otherwise a two-man sneak of the top one.
- 2:20: start your Bruiser Camp; capture at 2:45 so it joins the wave that hits during the race.
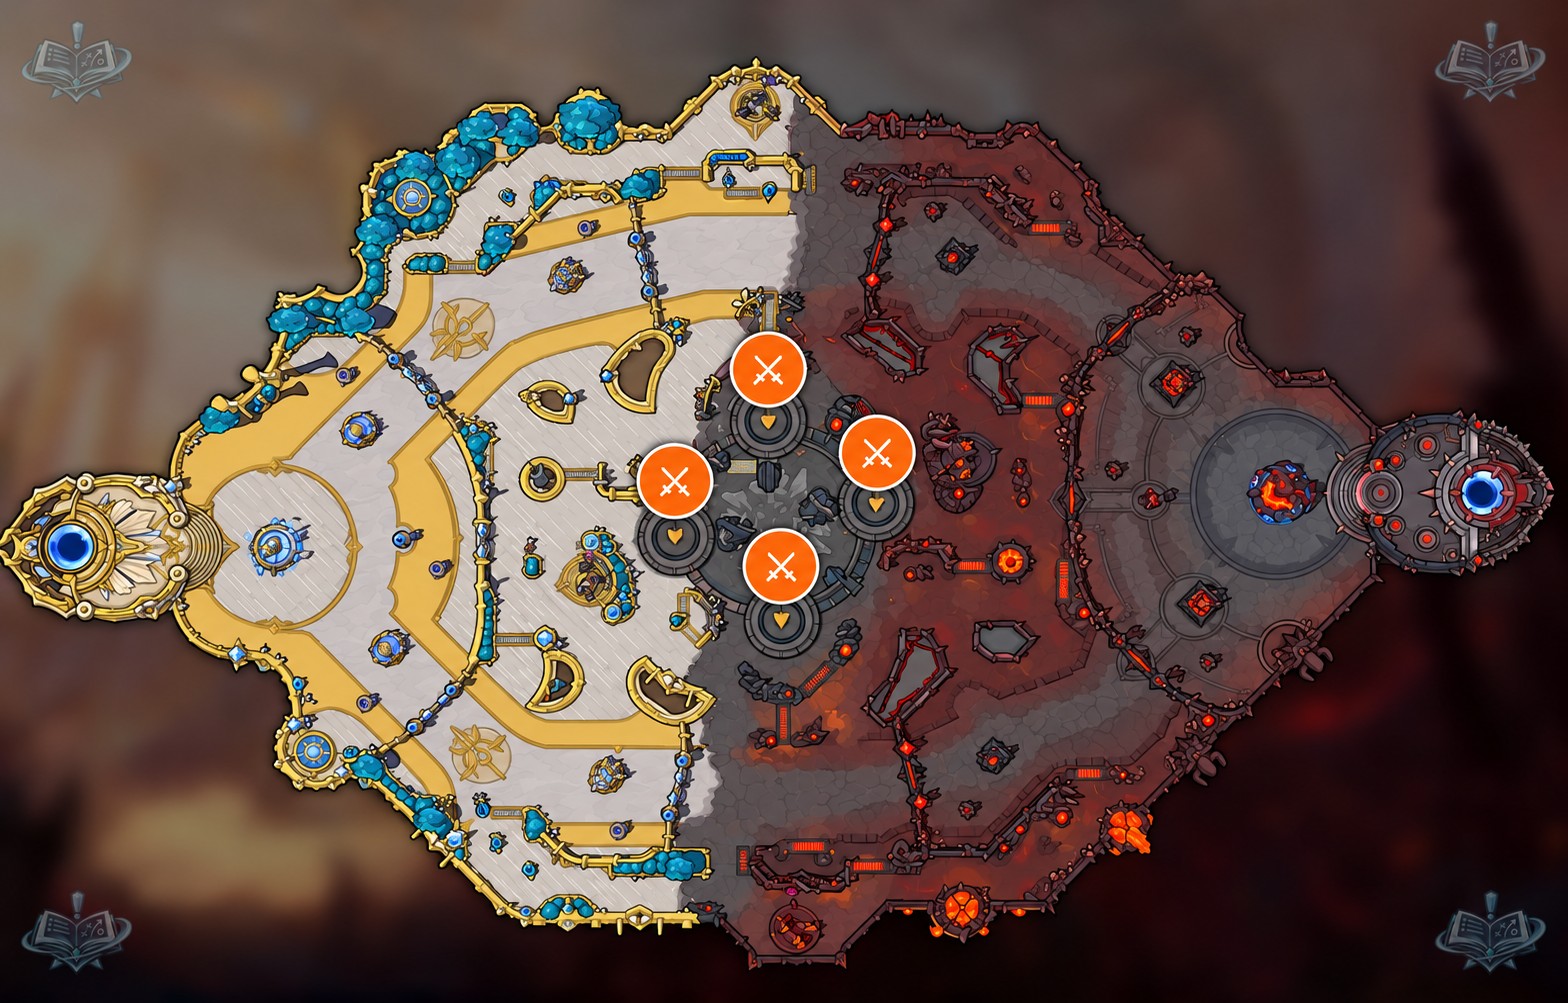
- 2:50: everyone walks to the center; check the minimap icons (crossed axes = enemy Immortal, shield = yours) to know where to stand.
Playing the objective
Read the positions before committing. The bushes tell you the mode: when each Immortal stands near bushes of its own color the layout favors defending; when the colors are crossed it favors racing. From there pick a split: full defense (5 on yours), defend and race (4-1), defend and soak (3-4 on yours, 1-2 in lane), harass and race (1-4) or full race (5 on theirs). The default when even is to play around your own Immortal and use displacements to shove enemies into its rain of blades for a 2-second stun and heavy damage. Watch both health bars, not the kill feed: a hero arriving 10 seconds late can let the enemy drop your Immortal to 50% unopposed. If you win, push with the Immortal while the offlaner soaks, unless you are going for a Keep or the core, in which case stay five; if you lose, defend with four and soak with one under the same rule.
- Offensive layouts (easier to race): Ilarian south / Beleth north, or Ilarian east / Beleth west.
- Defensive layouts (easier to defend): Ilarian north / Beleth south, or Ilarian west / Beleth east.
- Use the 10-second swap at half health to reset: heal, reposition and re-read which layout you get after the swap.
- Against a laning Immortal, stack on it as a group and break the shield fast; dodge its indicators, since a 2-second stun under a Fort is lethal.
Mercenary camps
There are four camps: an Impaler Siege Camp in each lane, a Bruiser Camp that feeds the top lane for the right team and one that feeds the bottom lane for the left team. They disappear when an Immortal enters a lane (unless already in combat) and return when that Immortal dies, so the window right after a laning Immortal falls is the safest time to clear them. Since each Bruiser Camp goes into a different lane depending on the side, know which lane yours pushes before you plan a capture.
- Siege camp (3 Impalers): 0:30, respawns 3:00 after capture. Ranged units that hit structures from outside tower range but clear minions slowly.
- Bruiser camp (1 Fallen Shaman + 2 Fallen Hounds): 0:30, respawns 4:00 after capture. The Shaman resummons two hounds whenever they die, and all of them deal double damage to minions, structures and summons.
- Clearing an enemy Fallen Shaman camp in lane: kill the Shaman first or the hounds keep coming back.
- Capture your Bruiser Camp 15 seconds after a wave spawns (for example at 2:45) so it walks in with your minions.
Late game and win conditions
The objective is the only win condition on this map: there is no Boss and split-pushing two lanes is hard against a grouped enemy, so every late race is a potential game end. Later Immortals have far more health, which means a decisive race win produces a shield that alone can take a Keep and threaten the core. The core fires two volleys of Frozen Orbs every 12 seconds that deal 5% max health and root for 1.5 seconds, so a final push should come with the Immortal tanking and heroes finishing. When you lose a late race by a big gap, all five defend the Keep and the offlaner soaks only if the enemy is not committing to the core.
- Win condition: the objective. Plan every late fight as a race, not as a skirmish.
- Before a late race, use the fountain and clear both lanes so the Immortal that wins walks into empty lanes.
- Do not chase after a won race: escort the Immortal so the enemy cannot burst its shield unopposed.
O que buscar no draft
O que buscar no draft
- Prefer sustained race damage: Artanis, Raynor, Hanzo, Greymane, Valla, Zul'jin, Tyrande, Li-Ming, Chromie, Lunara and Sgt. Hammer all melt Immortals.
- Prefer displacements that push enemies into your Immortal's stuns: knockbacks and pulls pay double here.
- Prefer a strong early game: the first race at 3:00 is fought before level 4 and sets the tempo.
- Prefer poke to bleed enemies off the objective before the race starts.
- Prefer quests that stack on heroes and vision tools; the enemy is always in the same small area.
- Avoid weak early-game heroes who only come online after level 10: the first two races are already gone by then.
Erros típicos
- Arriving late to 3:00: 5 seconds costs about 25% of the Immortal's health, and 10 seconds lets the enemy hit 50% unopposed.
- Trading kills while ignoring both health bars and losing the race quietly.
- Standing in your own Immortal's indicators, or fighting outside them where the enemy takes no punishment.
- Sending one hero to stop a laning Immortal with a big shield instead of collapsing on it as five.
- Trying to take both Siege Camps while your four-man is outnumbered at bottom.
Dicas
- 1Use the Healing Fountain before 1:00; its 2-minute cooldown has it back for 3:00.
- 2Minimap icons show the Immortals before they spawn: crossed axes mark the one to attack, a shield marks yours.
- 3Bush colors are a cheat sheet: matching colors near each Immortal means defend, crossed colors mean race.
- 4The first spawn is always Ilarian south / Beleth north, then Ilarian east / Beleth west after the swap.
- 5Immortals are immune during the 10-second swap at half health: use it to heal, reposition and pick a new split.
- 6The winning Immortal takes the lane where enemy structures have taken the least total damage, so it usually shows up in the healthier lane.
- 7A laning Immortal's cooldowns are 16 seconds, 2 seconds slower than in the center.
- 8Each Bruiser Camp goes to a different lane depending on your side: the right team's pushes top, the left team's pushes bottom.