










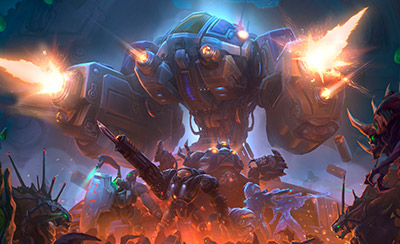

Braxis Holdout
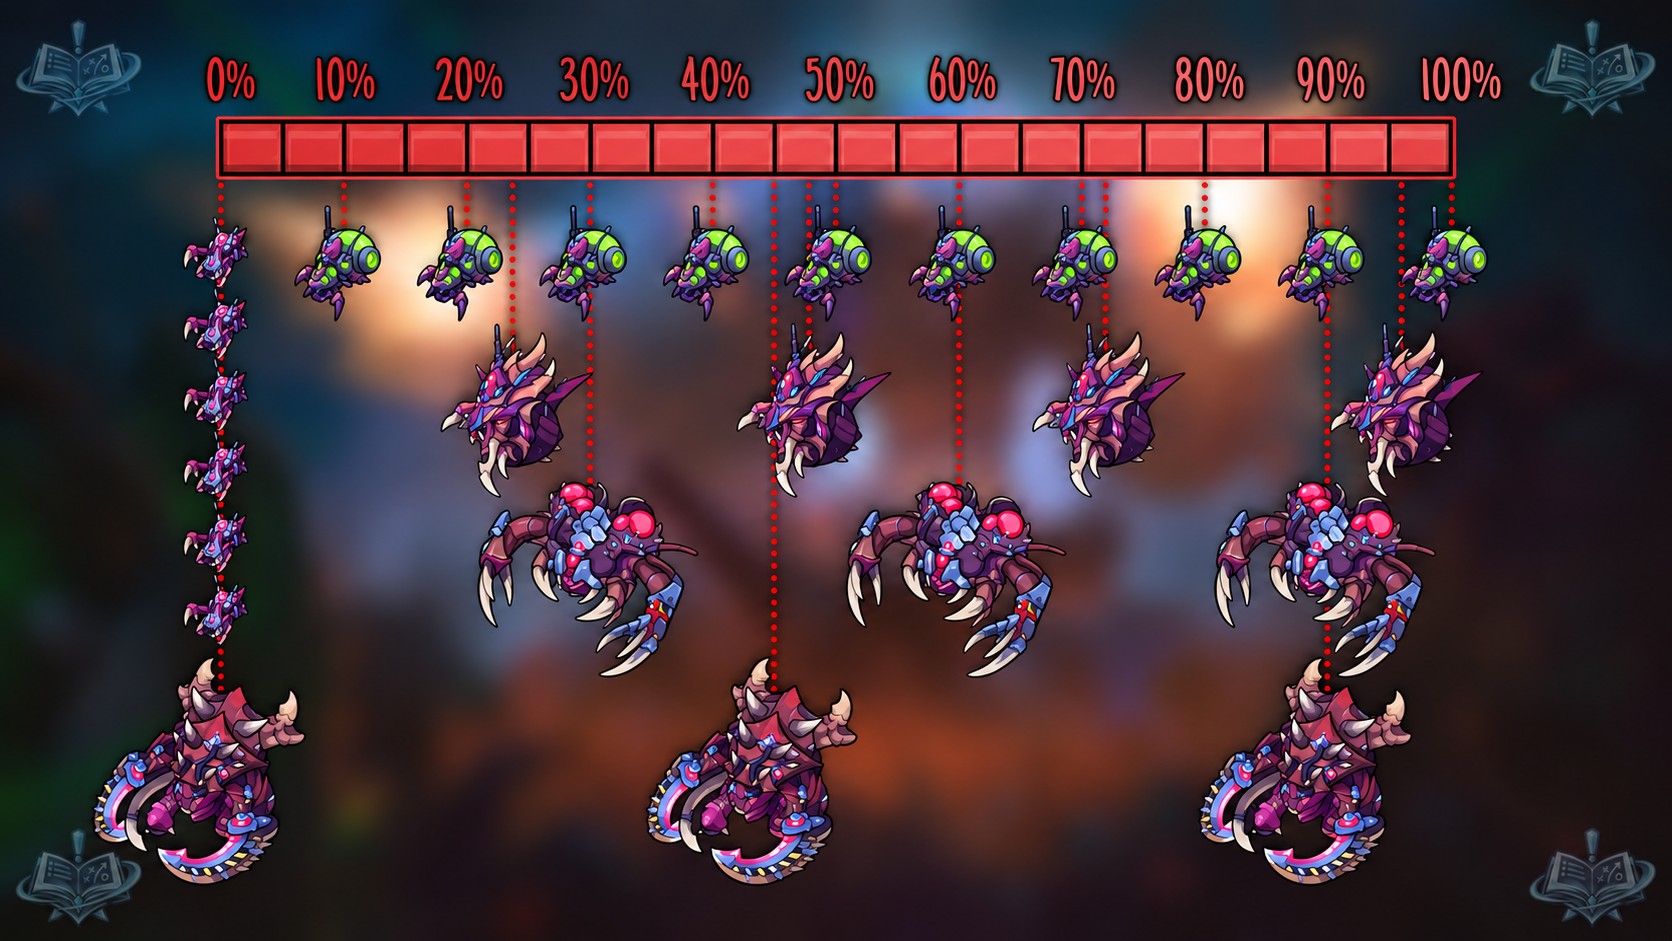
Braxis Holdout is a two-lane map where the objective is two Beacons, one near each lane, and progress only ticks for the team holding both. The first Beacons activate at 1:30, well before talents matter, so early-game strength and point control decide the opening rounds. A 100% wave brings ten Banelings, four Hydralisks, three Guardians and three Ultralisks against a 0% wave of six Zerglings and one Ultralisk, which is the difference between a scratched wall and a dead Fort. Gankers, sustained damage and healing, global mobility and moderate waveclear thrive here; mana-hungry heroes and slow starters do not.
- Rotas
- 2 rotas
- Duração típica
- ~17 min
- Primeiro objetivo
- First at 1:30
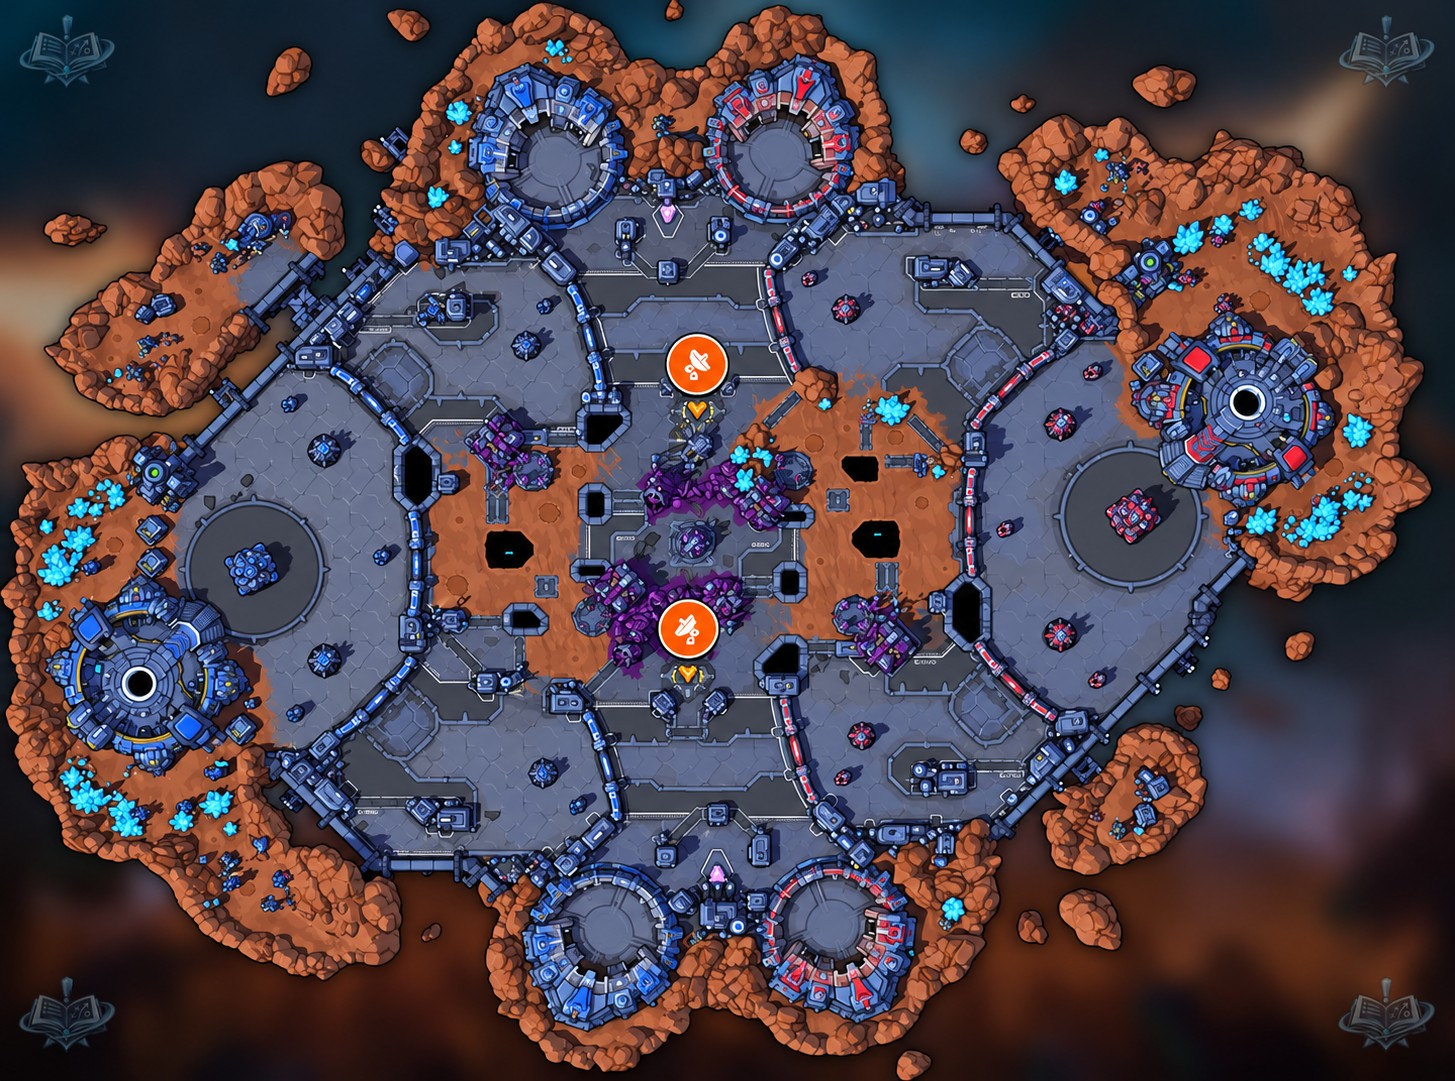
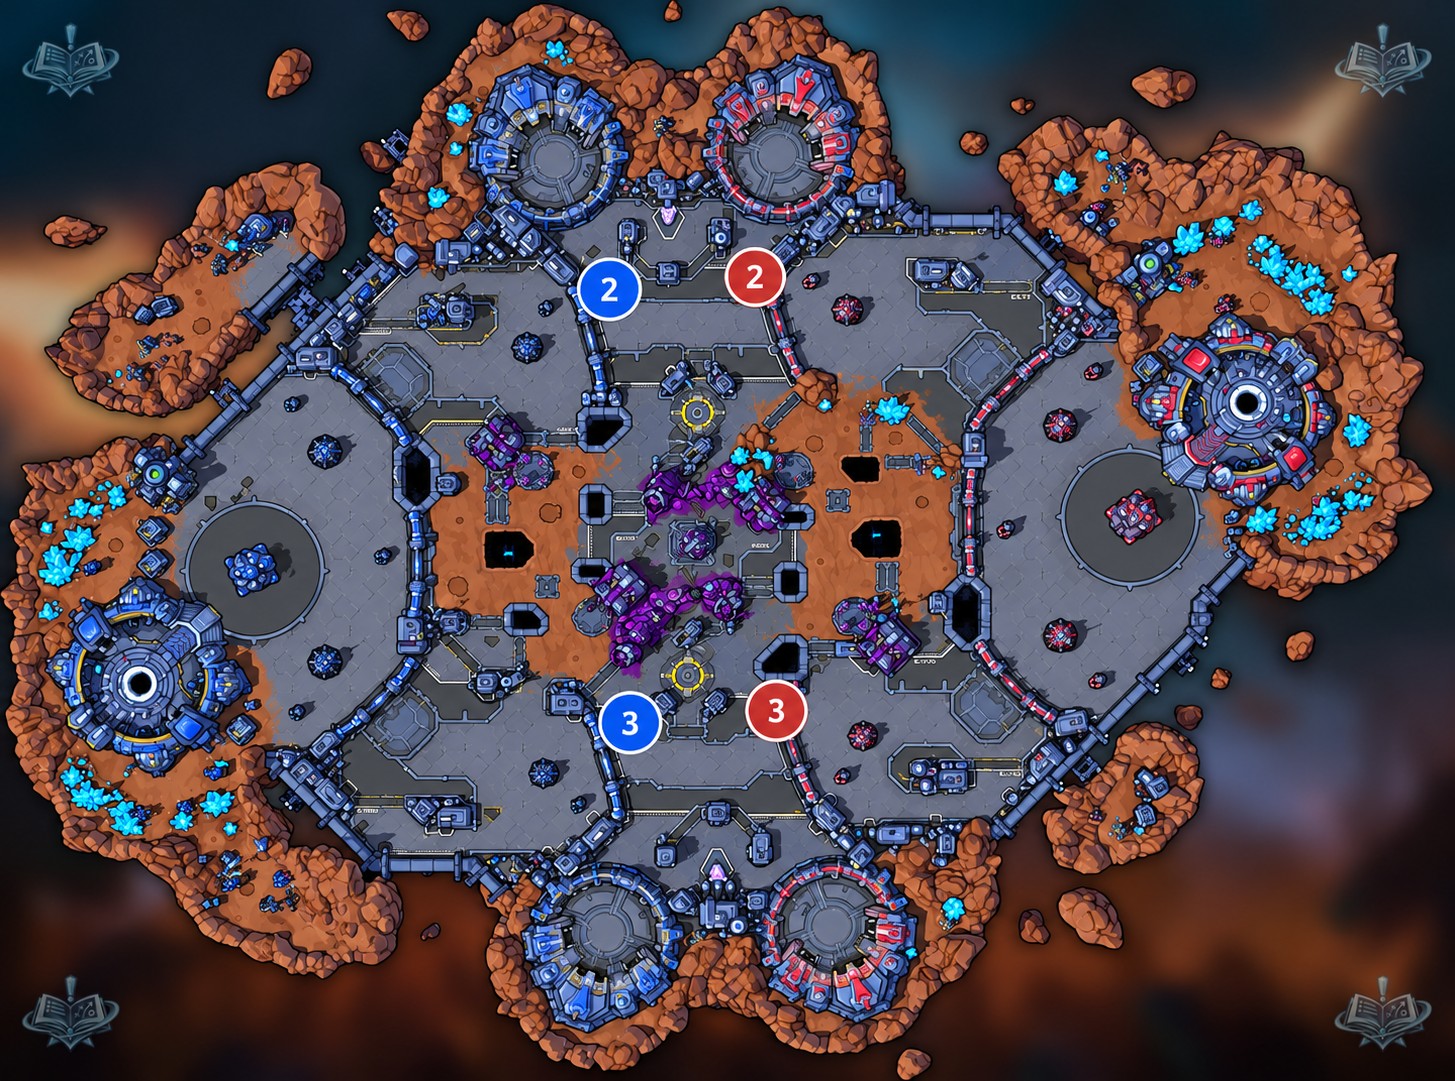
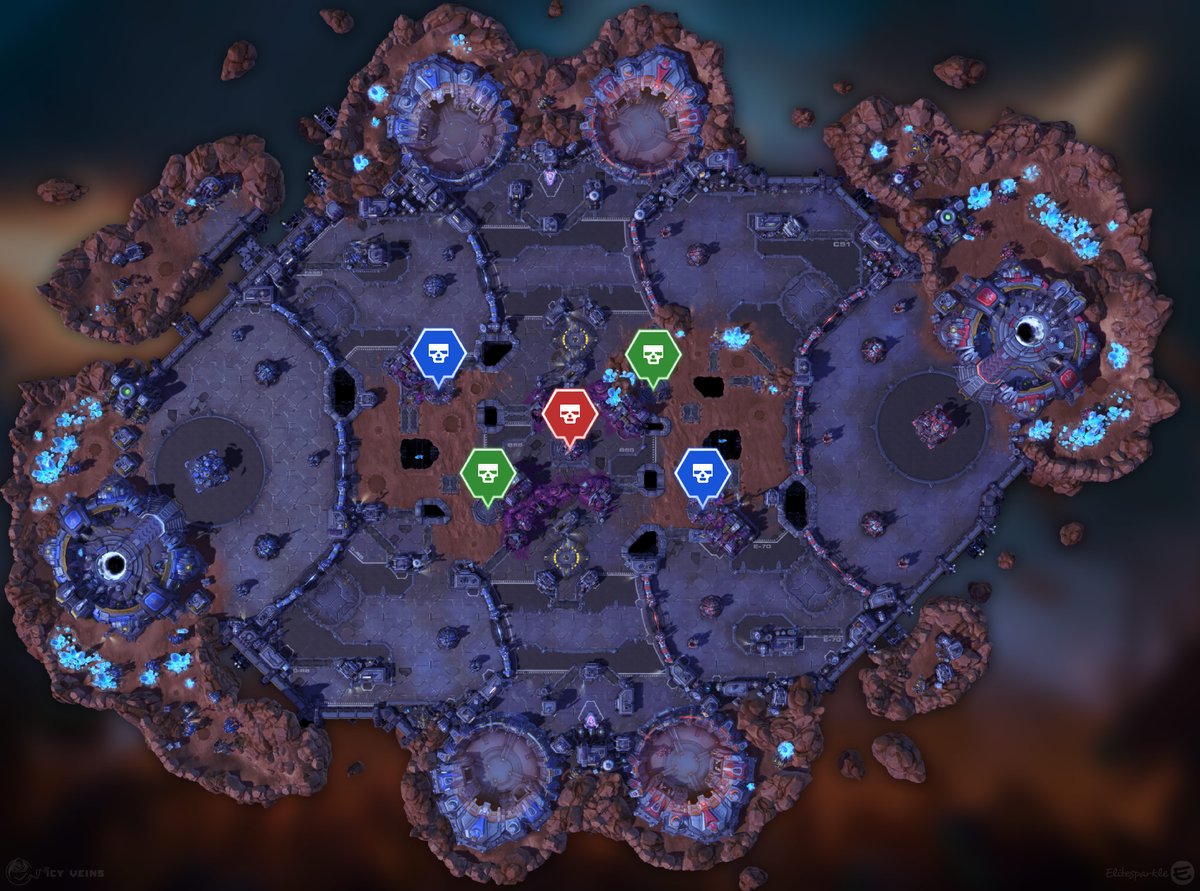
Imagem do campo de batalha: Icy Veins. Objetivos marcados sobre o mapa do jogo.
Objetivos


Beacons
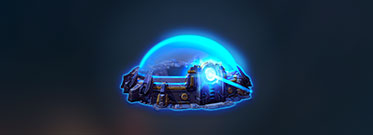
First at 1:30. Then 2:10 after both Zerg waves are dead.Capturing a Beacon takes 3 seconds if neutral and 6 if the enemy holds it. Only the team holding both gains progress, at 2% every 0.75 seconds, so a clean 0-to-100 takes just under 40 seconds. Stepping on an enemy Beacon while an enemy hero stands on it does nothing: you have to push them out first.
Zerg waves
First when either cell reaches 100%, at the earliest about 40 seconds after the Beacons activate at 1:30. The next Beacons come 2:10 after both waves die.Both cells open at once and the waves spawn in opposite lanes, random the first time and alternating afterwards; the cage color in each lane tells you where yours (blue) and theirs (red) will appear. Every wave has 6 Zerglings and 1 Ultralisk, then adds 1 Baneling per 10%, 1 Hydralisk per 24%, 1 Guardian per 30% and 1 Ultralisk per 45%. Zerg prioritize minions and structures but will attack heroes, take crowd control for half duration, and Guardians and Ultralisks drop pods every 13 seconds with 3 Zerglings and a Hydralisk.
Globe Spawners
First at 0:30. A new globe appears 45 seconds after the previous one is picked up.One spawner sits above the top lane and one below the bottom lane, placed so that the hero holding the nearby Beacon cannot grab the globe without leaving it. These globes never expire, so whichever team is free walks over and takes them.
Plano de partida
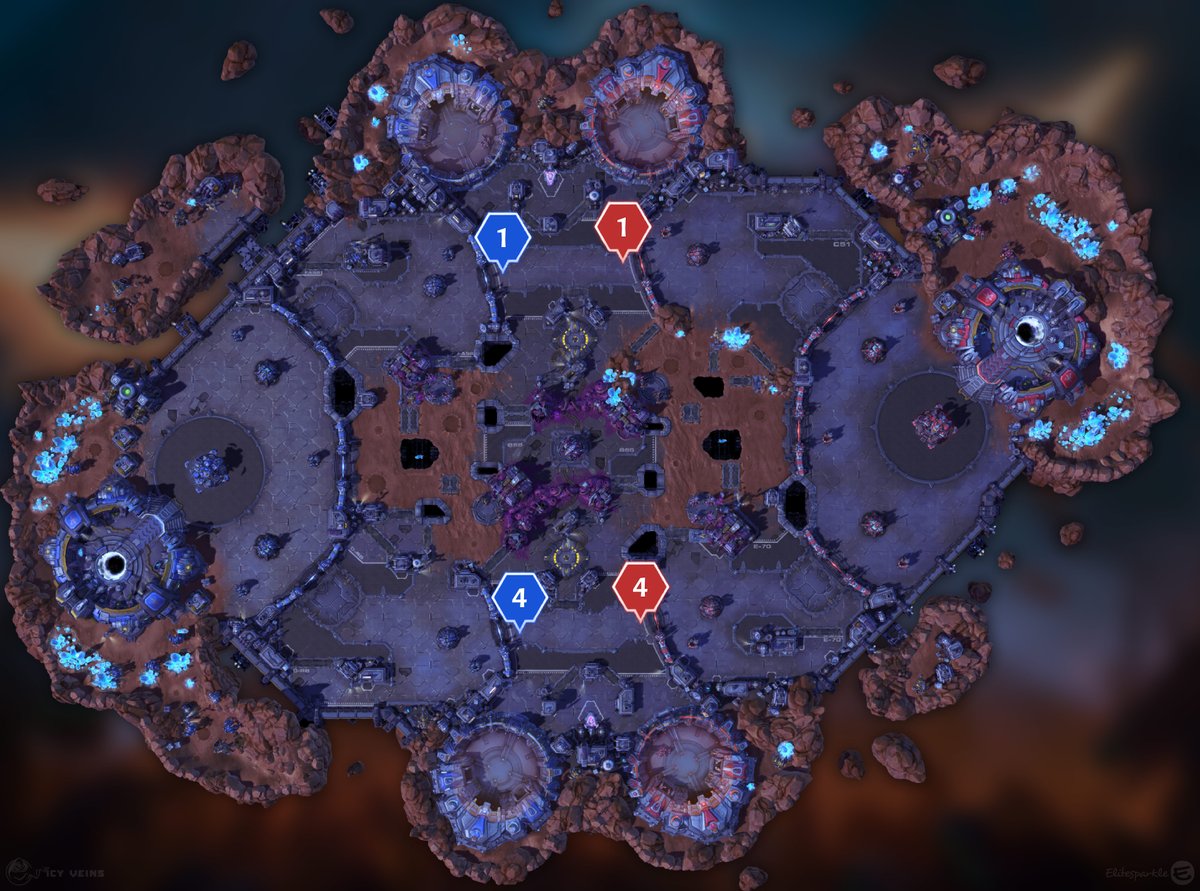
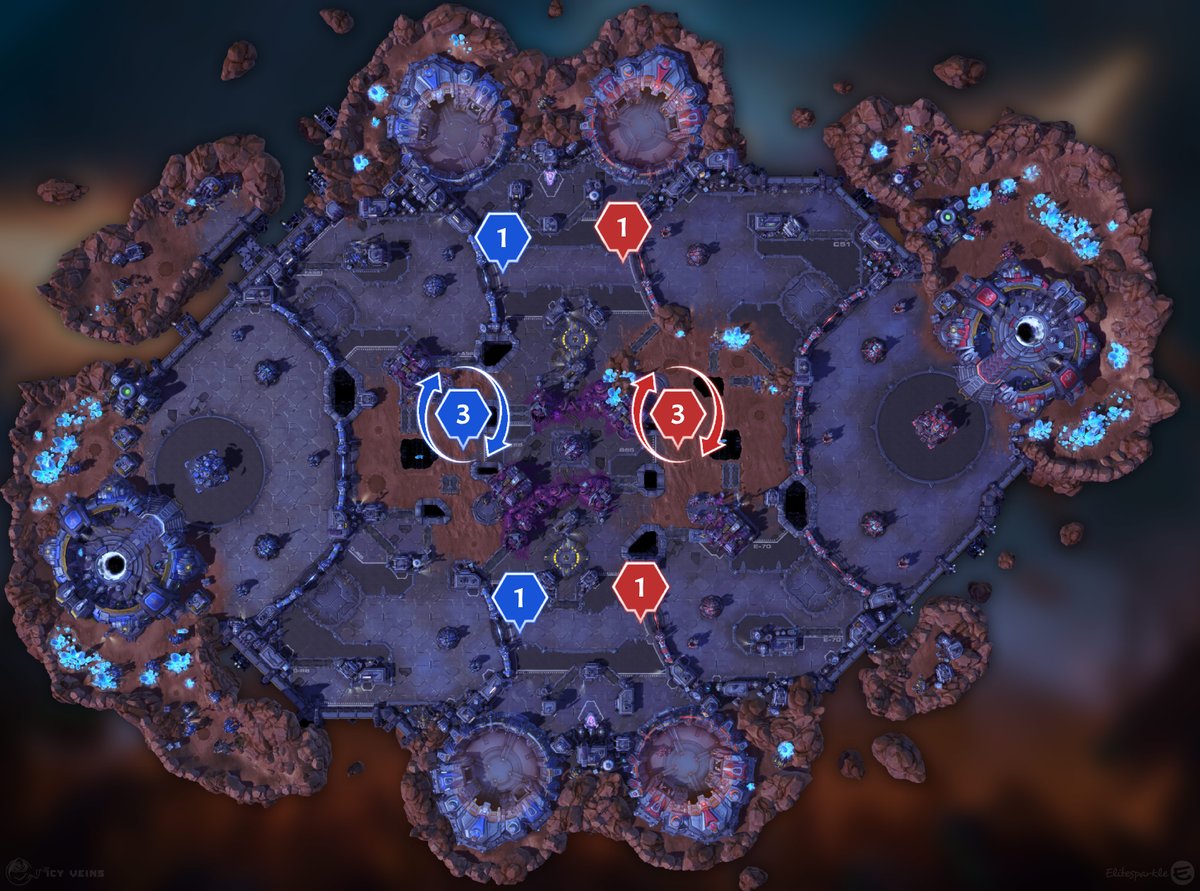
Lane assignments
Three formations rotate like rock-paper-scissors here. The standard 1-4 puts an offlaner top and four bottom, and beats a 1-3-1 that spreads too thin. A 2-3 sends two heroes with kill pressure top to bully the enemy offlaner and three anti-push heroes bottom, and beats the 1-4. A 1-3-1 keeps an offlaner top, an anchor bottom and three roamers between them, and beats the 2-3 by punishing the two-man top with a three-man rotation. Pick based on your draft and adjust once you see where the enemy sends its numbers.
- 1-4: offlaner top, four bottom. Counters 1-3-1.
- 2-3: two gankers top to overwhelm the enemy offlaner, three with anti-push tools bottom. Counters 1-4.
- 1-3-1: offlaner top, anchor bottom, three roaming between lanes. Counters 2-3.
- Heroes that jump impassable terrain rotate between lanes fastest and are ideal roamers.
Early game
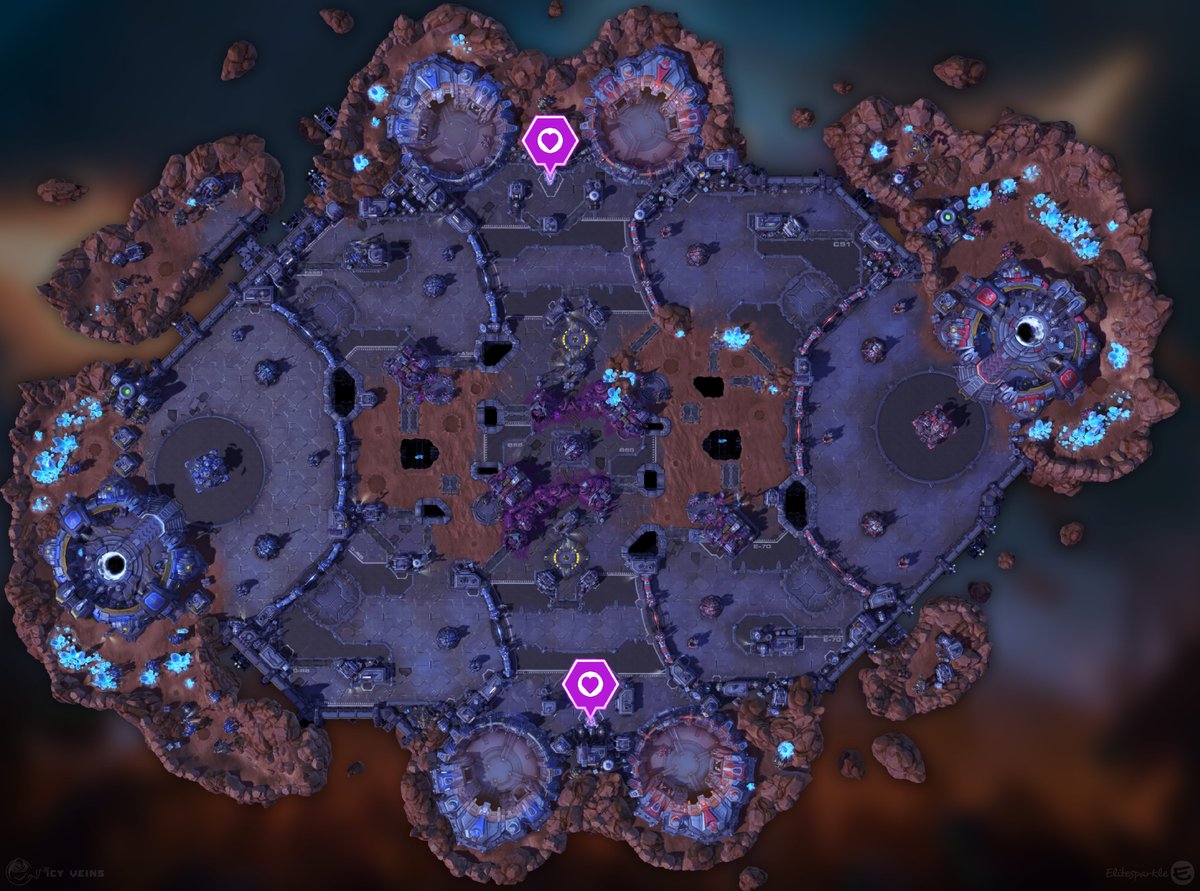
The first Beacons come at 1:30, so the opening is packed. Use the fountain on cooldown; there is no timed spawn worth saving it for. At 0:30 clear your Bruiser Camp (Goliaths and a Raven) and capture it at about 0:50, 20 seconds after a wave spawns, so it walks in behind your minions. At 0:45, or as soon as the bruisers are down, start your Siege Camp (two Hellbats) and capture it near 1:10, 10 seconds after a wave, so it runs in front. Both pushes should be landing on enemy structures right as the Beacons light up, which forces the enemy to choose between their wall and the point. By 1:30, have a durable hero on each Beacon.
- 0:30: Bruiser Camp, capture at 0:50.
- 0:45: Siege Camp, capture at 1:10.
- 1:20: a tank or bruiser walks to each Beacon; the group decides which one it will actually fight for.
- Grab the globe from your side's spawner on the way; it has been sitting there since 0:30.
Playing the objective
Secure one Beacon with a durable hero and keep it as long as you can without dying; holding one denies the enemy any progress. Then look for an advantage, a kill or a bad enemy rotation, and take the second Beacon to start your own bar. Contest where the enemy is not: if they commit top, take bottom and vice versa, and retreat rather than feed when they are stronger in that area. Read the result by the gap: a big win (100% vs 25%) means push with your wave while the offlaner keeps soaking; a small win (100% vs 75%) means defend against theirs unless yours can end the game; any loss means defend your structures, and your best waveclear goes to the lane with the red cage.
- Standing on an enemy Beacon does nothing while their hero is on it: displace or kill them, then the 6-second recapture starts.
- Kill Banelings first: they die fast and their explosion on non-heroes is what deletes structures; then Hydralisks.
- Crowd control lasts half as long on Zerg; area damage does full work.
- A 100% wave versus a 0% wave is 10 Banelings, 4 Hydralisks, 3 Guardians and 3 Ultralisks against 6 Zerglings and 1 Ultralisk: fight for the second Beacon accordingly.
Mercenary camps
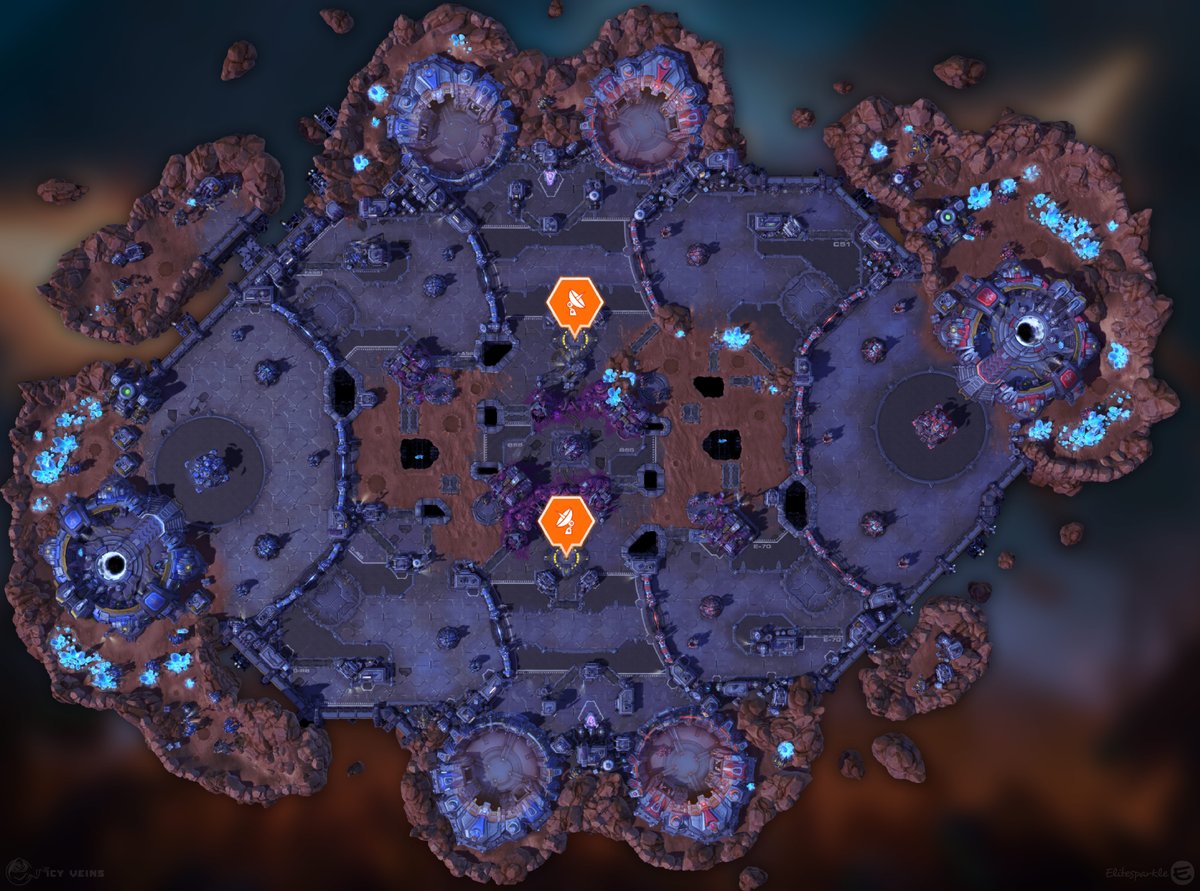
Braxis has five camps: a Bruiser Camp and a Siege Camp in each lane (bruisers on the left of top and the right of bottom, Hellbats on the right of top and the left of bottom) plus the Archangel Boss in the middle. All of them vanish when the Zerg spawn (unless already in combat) and return only after both waves are dead, so camps are taken between objectives, never during. The Archangel does not push a fixed lane: it walks into the lane where enemy structures have taken the least total damage.
- Siege camp (2 Hellbats): 0:30, respawns 3:00 after capture. Cleaving attacks strip 4 armor per hit for 3 seconds, stacking to 20, on heroes and structures alike.
- Bruiser camp (3 Goliaths + 1 Raven): 0:30, respawns 4:00 after capture. The Raven fires a Seeker Missile every 5 seconds that reveals its target; the Goliaths deal the real damage (40 per second, +1 per minute).
- Boss camp (Archangel), center: 5:00, respawns 5:00 after capture. Mortar every 3 seconds and a Bullet Storm every 16 seconds in a long rectangle toward the nearest enemy; immune to bribe. Take it after about 10:00 with an advantage and no objective up.
- Camps are gone while Zerg are alive: finish a capture before the cell hits 100% or lose it.
Late game and win conditions
Win conditions are the objective and the Boss. Late waves at 100% carry three Ultralisks and three Guardians, each dropping pods every 13 seconds, so a big-gap win late usually takes a Keep and can end the game if the team walks with it. After about 10:00, take the Archangel whenever you are up heroes and no Beacons are active, then push the lane it picks. The core fires 5 missiles every 4 seconds at a nearby hero for 5% max health each, so send the wave in first and dive behind it. If you lose a late Beacon fight, do not trickle: group at the Keep, clear Banelings on the approach and let the wave crash into the structures, not into you.
- Win conditions: objective and Boss.
- The Archangel picks the healthiest enemy lane, so expect it where you have pushed least.
- Zerg attack heroes too: engage a wave from the side, behind your own structures, never from the front in the open.
O que buscar no draft
O que buscar no draft
- Prefer gankers and a strong early game: the first Beacons come at 1:30 and level 1 duels decide them.
- Prefer point control: heroes who can hold a Beacon or bully the enemy off one.
- Prefer sustained damage and healing for long standoffs on the Beacons.
- Prefer global presence or terrain-hopping mobility to swing between the two lanes.
- Prefer quests that stack on heroes and moderate waveclear for the Zerg waves.
- Avoid mana-intensive heroes and weak early-game picks: the objective is long and starts before talents matter.
Erros típicos
- Standing on an enemy-held Beacon next to its defender and expecting to stop their progress.
- Dying to keep a Beacon: a dead hero holds nothing and hands the enemy both points.
- Ignoring Banelings until they reach the Fort; they die in one hit and explode for massive structure damage.
- Starting a camp when a cell is near 100%: the camp disappears the moment the Zerg spawn.
- Chasing across the map after a small-gap win while the enemy wave dismantles your Keep.
Dicas
- 1Beacons take 3 seconds to capture when neutral and 6 when enemy-held; progress is 2% every 0.75 seconds.
- 2Zerg waves spawn in opposite lanes: blue cage is yours, red cage is theirs. Check them before the cells open.
- 3Wave breakpoints: a Baneling every 10%, a Hydralisk at 24%, a Guardian at 30%, a second Ultralisk at 45%.
- 4Guardians and Ultralisks drop pods every 13 seconds with 3 Zerglings and a Hydralisk: kill them before they reach the wall.
- 5Globe spawners refill 45 seconds after a pickup and their globes never expire: the free team should always collect them.
- 6Use the fountain on cooldown; the objective takes long enough that saving it is a waste.
- 7Hellbat armor shred (up to 20) works on heroes too: fight next to your Hellbats when a Beacon skirmish breaks out.
- 8Camps return only after both Zerg waves die, and the next Beacons come 2:10 later: that gap is your camp window.