










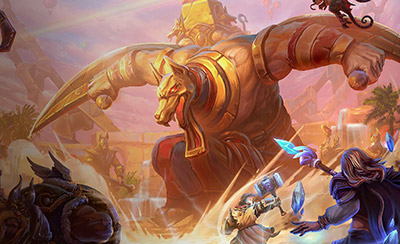

Sky Temple
Sky Temple is a three-lane map with three temples: one above the top lane, one between top and middle, and one below the bottom lane. Up to two temples are active at once, so most objective phases are two separate skirmishes rather than one big fight. Mercenary camps stay active during the objective, which means a well-timed camp can pull a defender away or push a lane while the enemy is busy. The map rewards teams that clear camps fast, rotate with global heroes and know when to trade one temple for the other instead of forcing a five-on-five. Structure count is the scoreboard here: when you're ahead, play safe and trade; when you're behind, look for a gank or a fight that flips the count.
- Rotas
- 3 rotas
- Duração típica
- ~20 min
- Primeiro objetivo
- First at 3:00 (top and middle temples)
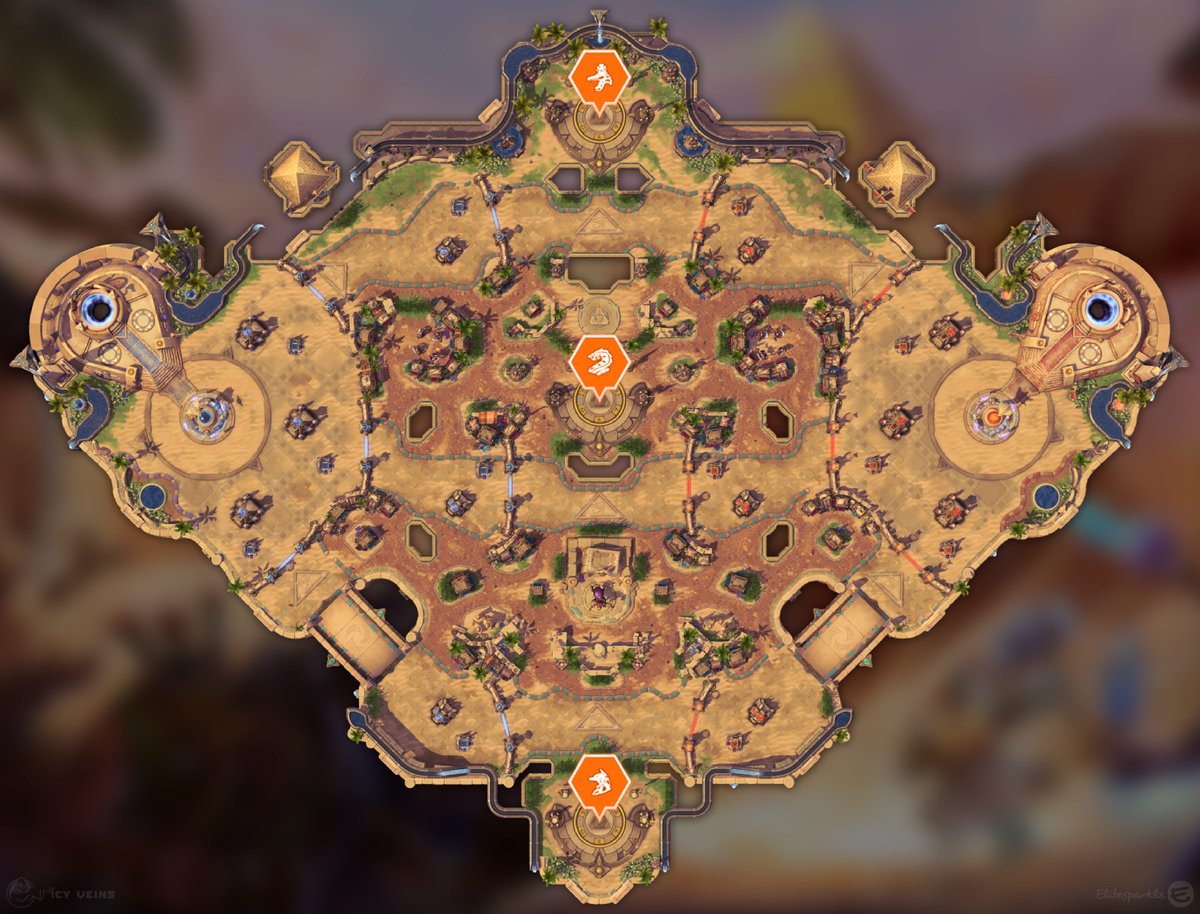
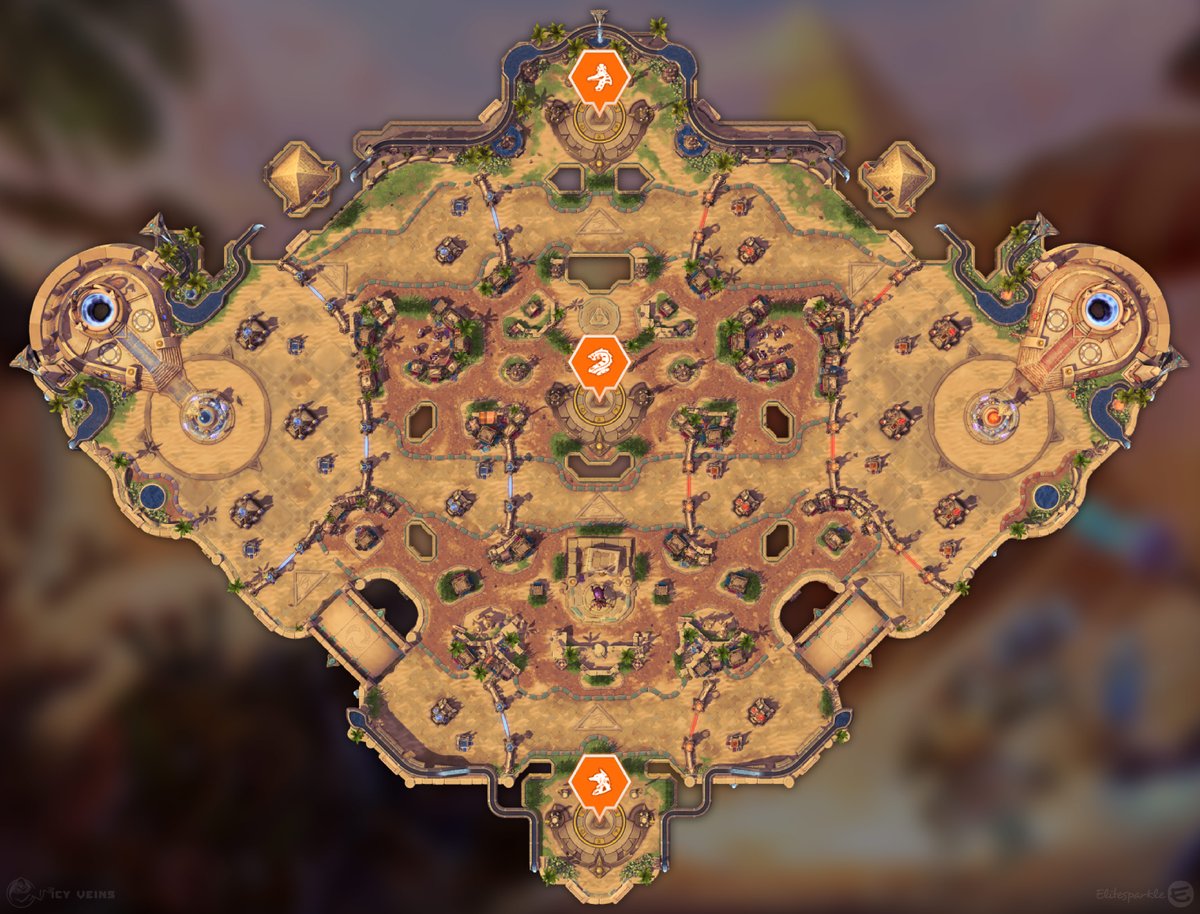
Imagem do campo de batalha: Icy Veins. Objetivos marcados sobre o mapa do jogo.
Objetivos



Temples
First at 3:00 (top and middle temples). Then 2:00 after the previous temples run out. Each temple activates 2 seconds after a hero steps on it and fires once per second for 40 shots.A temple with only your heroes on it fires at the closest enemy structures (fountains and side walls excluded), pausing while it is contested or empty. Each temple has 40 shots plus 5 bonus shots that fire automatically for whoever holds it when the 40 run out, each dealing 450 damage (+20 per minute). Leaving a temple always fires 2 more shots, so you can walk off at 2 shots left and still collect the 2 remaining plus the 5 bonus. The spawn order is fixed at the start: top and middle, then bottom alone, then top or middle paired with bottom, and afterwards random sets of one or two.
Temple guardians and defenders
First at 3:00, with every temple activation. Each temple starts with 1 Guardian and 2 Defenders, then 2 more Defenders spawn. They despawn when the temple is exhausted.You don't have to kill them to hold a temple, but doing so cuts the damage you take while standing on it. The Guardian knocks back everything in a frontal cone every 12 seconds and drops a Regeneration Globe when killed; Defenders don't. Kill the Defenders on your own side first so you are fresher when enemy heroes arrive.
Plano de partida
Lane assignments
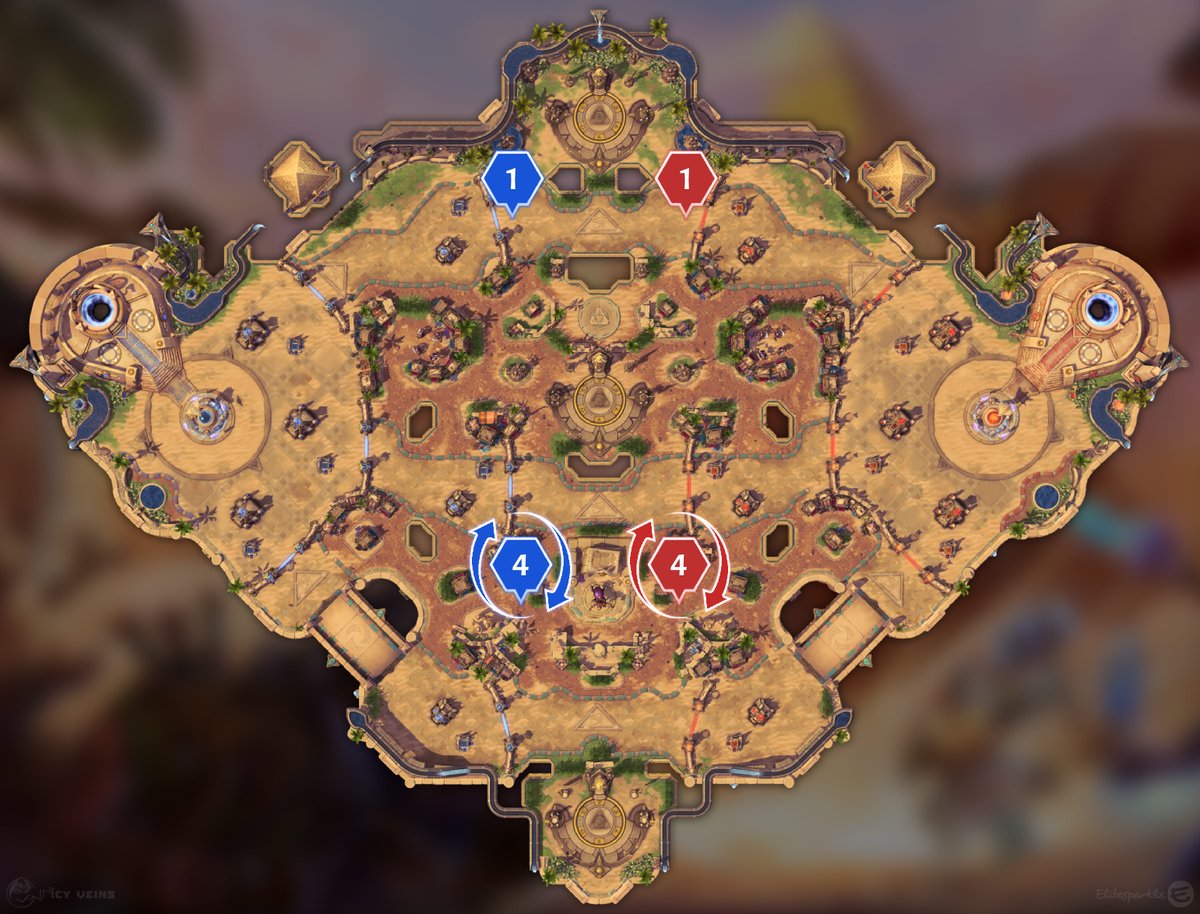
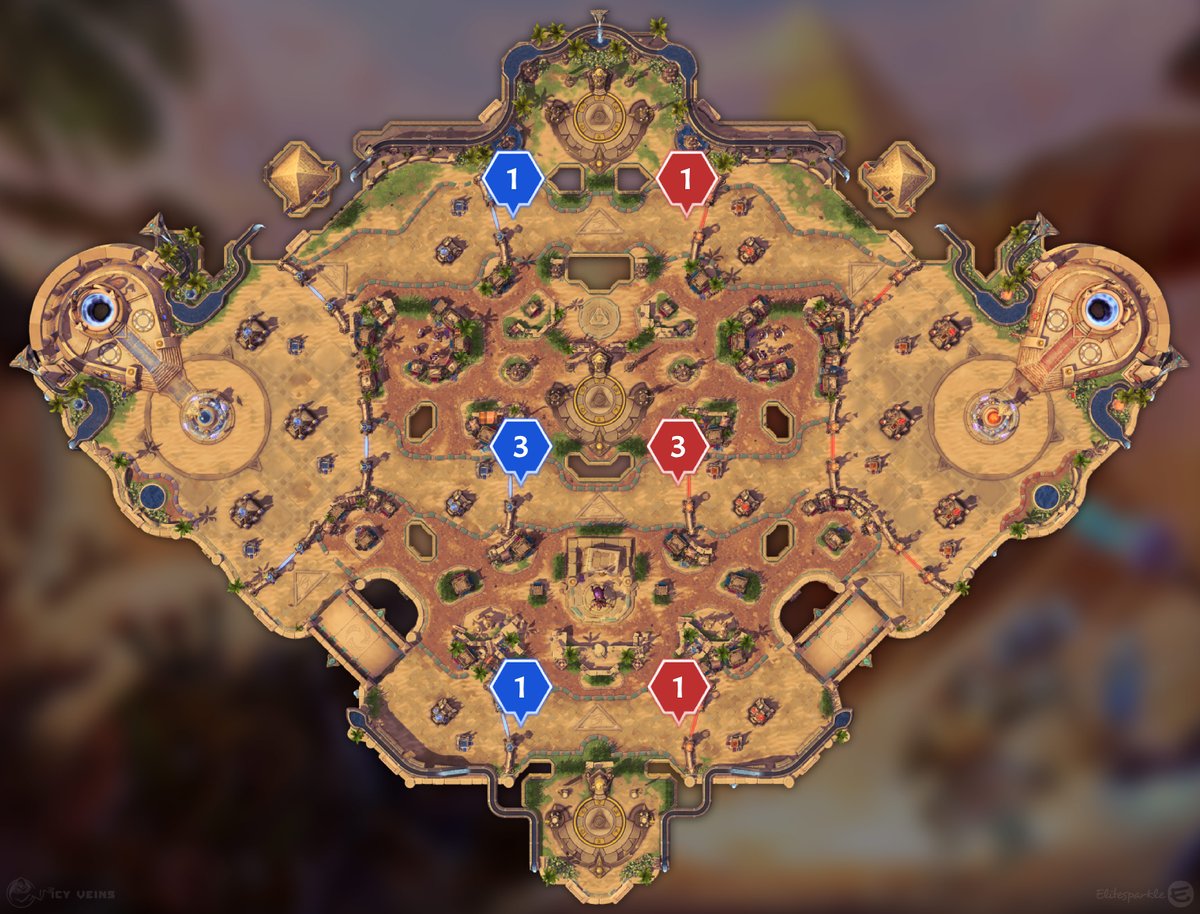
The standard formation is 1-4: your offlaner holds the top lane while the other four rotate between middle and bottom, which keeps them close to the siege camps and to two of the three temples. The alternative is 1-3-1, with the offlaner top, three heroes in middle roaming as soon as they can, and an anchor holding bottom. Give the lane farthest from the next temple to a global hero if you have one, so they soak and still arrive on time. Positions are not rigid: the point is that top is always covered by one hero while the rest stay grouped enough to win a two-temple phase.
- 1-4: offlaner top; four heroes rotate middle and bottom.
- 1-3-1: offlaner top; three in middle roaming early; one anchor bottom.
- Global heroes take the lane farthest from the next temple and teleport in.
Early game
Use your fountain before 1:00 so it is back for the 3:00 temples. At 0:30 start clearing your Bruiser camp in the top lane and capture it around 1:05 (5 seconds after a minion wave spawns) so the knights arrive ahead of your minions and push into the top fort. Any damage on top-lane structures before 3:00 helps the top temple finish the fort during the first phase. At about 2:20 start the Siege camp on your bottom side and capture it around 2:50 (20 seconds after a wave) so the giants join behind your minions right as the temples wake. At 3:00 you want at least one hero on each active temple; prioritize the top temple with four heroes while the offlaner keeps soaking.
- 0:30: clear the top Bruiser camp; capture at 1:05 to lead the wave.
- 2:20: clear the bottom Siege camp; capture at 2:50 to trail the wave into the 3:00 phase.
- Chip the top fort before 3:00 so the first top temple can finish it.
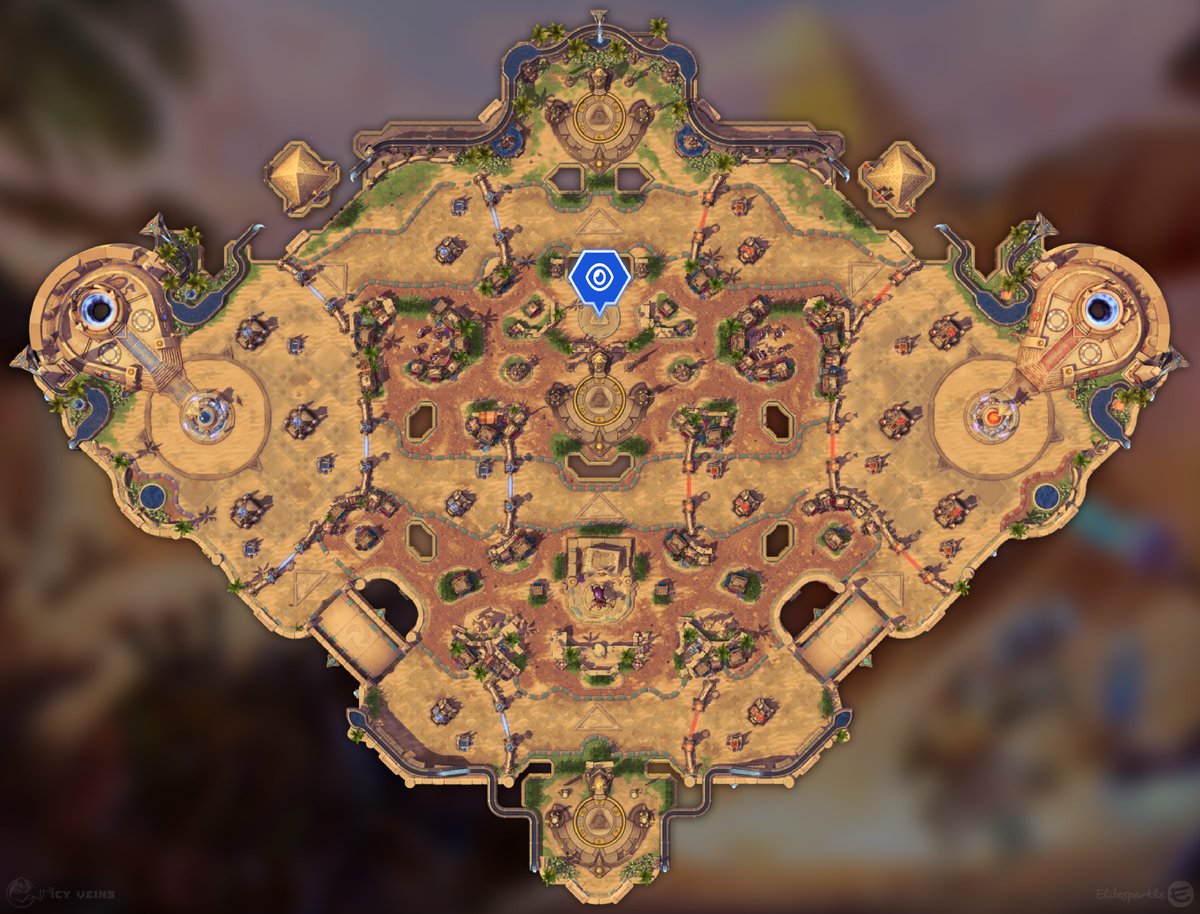
- Take the watchtower between top and middle only if you're already there; it neutralizes after 45 seconds empty.
Playing the objective
Two active temples mean two decisions, not one. Contest the temple you can win and let the other go if the enemy commits five there; a temple fires while it's uncontested, so one hero standing on the ignored temple gets full value while the enemy wastes numbers. In the first phase it is fine to take only one of the two, especially with a weak early-game composition; the second phase is bottom only, and that single temple is worth winning outright. When you are ahead in structures, keep trading temples and avoid team fights; when behind, gank or force a fight before the enemy's structure lead snowballs. Losing a temple isn't a disaster: rotate to the other one, take the camp the enemy left up, or set up the boss after 10:00 while they are busy on the top temple.
- A contested temple doesn't fire: one body on the circle stalls the enemy's damage.
- Kill your side's Defenders first; the Guardian's cone knockback comes every 12 seconds.
- Leave at 2 shots left: the temple still fires those plus the 5 bonus shots for you.
- Ahead in structures? Trade temples. Behind? Gank or fight before the gap widens.
Mercenary camps
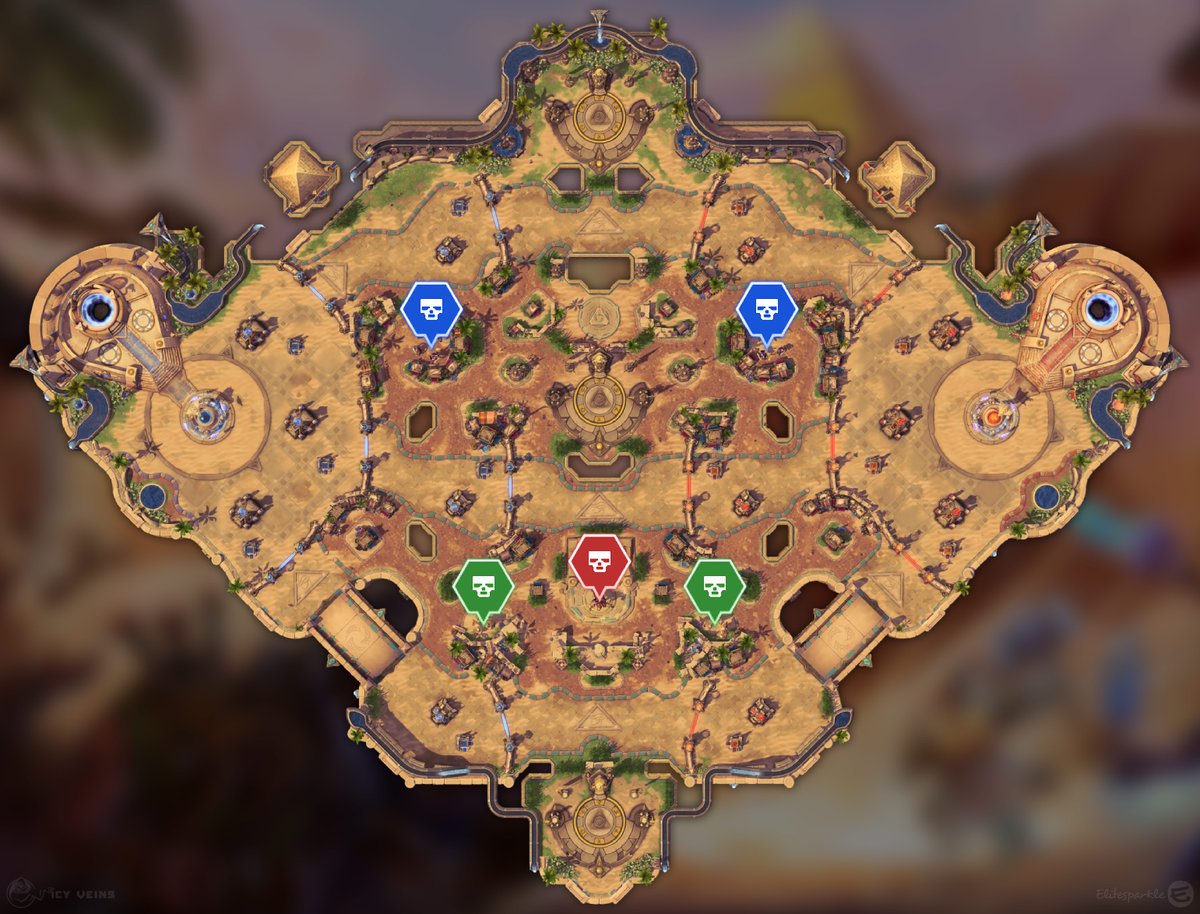
Sky Temple has five camps: two Bruiser camps in the top lane, two Siege camps in the bottom lane and one Boss camp on the bottom side. All of them stay active during temple phases, so camps are part of every objective plan, not something you do in between. The Wizard in a Bruiser camp puts a Spell Armor field around allied units in lane, so don't fight into a wave that still has one alive. Siege Giants throw dodgeable stones and outrange towers, making them the safest capture and the best lane pusher for the bottom temple phases. The Sand Golem stuns in melee range with Mega Smash and knocks back with Whirling Sands; it is worth taking from about 10:00 when the enemy is committed to the top temple.
- Siege camp (2 Siege Giants): 0:30, respawns 3:00 after capture. Dodge the stones to take it for free; 100% bonus damage to structures.
- Bruiser camp (3 Knights + 1 Wizard): 0:30, respawns 4:00 after capture. The Wizard's Spell Armor field protects your wave; don't fight into an enemy Wizard.
- Boss camp (Sand Golem): 5:00, respawns 5:00 after capture. Mega Smash stuns in melee every 10 seconds; Whirling Sands knock back every 15. Immune to Bribe.
- Camps never shut off during temples: time a Bruiser capture for right before a phase without the top temple, and a Siege capture for one without the bottom temple.
Late game and win conditions
Temple shots scale with time, so late phases take down keeps that early ones would only scratch; the team that keeps its structure lead can end through temples alone. From about 10:00, keep vision on the Boss camp with a hard-to-kill hero or a vision tool so the enemy can't take the Sand Golem uncontested, and capture it yourself whenever you have an advantage and no temple to contest. Split-push is a real win condition here: a solo hero on the far top temple or pushing with a Bruiser camp forces the enemy to send someone away from the main fight. When you go for the core, remember it spawns two rings of six tornadoes every 23 seconds that deal 25 damage and knock heroes back, so commit with minions or a boss rather than trickling in.
- Win conditions: temple damage, the Sand Golem from 10:00, and split-push on the far top side.
- Bait Whirling Sands onto the enemy side of the Boss pit before it spawns so invaders walk through tornadoes.
- Core tornadoes: two sets of six every 23 seconds, 25 damage plus knockback. Don't trickle in.
O que buscar no draft
O que buscar no draft
- Prefer heroes who clear mercenary camps quickly: camps stay active during temples and decide the side fights.
- Prefer global presence so one hero can soak the far lane and still show up for a two-temple phase.
- Prefer gankers and split-pushers; the map is wide and the enemy has to cover top, bottom and the boss.
- Prefer point control and burst for the Sand Golem: securing or stealing the boss swings late games.
- Avoid heroes whose quests need hero hits to stack; temple phases are often two small skirmishes with little sustained hero damage.
- Avoid compositions with no one who can stand alone on a temple under Guardian and Defender pressure.
Erros típicos
- Sending all five to one temple while the enemy takes the other for free with a single hero.
- Forcing a team fight when you are ahead in structures instead of trading temples and letting your lead do the work.
- Ignoring camps during a temple phase even though they stay active and push lanes the enemy has left empty.
- Standing on a temple until it hits zero instead of leaving at 2 shots and collecting the bonus shots on the move.
- Letting the enemy take the Sand Golem uncontested after 10:00 because nobody kept vision on the pit.
Dicas
- 1Temples activate 2 seconds after you step on and fire once per second: 40 shots plus 5 automatic bonus shots at 450 (+20 per minute) each.
- 2A temple always fires 2 more shots after you leave; walk off at 2 remaining to save time.
- 3Spawn order: top and middle first, then bottom alone, then top or middle paired with bottom.
- 4Use the fountain before 1:00 so it's off cooldown for the 3:00 phase.
- 5Capture the top Bruiser camp at 1:05 (5 seconds after a wave) to make it lead the minions into the fort.
- 6Capture the bottom Siege camp 20 seconds after a wave so the giants trail behind the minions.
- 7Kill your side's Defenders first; only the Guardian drops a Regeneration Globe.
- 8The single watchtower sits between top and middle and reveals the middle temple and the rotation paths; don't die contesting it.