










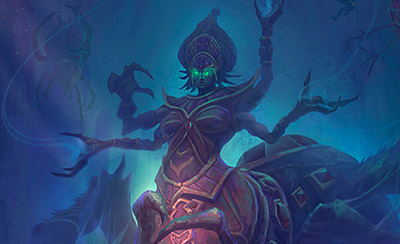

Tomb of the Spider Queen
Tomb of the Spider Queen is a compact three-lane map where the objective is running from the first minion wave: every kill is progress, and the two altars sit between the lanes so turn-ins are never far away. Middle and top are close enough to walk between without mounting, which is why four heroes rotate between them while one offlaner holds bottom. There is no timer to wait for, so the game is a constant tug of war over waveclear, altar denial and picking off the enemy hero carrying the most gems. Mercenary camps vanish while Webweavers are alive, so camps have to be taken before a summon or after the spiders die. Teams with strong waveclear, long-range poke around the altars and a solid late game win here; compositions that need bushes or fall off late struggle.
- Rotas
- 3 rotas
- Duração típica
- ~20 min
- Primeiro objetivo
- First at 0:30, when the first minion waves meet, and then continuously for the whole game.
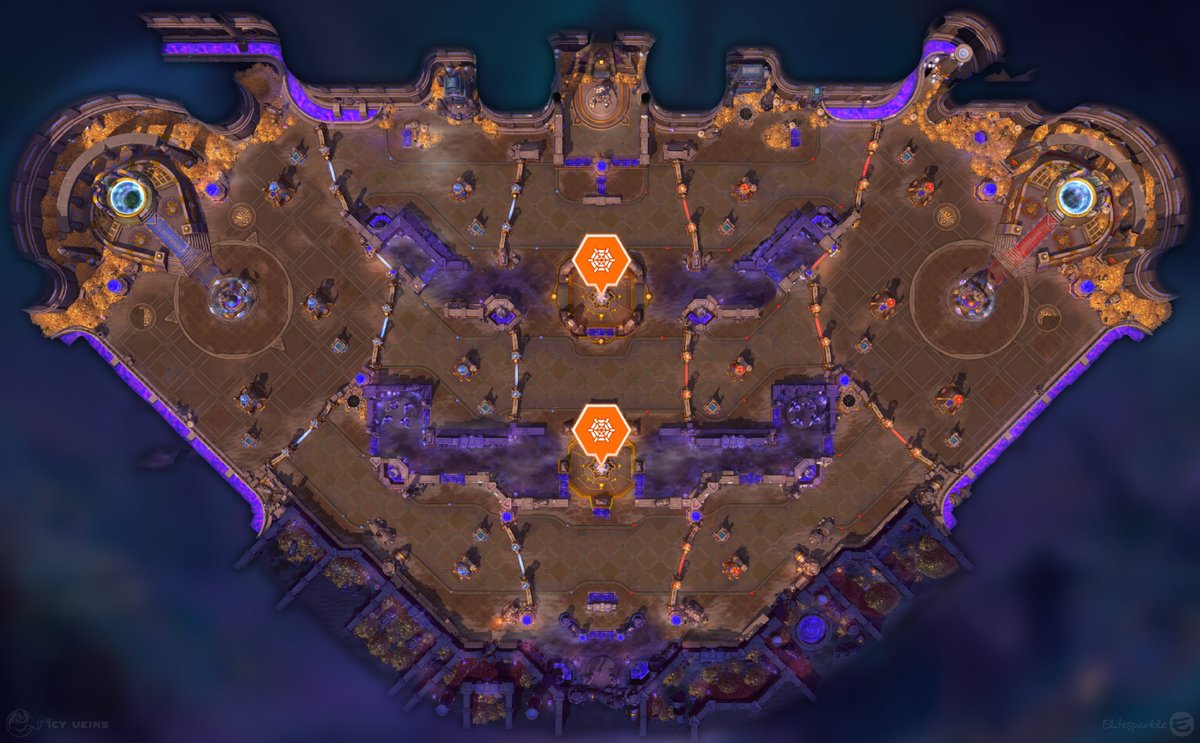
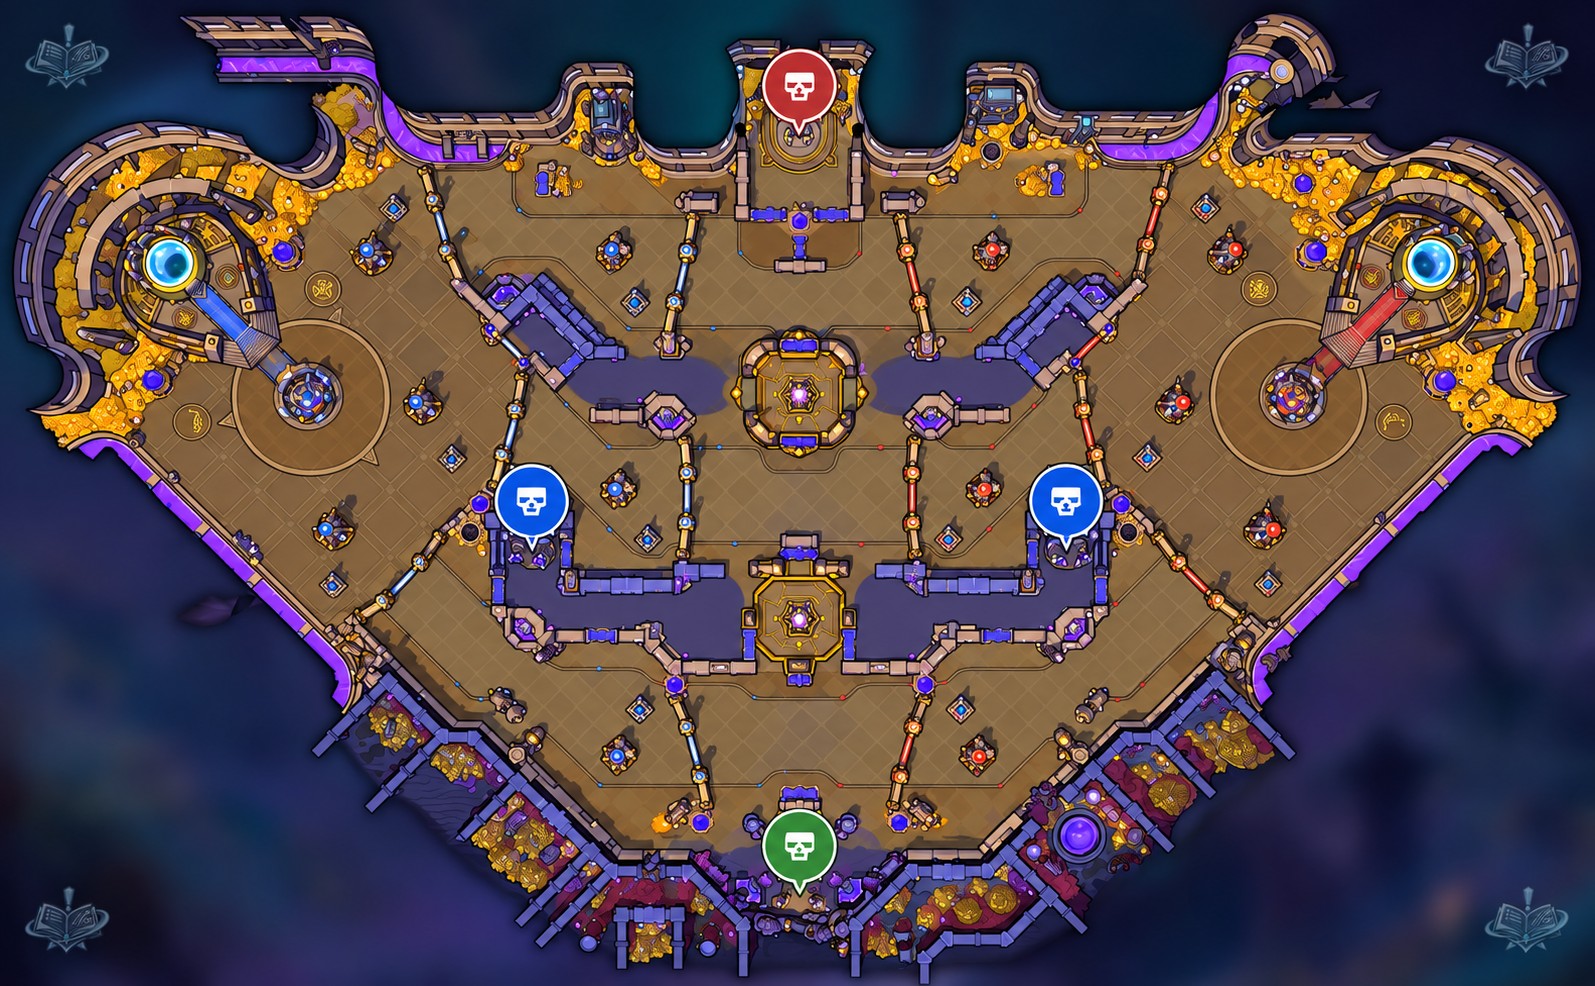
Imagem do campo de batalha: Icy Veins. Objetivos marcados sobre o mapa do jogo.
Objetivos



Gems
First at 0:30, when the first minion waves meet, and then continuously for the whole game.Enemy ranged minions drop 1 gem; enemy heroes drop 3 (Murky, The Lost Vikings and Misha drop only 1). A hero can carry up to 100. When you die, all your gems fall to the ground and your allies have 8 seconds to grab them before they disappear for good; enemies can see where they landed and will try to zone your team off them. Press Tab to see which enemy hero is carrying the most: that is the one to kill when nobody is nearby to pick up the drop, or to stop from paying.
Altars and Webweavers
First possible once a team holds 50 gems; each later summon costs 5 more. Channel 6 seconds at an altar; Webweavers spawn 15 seconds after the payment completes.Your team's gem counter under the minimap glows when you have enough to pay. Once the total is reached, a Webweaver spawns in each lane 15 seconds later and walks at the enemy structures. Webweavers cast Death Wave, a 4-second channel that hits hard in front of them on a 7-second cooldown, and Spawn Minions every 20 seconds, which adds 2 Cryptcrawlers. Before you pay, line up the waves so all three spiders reach structures at the same time; before the enemy pays, ruin your waves so theirs arrive staggered and weakened.
Plano de partida
Lane assignments
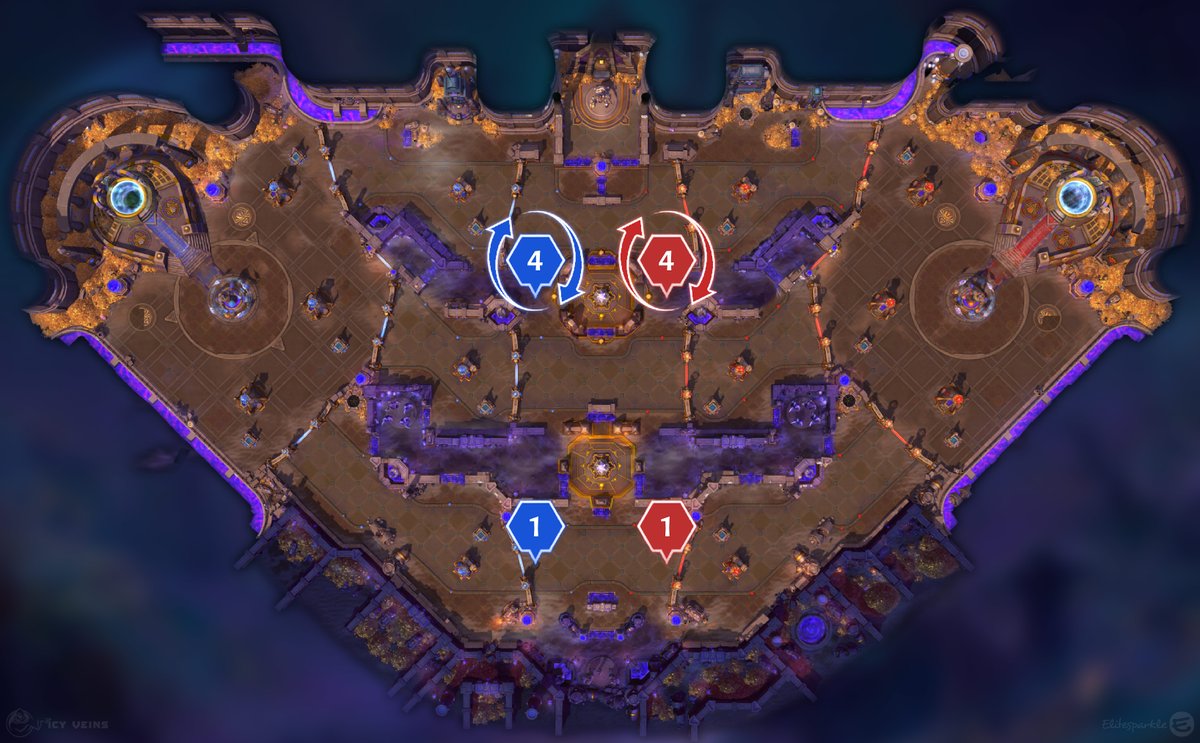
The formation on this map is 4-1: four heroes rotate between middle and top, and one offlaner holds the bottom lane. Middle and top are so close that you rotate on foot; a hero with a speed boost makes the group even more efficient. The four-stack collects gems from two lanes, controls both altars and can collapse on the enemy's top or middle laner. The bottom offlaner needs to survive alone, clear waves and bank gems at the nearby altar without dying with a pocket full of them. Don't split further unless you are winning: a lone hero with 30 gems is the enemy's favorite target.
- 4-1: four rotate middle and top; one offlaner holds bottom.
- No mount needed between middle and top; movement speed effects pay off here.
- The offlaner banks at the altar nearest bottom and never carries a big stack into a duel.
Early game
There is no objective timer, so use the fountain on cooldown instead of saving it. At 0:30 your Bruiser camp in the middle lane is up: clear it and capture at 1:05 (5 seconds after a wave spawns) so the knights lead your minions into the enemy middle structures. If you sent a second hero bottom early, you can instead sneak the neutral Siege camp in the bottom lane at 0:30, but then skip the Bruiser camp because the pair may need help. Every wave you clear is gems, so trade efficiently and pick up the drops before the enemy can zone you; the first team to bank 50 sends the first Webweavers. Watch the enemy counter as much as your own and start denying their altar once they are close.
- 0:30: Bruiser camp in middle; capture at 1:05 so it leads the wave.
- Alternative 0:30: two heroes sneak the neutral bottom Siege camp; don't also commit to the Bruiser camp.
- Fountain on cooldown: there's no spawn to save it for.
- Bank at 10+ gems whenever you pass an altar.
Playing the objective
When your team has enough gems, prepare the waves so they are even across lanes, then pay with someone giving vision in the bushes next to the altar so the 6-second channel isn't interrupted by a surprise. When the enemy has enough, do the opposite: mess up your waves so their spiders arrive out of sync, and stop the enemy hero carrying the most from reaching the altar, without dying and handing them a numbers advantage while Webweavers are on the way. Your own Webweavers should be escorted: send one hero to each side lane and the rest with the spider in the lane where you want a fort down. Defending, kill the Cryptcrawlers, dodge Death Wave and pick the spider that threatens the weakest structure first. After about 10:00, if you're ahead, pull the Boss while your last gems are being paid so the camp stays in combat and doesn't vanish, then push with the Sand Golem and all three Webweavers at once.
- Paying: even the waves, post a hero in the altar bushes, channel 6 seconds.
- Denying: ruin your waves, poke the top gem carrier off the altar, don't die doing it.
- Spiders spawn 15 seconds after payment; use that window to reposition.
- Death Wave is a 4-second frontal channel on a 7-second cooldown: step to the side, not backward.
- Boss combo: aggro the Sand Golem as the last gems go in so the camp stays active through the summon.
Mercenary camps
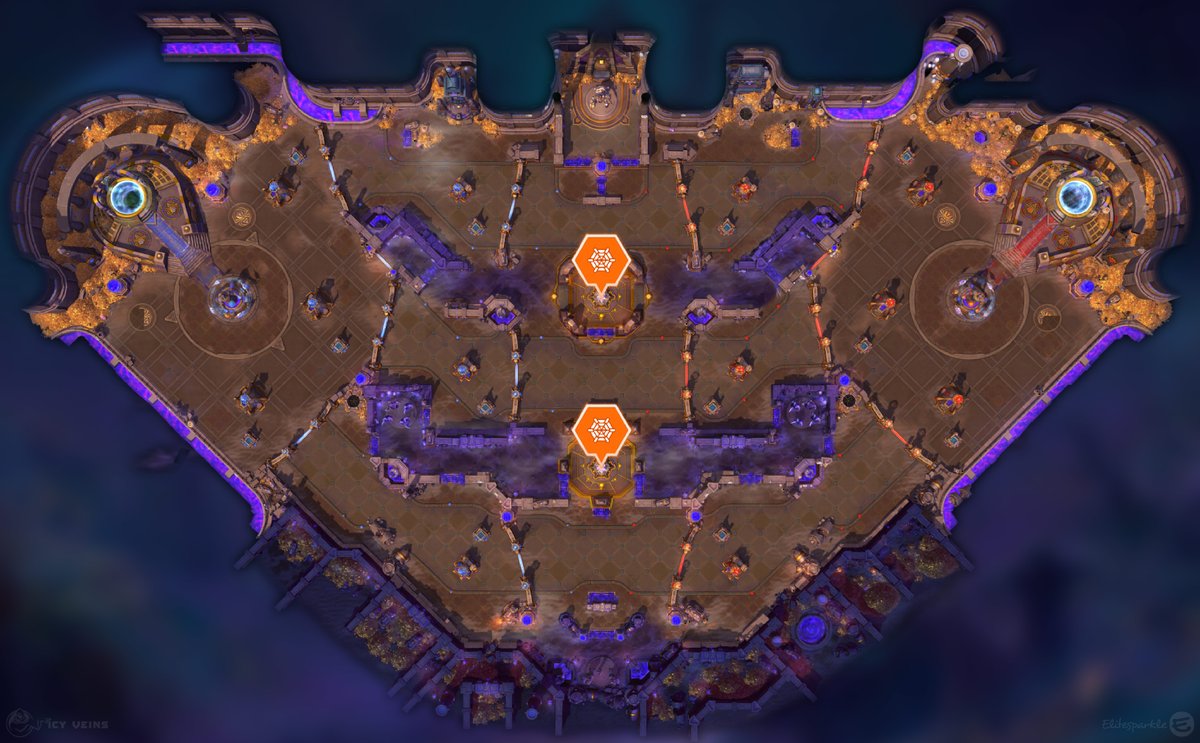
There are four camps: one Boss camp in the top lane, two Bruiser camps in the middle lane (one per side) and one neutral Siege camp in the bottom lane. All of them disappear from the map when Webweavers start spawning, unless their mercenaries are already in combat, and only return once every Webweaver is dead. That rule shapes your timing: take camps right before a summon so they push alongside the spiders, or keep one in combat so it survives the wipe. The Bruiser Wizard shields your wave with Spell Armor, so a knight camp next to a Webweaver is a real threat to a fort. The Siege Giants can be captured without taking damage if you dodge their stones and they hit structures from outside tower range.
- Siege camp (2 Siege Giants, neutral, bottom lane): 0:30, respawns 3:00 after capture. Dodgeable stones; 100% bonus damage to structures.
- Bruiser camp (3 Knights + 1 Wizard, middle lane): 0:30, respawns 4:00 after capture. Capture 5 seconds after a wave to lead the minions.
- Boss camp (Sand Golem, top lane): 5:00, respawns 5:00 after capture. Mega Smash stuns every 10 seconds, Whirling Sands knock back every 15; immune to Bribe.
- Camps vanish while Webweavers live: capture before paying, or keep the camp in combat as you pay.
Late game and win conditions
Games here are won through Webweavers and the Boss, so a strong late game matters more than a fast start. Each summon costs 5 more gems than the last, which means late turn-ins take longer to build and a single lost stack hurts more; keep banking small amounts and never let your best carrier die alone. From about 10:00 the Sand Golem is available: take it when you have a clear advantage or right after your spiders die, ideally combined with the trick of paying the last gems while the boss is aggroed. When you push to end, group behind the spider in one lane while the other two force defenders to split. The core fires a Death Wave every 5 seconds that deals 5% of maximum health and slows by 70% for 1.25 seconds, so bring minions and mercenaries to tank it and don't stand still in front of it.
- Win conditions: Webweavers and the Sand Golem; there is no split-push shortcut here.
- Bait the Golem's Whirling Sands toward the enemy side of the pit so invaders eat the tornadoes.
- Core Death Wave: every 5 seconds, 5% max health and a 70% slow for 1.25 seconds. Tank it with spiders and camps.
O que buscar no draft
O que buscar no draft
- Prefer high waveclear on as many heroes as possible; every wave is gems and pressure.
- Prefer poke and area damage for altar standoffs, plus vision tools to watch the bushes while you pay.
- Prefer heroes with stacking quests: the map is small, fights are constant and stacks come fast.
- Prefer sustained damage and healing and a strong late game, since Webweaver costs climb and games run long.
- Prefer abilities that use impassable terrain; the altars and camps sit in tight corridors.
- Avoid low-waveclear picks, heroes who fall off late, and effects that depend on bushes.
Erros típicos
- Walking around with 40 gems looking for a fight instead of banking them at the altar you just passed.
- Paying without anyone watching the bushes and losing the whole stack to an interruption and a kill.
- Dying while trying to stop an enemy turn-in, so your team defends Webweavers a player down.
- Taking camps after the enemy pays: they vanish the moment the spiders spawn.
- Ignoring the enemy gem counter and getting surprised by three Webweavers with your waves out of position.
Dicas
- 1Costs: 50 gems for the first summon, +5 for each one your team has already bought.
- 2Ranged minions, Murky, The Lost Vikings and Misha drop 1 gem; every other hero drops 3.
- 3Dropped gems last 8 seconds and only your allies can pick them up, but the enemy sees where they are.
- 4Press Tab to find the enemy carrying the most gems; that's your kill or deny target.
- 5Pay at 10+ gems; your counter under the minimap glows when the team can afford Webweavers.
- 6Webweavers spawn 15 seconds after the 6-second channel; even your waves beforehand so all three hit at once.
- 7Aggro the Sand Golem while the last gems are paid so the Boss camp doesn't disappear during the summon.
- 8Use the fountain on cooldown; there's no objective spawn to save it for.