










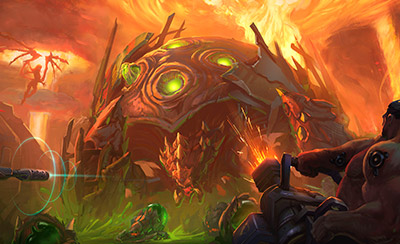

Warhead Junction
Warhead Junction is one of the biggest three-lane maps, with the boss and both Bruiser camps up north, both Siege camps down south and a two-way Sewage Tunnel linking the top and bottom lanes. Warheads drop in nine fixed spots across the three lanes, usually two at a time, so phases are about splitting sensibly, grabbing at least half the warheads and then converting them into fort and keep damage rather than one decisive fight. Camps never turn off, so mercenary pushes are part of every phase and the Slime Boss becomes a genuine finisher from about 10:00. Because the objective can't be won on the spot, the game rewards gankers, global heroes, self-sustain and split-pushers who make the enemy defend three lanes at once. Stored nukes are a late-game win condition of their own: launched together they can burn through a core's shield and health.
- Rotas
- 3 rotas
- Duração típica
- ~20 min
- Primeiro objetivo
- First at 3:00
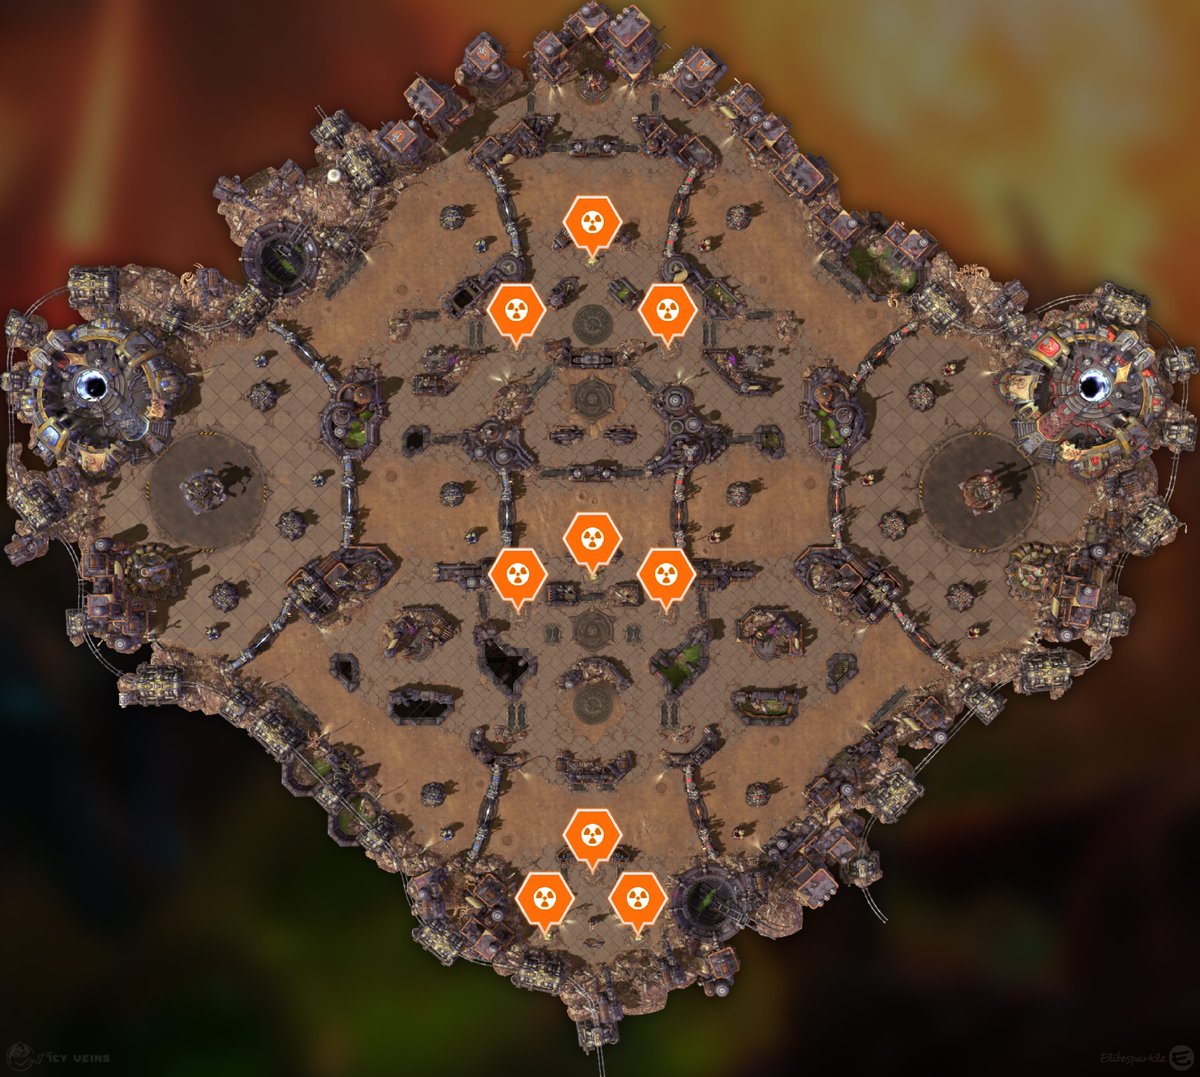
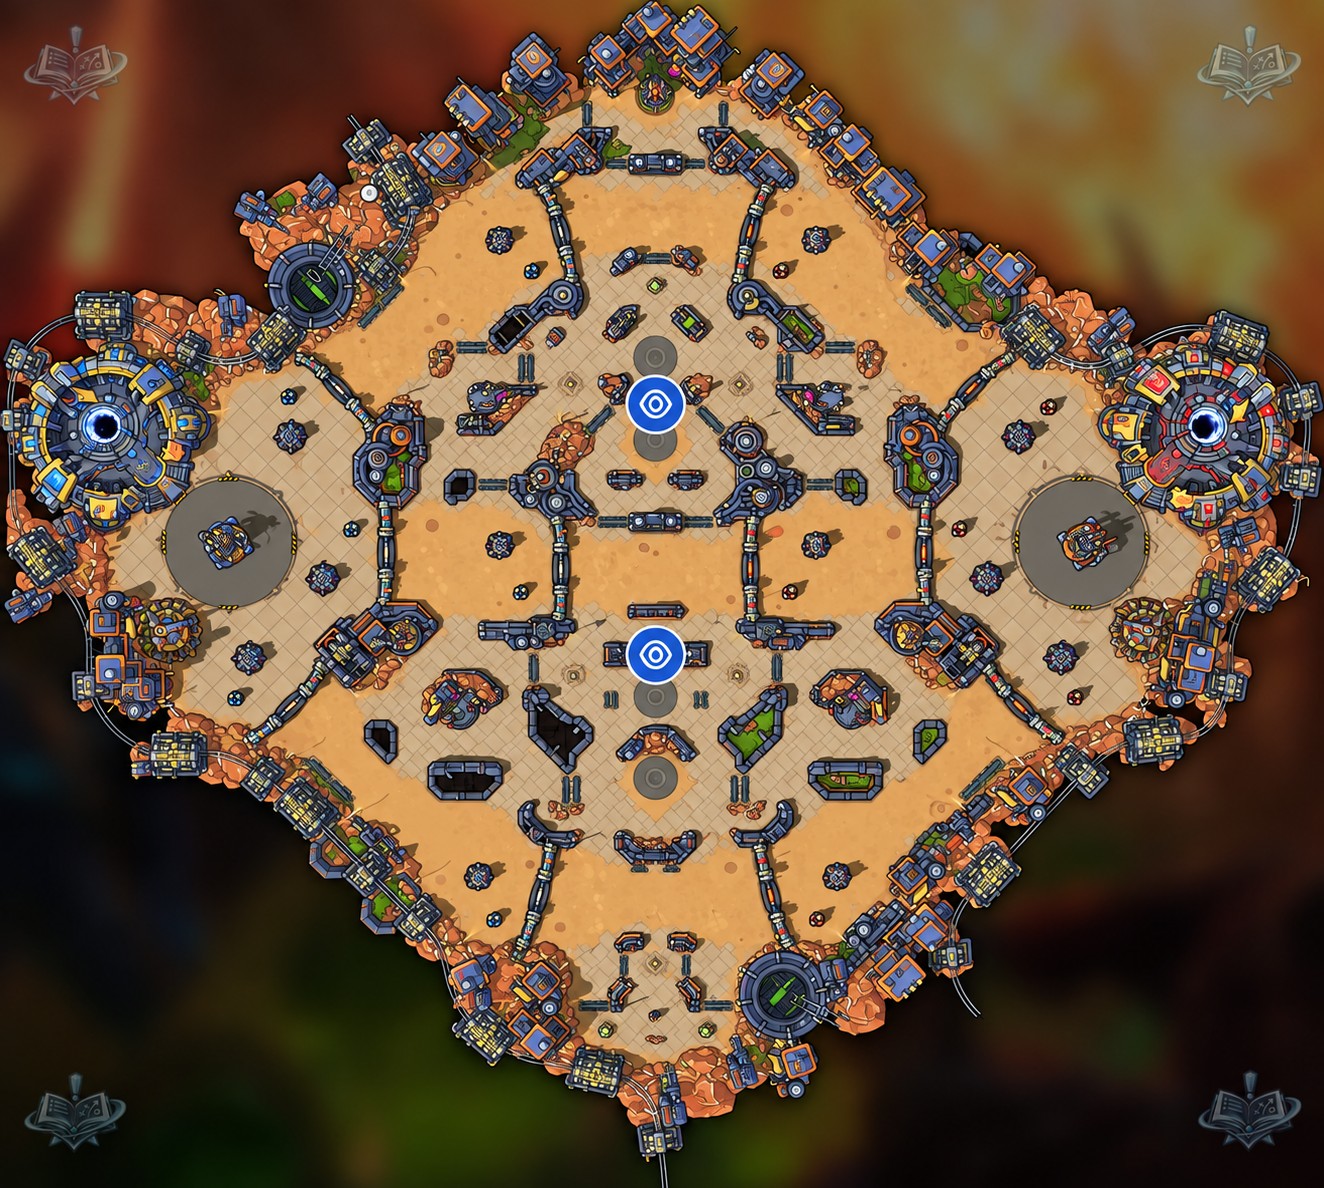
Imagem do campo de batalha: Icy Veins. Objetivos marcados sobre o mapa do jogo.
Objetivos



Warheads
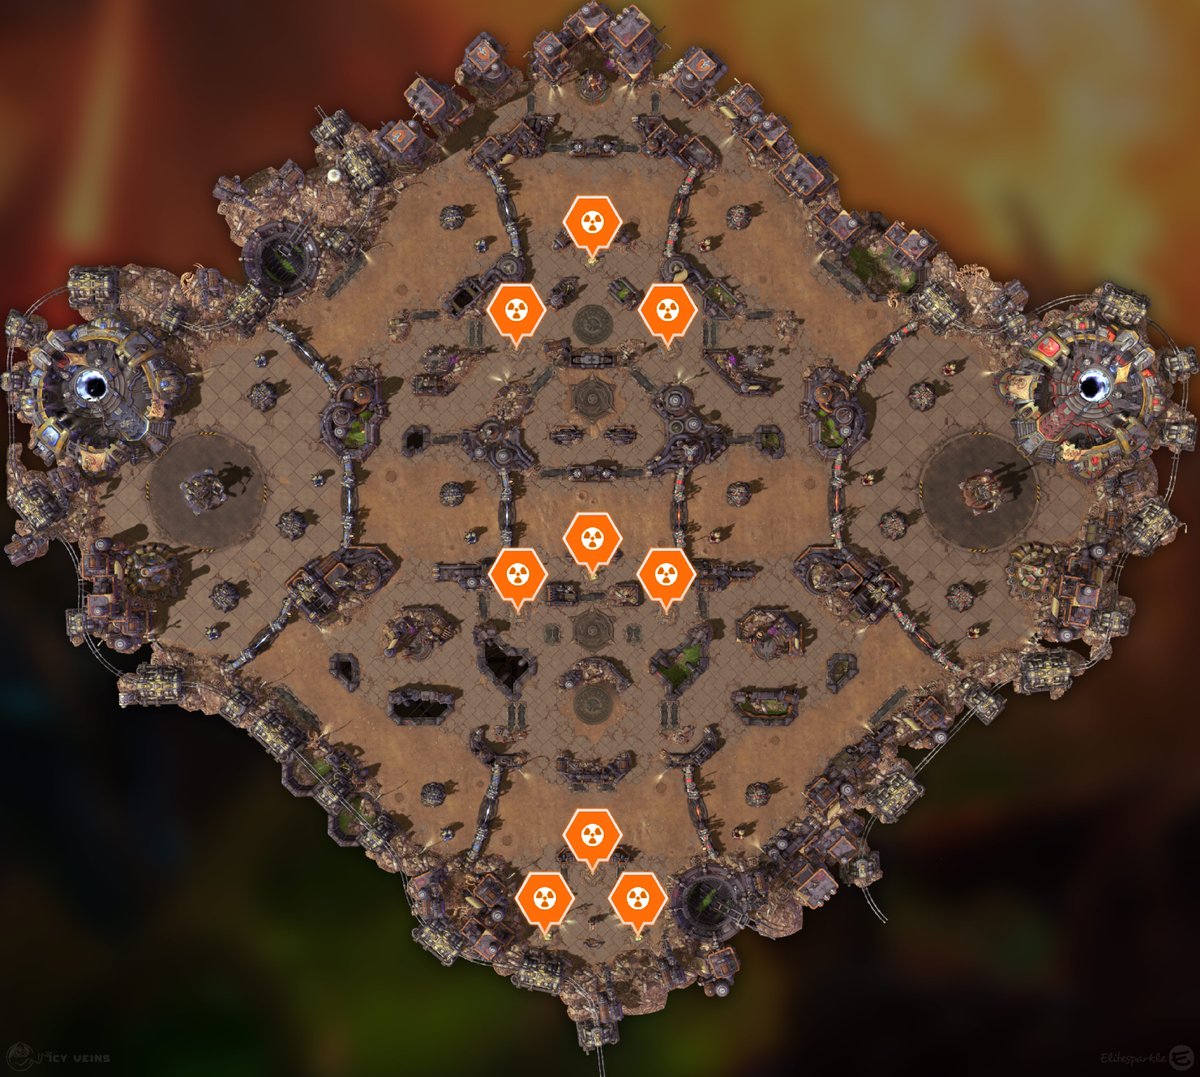
First at 3:00. Then 2:55 after every warhead of the previous set has been collected. Picking one up takes a 5-second channel.Warheads appear in nine possible spots, three per lane, distributed evenly: a lone warhead in a lane sits in the center, two sit on the sides. Every set has 2 to 4 warheads. The first set has 2 or 3 (with 2, both are in the middle lane; with 3, one middle and two in one side lane), the fourth set has 3 or 4 (with 4: one top, two middle, one bottom), and every other set has exactly 2, always in different lanes. Collecting a warhead from its spawn also drops a Regeneration Globe. Each hero can hold one nuke, and the item is on a 5-second cooldown right after pickup, so don't wander into tower range expecting to fire immediately.
Nukes
First usable about 3:10, once the 3:00 warheads are channeled and the 5-second pickup cooldown ends. Launching takes a 3-second channel and the blast lands 4 seconds later.A nuke deals 1750 damage (+70 per minute, scaling for 25 minutes) to everything in the area and ignites structures for 10 seconds at 120 damage per second (+4.8 per minute); heroic basic attacks on a burning structure pause the burn timer for 3 seconds. Forts, Keeps and the Core take 125% more damage. The channel can be interrupted with crowd control, which puts the nuke on a 5-second cooldown, but its damage can't be reduced once it's in the air. A hero who dies with a nuke drops it on the ground for anyone, friend or enemy, to pick up. Nukes stop scaling the moment they're picked up, so a warhead grabbed at 3:05 hits for roughly 700 less than one grabbed at 13:05.
Plano de partida
Lane assignments
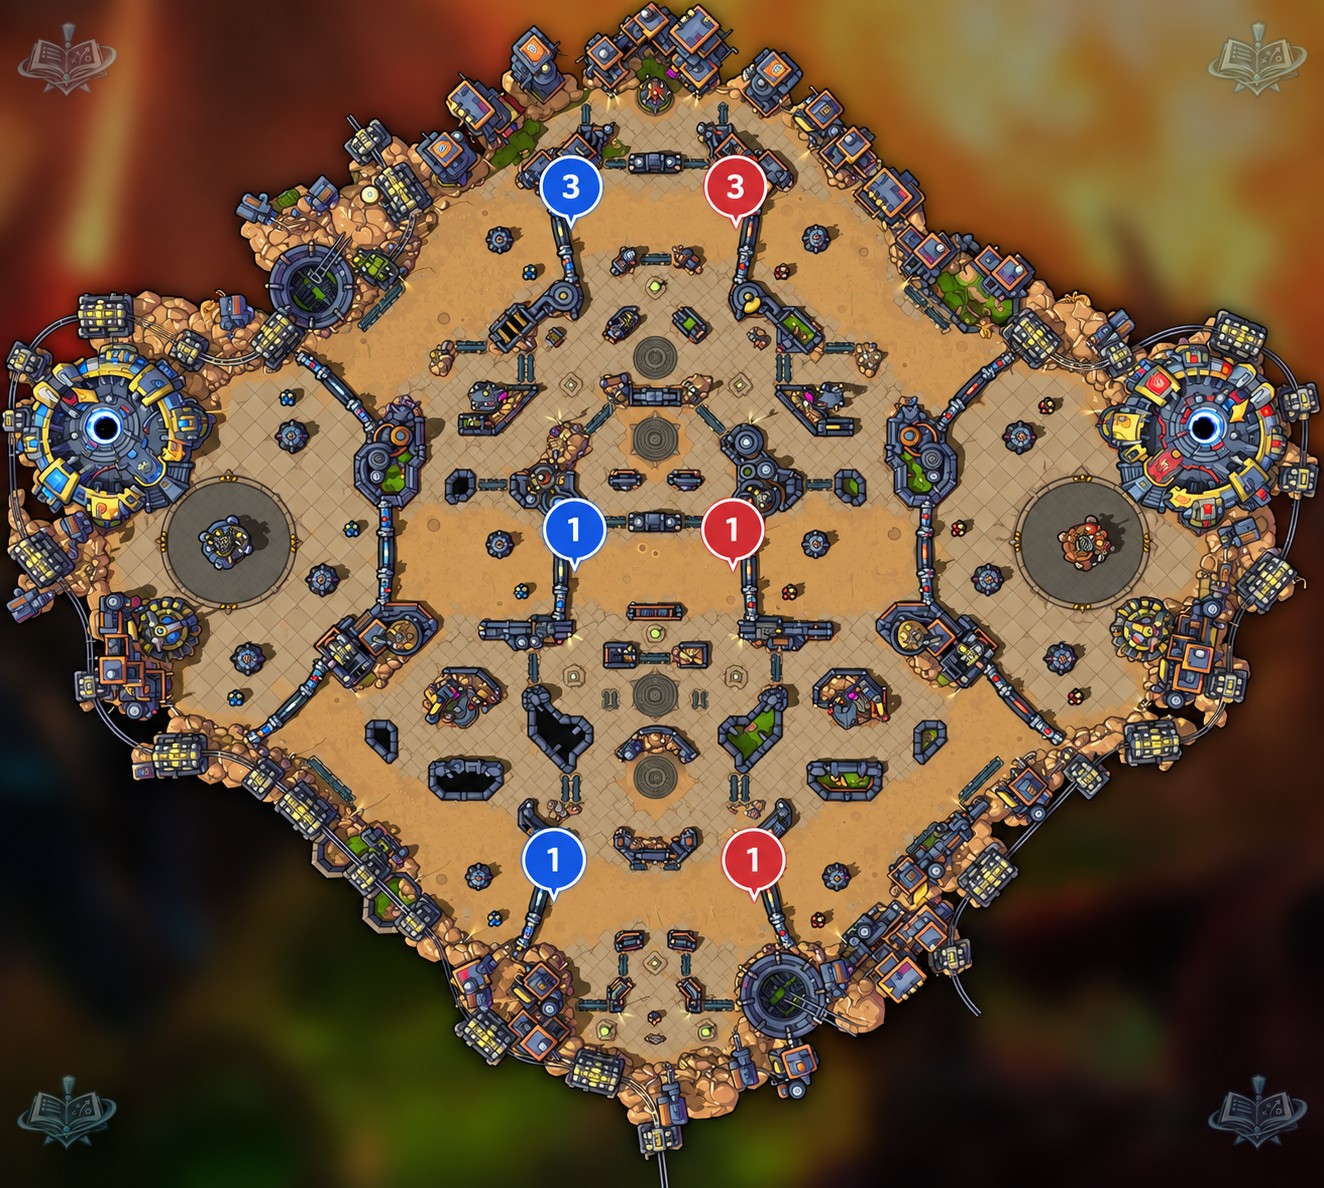
Run 3-1-1: three heroes in the top lane pushing as hard as they can, an offlaner in middle, and an anchor in the bottom lane. The three-stack lives next to both Bruiser camps and the boss, so it can push top with knights, keep the Slime Boss pit in vision and threaten the top warhead spots. The middle offlaner soaks and is closest to every warhead row, while the bottom anchor holds the isolated lane and takes the Siege camps. Global heroes belong in whichever lane is farthest from the next warhead spawns; they soak until the last second and jump in.
- 3-1-1: three top and pushing; offlaner middle; anchor bottom.
- The top trio owns the Bruiser camps and boss vision; the bottom anchor owns the Siege camps.
- Global heroes take the lane farthest from the next warheads.
Early game
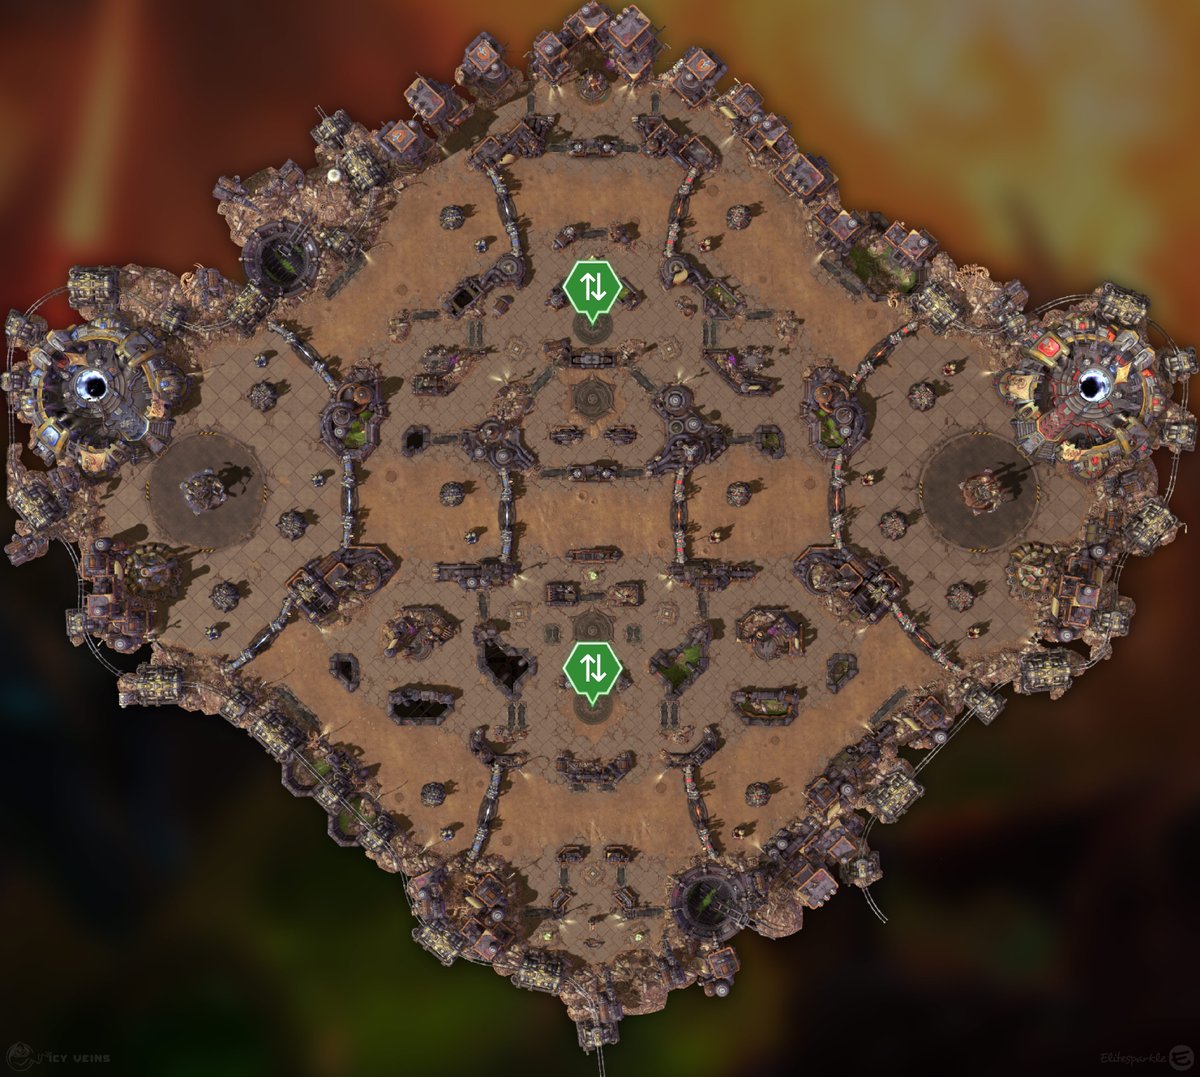
Use your fountain before 1:00 so it's back for the 3:00 warheads. At 0:30 the top trio starts the Bruiser camp and captures it around 0:45 (15 seconds after a wave) so the Goliaths and Raven trail your minions into the top structures. At about 2:30, the bottom side clears the Siege camp and captures it near 2:35 (5 seconds after a wave) so the Hellbats lead the wave and strip Armor from the fort as the first warheads land. The first set is 2 or 3 warheads: with 2 they are both in the middle lane, so the offlaner should be positioned to channel one while the trio contests the other. Grab the two watchtowers just above and below the middle lane only when you're already there; each one shows a Sewage Tunnel entrance.
- 0:30: Bruiser camp; capture at 0:45 so it trails the wave into top.
- 2:30: bottom Siege camp; capture at 2:35 so the Hellbats lead the wave into the 3:00 phase.
- First set with 2 warheads: both middle. With 3: one middle, two in a single side lane.
- Fountain before 1:00; watchtowers only if you're passing by.
Playing the objective
Aim to get at least half the warheads each set, then use them to open the map: one nuke per fort while catching its towers is far more efficient than three on the same fort. Poke enemies who are channeling a pickup, and stand near your own structures to interrupt anyone trying to launch; a stopped channel costs them 5 seconds and often the window. Attackers will try to fire from behind the impassable terrain around your forts, so hold vision on those angles. If you know you'll die in the next 3 seconds, fire the nuke on the spot rather than dropping it for the enemy, unless they have instant burst or interrupts. Since forts and keeps take 125% more, don't hesitate to nuke one whose towers are already gone, and remember the burn lasts longer if allies keep hitting the structure.
- Spread nukes: one per fort with towers in the blast beats stacking three on one target.
- Wave timings to also erase a minion wave: fort and towers at :16/:46 top, :09/:39 middle, :17/:57 bottom; keeps at :29/:59 top, :28/:58 middle, :29/:59 bottom.
- Defending: stay near your structures and interrupt the 3-second launch channel; it puts the nuke on a 5-second cooldown.
- About to die? Fire the nuke anywhere useful; a dropped one is the enemy's to pick up.
- The only non-structure target worth a nuke is a Boss camp: it speeds the kill and zones the enemy off the pit.
Mercenary camps
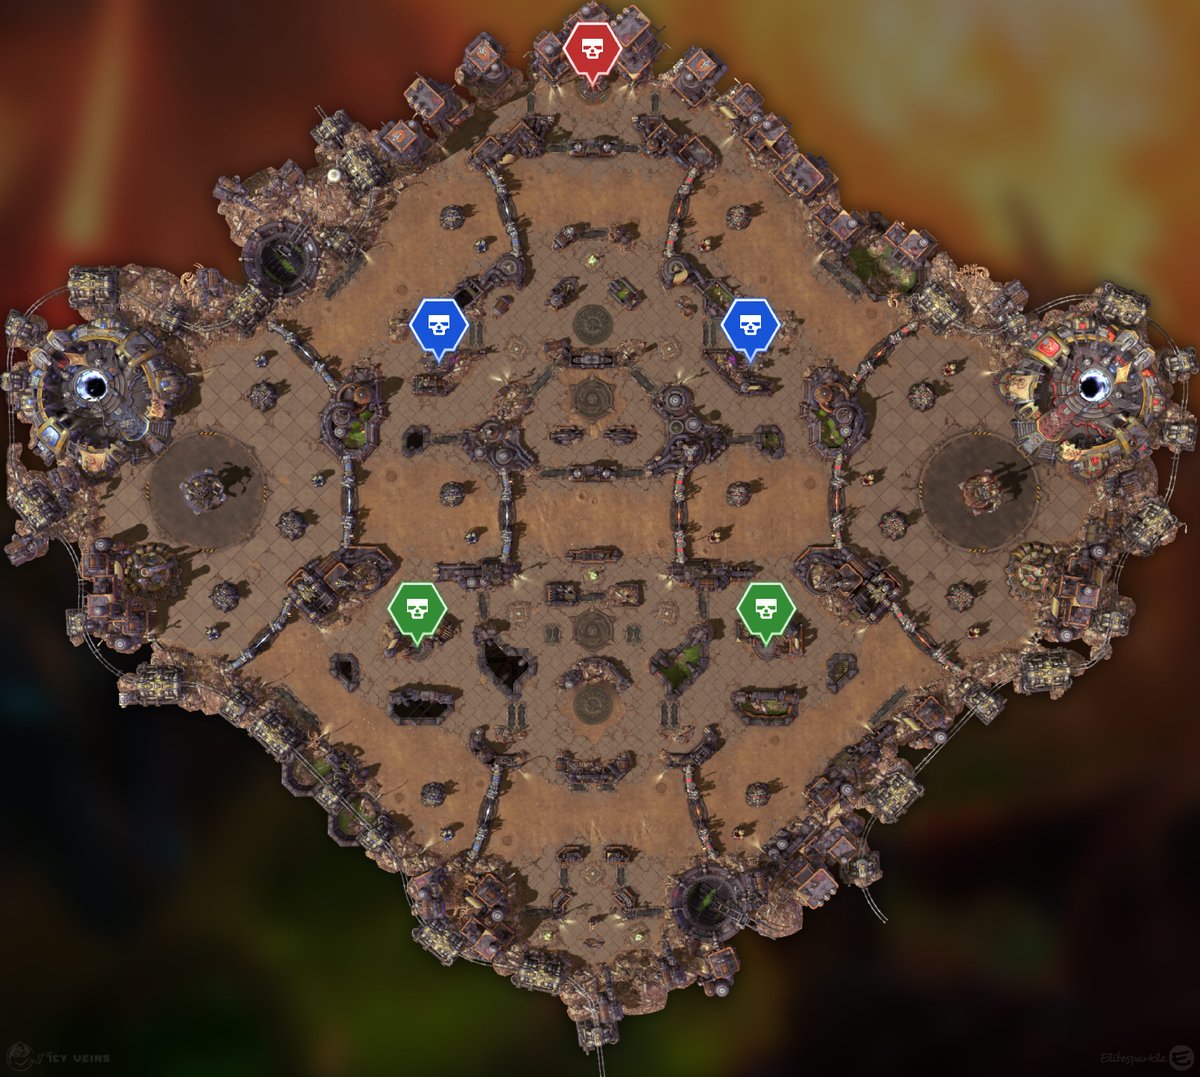
There are five camps: the Slime Boss and two Bruiser camps in the top lane, and two Siege camps in the bottom lane. Every camp stays active during warhead phases, so a capture timed for the phase forces the enemy to choose between a warhead and a fort. Hellbats cleave and strip Armor from structures and heroes they hit, 4 per attack stacking five times for 20, so they are the ideal escort for a fort push and a nuke. Goliaths do the Bruiser camp's damage while the Raven fires a Seeker Missile every 5 seconds that reveals the hero it hits; the whole camp pushes top, straight into the lane your trio already pressures. The Slime Boss drops a damaging pool with Slime Spit every 14 seconds and follows about 6 seconds later with Spawn Pods, so move out of the puddle and spread for the pods.
- Siege camp (2 Hellbats, bottom lane): 0:30, respawns 3:00 after capture. Cleaving attacks strip 4 Armor per hit, up to 20; pair them with a nuke on the bottom fort.
- Bruiser camp (3 Goliaths + 1 Raven, top lane): 0:30, respawns 4:00 after capture. Raven's Seeker Missile reveals its target every 5 seconds; capture 15 seconds after a wave to trail the minions.
- Boss camp (Slime Boss, top lane): 5:00, respawns 5:00 after capture. Slime Spit pool every 14 seconds, Spawn Pods about 6 seconds later. Immune to Bribe.
- All camps stay active during warheads: a Bruiser or Siege capture at phase start pulls a defender off the objective.
Late game and win conditions
From about 10:00, take the Slime Boss whenever you have an advantage, warheads or not; a boss walking down top with a nuke landing on the keep ahead of it is the map's cleanest finisher. Split-push is the other route: a solo pusher with a nuke in hand forces two or three defenders across a very large map, and the Sewage Tunnel (2-second channel, unusable while taking damage) lets your team swap between top and bottom faster than the enemy can rotate. Store warheads for the end: the core has a shield equal to 50% of its health, so you need about 150% of its maximum health in damage, and with realistic late scaling each nuke does roughly 30% on impact (stacking) plus a 20% burn (not stacking), so five nukes can end the game with a single volley. Aim ending nukes slightly toward your own team so the blast also zones defenders away from you. Watch out for the core itself: every 18 seconds it launches a warhead at a nearby hero for 30% of maximum health.
- Win conditions: the Slime Boss from 10:00, split-push across the big map, and a stored volley of nukes on the core.
- Core math: 50% shield plus 100% health; about 5 late-game nukes fired together (30% impact each, 20% burn once) finish it.
- Sewage Tunnel: 2-second channel, blocked while taking damage. Don't use it if the enemy holds both watchtowers; they'll see you coming and camp the exit.
- Core ability: a warhead every 18 seconds for 30% max health on a nearby hero. Send minions and the boss in first.
O que buscar no draft
O que buscar no draft
- Prefer a solid anchor for the bottom lane and a self-sufficient offlaner for middle; both spend long stretches alone on a huge map.
- Prefer gankers and global presence: warheads spawn in different lanes and rotation distance decides who gets them.
- Prefer split-pushers who can carry a nuke into a side lane and force multiple defenders to answer.
- Prefer poke to punish 5-second pickup channels and 3-second launch channels from range.
- Prefer point control and burst for the Slime Boss; the pit is the late-game fight that matters.
- Avoid heroes whose quests need hero hits to stack; skirmishes are short and spread out here.
Erros típicos
- Launching nukes at heroes; with a 3-second channel and 4-second delay they almost never land.
- Stacking three nukes on one fort instead of hitting three forts with their towers in the blast.
- Walking into tower range right after a pickup, forgetting the nuke is on a 5-second cooldown.
- Dying with a nuke in hand and letting the enemy pick it up off the ground.
- Taking the Sewage Tunnel while the enemy owns both watchtowers and running into a team waiting at the exit.
Dicas
- 1Pickup is a 5-second channel and drops a Regeneration Globe; the nuke then sits on a 5-second cooldown.
- 2Nuke: 3-second channel, 4-second delay, 1750 (+70 per minute for 25 minutes) plus a 10-second burn on structures; Forts, Keeps and Core take 125% more.
- 3Sets have 2 to 4 warheads: the 1st has 2-3, the 4th has 3-4, every other set exactly 2 in separate lanes.
- 4Nukes stop scaling when picked up; a late pickup hits much harder than an early one you've been carrying.
- 5Interrupting a launch puts it on a 5-second cooldown, but once launched no damage reduction applies; only Void Prison on the structure saves it.
- 6Heroic basic attacks on a burning structure pause the burn's timer for 3 seconds, so keep hitting it.
- 7Hellbats stack -4 Armor per hit up to 20 on structures and heroes; escort them with your nuke pushes.
- 8The core launches a 30% max-health warhead every 18 seconds and has a 50% shield; save 5 nukes to finish it.