












Symmetra · Damage
Symmetra guide
Mais guias de Symmetra
Este guia é montado pelo site com dados de partidas e do próprio jogo: ninguém o escreveu à mão. Se houver guias oficiais ou da comunidade, eles aparecem ao lado.
Introdução
Symmetra is a specialist damage hero in Overwatch with 125 health and 150 shields (275 in total). In competitive this season (PC, Americas, Europe and Asia averaged) it wins 50.0% of its games, is picked by 3.0% of teams and banned in 3.3% of matches: tier B on our ladder.
Pontos fortes
- Shines on Lijiang Tower, Nepal and Antarctic Peninsula (up to 57.4% won).
- Mobility: Teleporter gets it in and out of fights.
- Protection: Photon Barrier blocks or absorbs damage.
Pontos fracos
- Struggles on Numbani, Junkertown and New Queen Street (down to 46.1% won).
Cola de builds
Escolha a build de acordo com o que você quer fazer na partida.
- Symmetra · recommended perksEquilibradoRecomendadaOne minor and one major perk, chosen by what each one's text adds to a damage hero. Blizzard doesn't publish how often each perk is picked, so this is a reading of the perks, not a pick rate.
- Symmetra · alternative perksUtilidadeSituacionalThe other option of each perk level. Perks are chosen during the match, so switch to these when the enemy composition or the map asks for what they do.
Builds
Symmetra · recommended perks
Quando usar
One minor and one major perk, chosen by what each one's text adds to a damage hero. Blizzard doesn't publish how often each perk is picked, so this is a reading of the perks, not a pick rate.
Vantagem menor
 Capacidade de SentinelaA Torre de Sentinela ganha uma carga extra.
 Alinhamento PerfeitoAumenta em 20% o alcance do disparo primário do Projetor de Fótons.
Picked for more utility: Increase the range of Photon Projector's primary fire by 20%.
Vantagem maior
 Barreira FlutuanteO Teletransportador ganha a opção de criar uma barreira que avança. Pressionar E novamente desacelera o movimento da barreira.
 Bateria de EscudoSymmetra regenera 20 escudos por segundo enquanto estiver a até 10 metros de seu teletransportador.
Picked for more survival: Teleporter gains the option to create a forward moving barrier instead. Pressing E again slows down the barrier's movement.
Symmetra · alternative perks
Quando usar
The other option of each perk level. Perks are chosen during the match, so switch to these when the enemy composition or the map asks for what they do.
Vantagem menor
Capacidade de SentinelaA Torre de Sentinela ganha uma carga extra.Alinhamento PerfeitoAumenta em 20% o alcance do disparo primário do Projetor de Fótons.When the situation calls for it: Sentry Turret gains an additional charge.
Vantagem maior
Barreira FlutuanteO Teletransportador ganha a opção de criar uma barreira que avança. Pressionar E novamente desacelera o movimento da barreira.Bateria de EscudoSymmetra regenera 20 escudos por segundo enquanto estiver a até 10 metros de seu teletransportador.When the situation calls for it: Symmetra regenerates 20 shields per second while within 10 meters of her teleporter.
Habilidades
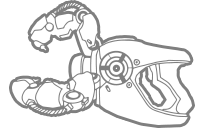 LMBProjetor de FótonsRaio de curto alcance com dano crescente. Segure para carregar e solte para lançar um orbe explosivo.Key: primary fire. Perks: Perfect Alignment
 ShiftTorre de Sentinela10sConstrói uma pequena torre que causa dano e reduz a velocidade dos inimigos.Key: Shift · cooldown 10 s. Perks: Sentry Capacity
 ETeletransportador12sCria dois teletransportadores temporários que possibilitam a viagem instantânea de um para o outro.Key: E · cooldown 12 s. Perks: Hovering Barrier, Shield Battery
 QBarreira de FótonsSupremaPosiciona uma enorme barreira de energia.Key: Q · ultimate
Estratégia
1Your job
In Role Queue each team fields two damage heroes: you secure eliminations, pressure the enemy supports and turn the numbers advantage your tank creates into won fights.
2Abilities
- primary fire · Photon Projector: Short-range beam weapon with increasing damage. Hold to charge, release to fire explosive orb.
- Shift · Sentry Turret · 10 s: Deploy a small turret that damages and slows enemies.
- E · Teleporter · 12 s: Create two temporary teleporters that enable instant travel between them.
- Q · Photon Barrier · ultimate: Deploy a massive energy barrier.
3Perks
During each match you unlock a minor perk and, later, a major perk: one of two options each time. ★ marks this guide's pick.
- ★ Perfect Alignment: Increase the range of Photon Projector's primary fire by 20%.
- Sentry Capacity: Sentry Turret gains an additional charge.
- ★ Hovering Barrier: Teleporter gains the option to create a forward moving barrier instead. Pressing E again slows down the barrier's movement.
- Shield Battery: Symmetra regenerates 20 shields per second while within 10 meters of her teleporter.
4In competitive
Blizzard's official stats for this season, division by division (PC, the three regions averaged).
- Bronze: 50.9% won, picked by 3.0% of teams
- Silver: 50.3% won, picked by 3.3% of teams
- Gold: 49.8% won, picked by 3.4% of teams
- Platinum: 49.7% won, picked by 3.1% of teams
- Emerald: 49.9% won, picked by 2.6% of teams
- Diamond: 51.3% won, picked by 2.1% of teams
- Master: 51.8% won, picked by 2.0% of teams
- Grandmaster: 51.1% won, picked by 2.8% of teams
5Best and worst maps
Win rate of Symmetra on each competitive map compared with its 50.0% overall.
- Lijiang Tower: 57.4% won (5.1% pick rate)
- Nepal: 56.4% won (4.4% pick rate)
- Antarctic Peninsula: 54.6% won (2.6% pick rate)
- Numbani: 46.1% won (3.1% pick rate)
- Junkertown: 46.2% won (2.0% pick rate)
- New Queen Street: 46.3% won (1.2% pick rate)
6Common mistakes
- Trading shots with the enemy tank while the enemy backline goes untouched.
- Staying on an angle after it's been found and focused.
Dicas
- Teleporter (E) moves you: if you spend it to engage, you won't have it to escape.
- Photon Barrier (Q) is your ultimate: plan it with your team's ultimates instead of using it as soon as it's ready.
- Pick your angle before the fight starts: a second line of fire splits the enemy's attention.
- Focus the same target as your team; spread damage gets healed.
Confrontos
Combina bem com
Both do better than their average on the same maps, such as Lijiang Tower, Nepal and Antarctic Peninsula: a good pairing when the map suits them.
Both do better than their average on the same maps, such as Lijiang Tower, Nepal and Antarctic Peninsula: a good pairing when the map suits them.
Both do better than their average on the same maps, such as Lijiang Tower, Nepal and Ilios: a good pairing when the map suits them.
Both do better than their average on the same maps, such as Lijiang Tower, Nepal and Antarctic Peninsula: a good pairing when the map suits them.




Mudanças
- Guide created for patch Season 4.
Ele te ajudou?
Seu voto ajuda outros jogadores a encontrar os melhores guias.