











Bel'Veth · Jungle
Bel'Veth Items: What to Buy and When
Mais guias de Bel'Veth
Este guia é montado pelo site com dados de partidas e do próprio jogo: ninguém o escreveu à mão. Se houver guias oficiais ou da comunidade, eles aparecem ao lado.
Introdução
This guide explains every item in Bel'Veth's builds and when to buy it. Your spikes are level 6, when Endless Banquet comes online, and each completed item: Dusk and Dawn first, then Cosmic Drive.


Pontos fortes
- Crowd control: Royal Maelstrom applies a root to set up kills.
- Mobility: Void Surge lets you reposition, engage or escape.
- Sustain from Royal Maelstrom.
Pontos fracos
- Fragile: Riot rates it 2/10 in defense.
- Hard to master: Riot rates its difficulty 10/10.
Cola de builds
Escolha a build de acordo com o que você quer fazer na partida.
- Standard buildEquilibradoRecomendadaThe default path: Dusk and Dawn, Cosmic Drive and Morellonomicon give the health, attack speed and ability power this class relies on. Pick it when you have no reason to adapt. Built from Riot's item tags and the champion's class; Riot publishes no build statistics.
- Burst buildOfensivoAvançadaAll-in on damage: Shadowflame, Void Staff and Bloodletter's Curse stack ability power, magic penetration and health. Choose it when you're ahead or the enemy team is fragile — it gives up safety for kill pressure.
- Defensive buildDefensivoSituacionalKeeps enough damage while adding health, magic resist and armor through Jak'Sho, The Protean, Bandlepipes and Zeke's Convergence. Choose it against dive, assassins or a lane you can't win.
Builds
Standard build
Quando usar
The default path: Dusk and Dawn, Cosmic Drive and Morellonomicon give the health, attack speed and ability power this class relies on. Pick it when you have no reason to adapt. Built from Riot's item tags and the champion's class; Riot publishes no build statistics.

Por onde se joga
É escolhida antes da partida: primeiro a rota principal e depois as alternativas.
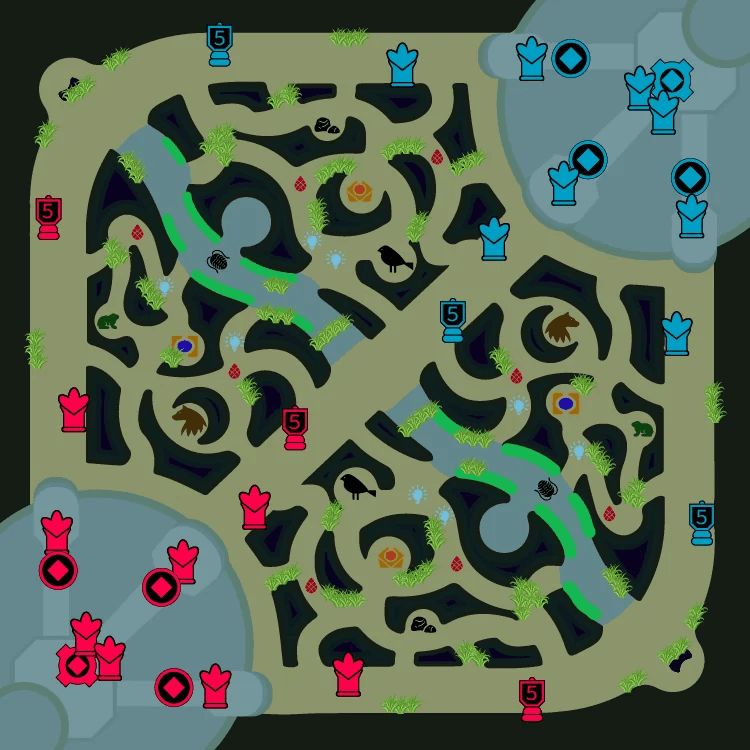
 1100 %
- SelvaPrincipal100 % das partidas
Prioridades na selva
Começa emBuff vermelho
Objetivos por prioridade
- 1Larvas do Vazio
- 2Gank no topo
- 3Arauto do Vale
- 4Caranguejo do rio
- 5Dragões
- 6Barão Nashor
- 7Atakhan
Guideline, not a measurement: an early skirmisher starting red side. Take the void grubs and look for ganks while your early damage is ahead, then Herald and dragons.
Itens iniciais


Itens principais
- 1Aurora e CrepúsculoHealth, attack speed and ability power.
- 2Ímpeto CósmicoHealth, ability power and move speed.
- 3MorellonomiconHealth, ability power and ability haste.
Botas

Situacionais


Runas
Primária· Precisão








Secundária· Determinação





Fragmentos


Feitiços de invocador
 Flash
Flash Golpear
Burst build
Quando usar
All-in on damage: Shadowflame, Void Staff and Bloodletter's Curse stack ability power, magic penetration and health. Choose it when you're ahead or the enemy team is fragile — it gives up safety for kill pressure.


Por onde se joga
É escolhida antes da partida: primeiro a rota principal e depois as alternativas.
1100 %- SelvaPrincipal100 % das partidas
Prioridades na selva
Começa emBuff vermelho
Objetivos por prioridade
- 1Larvas do Vazio
- 2Gank no topo
- 3Arauto do Vale
- 4Caranguejo do rio
- 5Dragões
- 6Barão Nashor
- 7Atakhan
Guideline, not a measurement: an early skirmisher starting red side. Take the void grubs and look for ganks while your early damage is ahead, then Herald and dragons.
Itens iniciais
Itens principais
- 1Chama SombriaAbility power and magic penetration.
- 2Cajado do VazioMagic penetration and ability power.
- 3Maldição SanguináriaHealth, ability power and magic penetration.
Botas
Situacionais
Runas
Primária· Dominação




Secundária· Precisão
Fragmentos
Feitiços de invocador
- Flash
- Golpear
Defensive build
Quando usar
Keeps enough damage while adding health, magic resist and armor through Jak'Sho, The Protean, Bandlepipes and Zeke's Convergence. Choose it against dive, assassins or a lane you can't win.


Por onde se joga
É escolhida antes da partida: primeiro a rota principal e depois as alternativas.
1100 %- SelvaPrincipal100 % das partidas
Prioridades na selva
Começa emBuff vermelho
Objetivos por prioridade
- 1Larvas do Vazio
- 2Gank no topo
- 3Arauto do Vale
- 4Caranguejo do rio
- 5Dragões
- 6Barão Nashor
- 7Atakhan
Guideline, not a measurement: an early skirmisher starting red side. Take the void grubs and look for ganks while your early damage is ahead, then Herald and dragons.
Itens iniciais
Itens principais
- 1Jak'Sho, o InconstanteHealth, magic resist and armor.
- 2BandocanosHealth, magic resist and armor.
- 3Convergência de ZekeHealth, magic resist and armor.
Botas

Situacionais
Runas
Primária· Determinação



Secundária· Precisão
Fragmentos
Feitiços de invocador
- Flash
- Golpear
Habilidades
 Morte em Lavanda PassivaBel'Veth recebe acúmulos de Velocidade de Ataque permanente depois de eliminar tropas, monstros grandes e Campeões. Além disso, ela recebe Velocidade de Ataque adicional temporária depois de usar uma Habilidade.
 QImpulso do Vazio4/3.25/2.5/1.75/1sBel'Veth avança na direção escolhida e causa dano a todos os inimigos atravessados.
- Tempo de recarga
- 4·3.25·2.5·1.75·1
- Alcance
- 450
 WAcima e Abaixo12/11/10/9/8sBel'Veth bate a cauda no chão, causando dano e Lentidão, além de Arremessar os inimigos ao ar.
- Tempo de recarga
- 12·11·10·9·8
- Alcance
- 715
 ETurbilhão da Realeza24/21/18/15/12sBel'Veth se enraíza num lugar, canalizando uma tempestade de golpes ao redor de si, visando o inimigo com a Vida mais baixa, além de receber Roubo de Vida e redução de dano.
- Tempo de recarga
- 24·21·18·15·12
- Alcance
- 500
 RBanquete EternoSuprema1sBel'Veth consome os restos de Coral do Vazio e revela sua Forma Verdadeira, recebendo Vida máxima, Alcance de Ataque e Velocidade de Ataque. Consumir Coral do Vazio dos restos de um monstro épico concederá a ela a capacidade de invocar Rêmoras do Vazio.
- Tempo de recarga
- 1
- Alcance
- 450
Estratégia
1Starting items
What to buy before leaving the base, and what each item gives:
- Gustwalker Hatchling
- Health Potion — Health regeneration.
2Core items
Your spikes are level 6, when Endless Banquet comes online, and each completed item: Dusk and Dawn first, then Cosmic Drive. Buy them in this order; each one is a power spike:
- Sorcerer's Shoes — Magic penetration.
- Dusk and Dawn — Health, attack speed and ability power.
- Cosmic Drive — Health, ability power and move speed.
- Morellonomicon — Health, ability power and ability haste.
3Situational items
Swap these in depending on the enemy team:
- Zhonya's Hourglass — Against heavy physical damage.
- Banshee's Veil — Against heavy magic damage.
- Void Staff — Against tanky teams.
4Adapting to the game
The damage build moves the offensive items forward when you're ahead; the defensive one adds survival when the enemy focuses you. The situational builds in the matchups guide answer specific threats.
Dicas
- Buy Dusk and Dawn as early as you can: it's your first real spike.
- Complete one item before starting the next: half-built items give less than one finished one.
- Look at the enemy team at every back and adjust the situational items.
- Don't sit on gold: spend it when you go back.
Mudanças
- Guide created for patch 16.19.1.
Ele te ajudou?
Seu voto ajuda outros jogadores a encontrar os melhores guias.