












Skye · Initiator
Skye guide
Mais guias de Skye
Este guia é montado pelo site com dados de partidas e do próprio jogo: ninguém o escreveu à mão. Se houver guias oficiais ou da comunidade, eles aparecem ao lado.
Introdução
Skye is an initiator in Valorant. Hailing from Australia, Skye and her band of beasts trailblaze the way through hostile territory. With her creations hampering the enemy, and her power to heal others, the team is strongest and safest by Skye's side. Initiators challenge angles by setting up their team to enter contested ground and push defenders away.
Pontos fortes
- Brings blind: Guiding Light (E) and Seekers (X).
- Brings crowd control (concuss, detain): Trailblazer (Q).
- Brings damage: Trailblazer (Q).
- Brings slows: Seekers (X).
Pontos fracos
- No information (reveals enemies) in the kit, which an initiator usually has: lean on your team for it.
Cola de builds
Escolha a build de acordo com o que você quer fazer na partida.
- Skye standard buysEquilibradoRecomendadaThe usual economy for an initiator: Classic on the pistol round, Marshal on an eco or bonus and Vandal with heavy armor on a full buy (3,900 credits before abilities). Buy Guiding Light (E) first: it is the ability that covers what an initiator needs most.
- Skye: utility firstOfensivoAvançadaBuy every charge of your utility before your weapon: a cheaper gun with full utility wins more rounds for an initiator than a rifle with half of it. Full buy: 3,250 credits with heavy armor.
- Skye force buyDefensivoSituacionalWhen the team cannot afford a full buy but has to play the round: Stinger with light armor (1,500 credits) or Bulldog with a regen shield (2,700 credits), and your abilities before the gun.
Builds
Skye standard buys
Quando usar
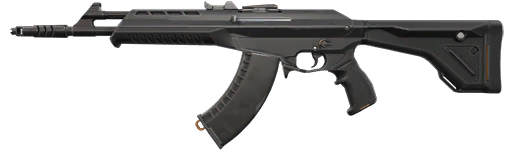
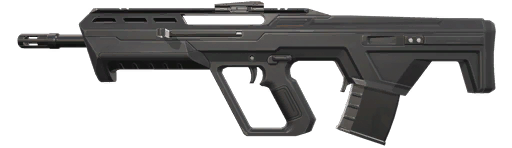
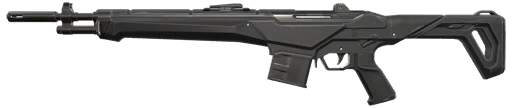
The usual economy for an initiator: Classic on the pistol round, Marshal on an eco or bonus and Vandal with heavy armor on a full buy (3,900 credits before abilities). Buy Guiding Light (E) first: it is the ability that covers what an initiator needs most.


Rodada de pistolas

Eco ou rodada bônus
Compra completa
- 1VandalHolds long angles after your utility has pushed the enemy off: one-tap at any distance. 2,900 credits. 160 head / 40 body up to 50 m; 9.75 shots/s, 25-round magazine, medium wall penetration.
- 2Armadura Pesada1,000 credits: absorbs 66% of the damage, up to 50.

Alternativas

Ordem de habilidades
| Habilidade | 1 | 2 | 3 |
|---|---|---|---|
 C C | · | · | C |
 Q Q | · | Q | · |
 E E | E | · | · |
Skye: utility first
Quando usar
Buy every charge of your utility before your weapon: a cheaper gun with full utility wins more rounds for an initiator than a rifle with half of it. Full buy: 3,250 credits with heavy armor.
Rodada de pistolas

Eco ou rodada bônus

Compra completa
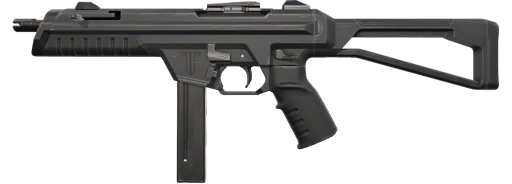
- 1Guardian2,250 credits. 195 head / 65 body up to 50 m; 5.25 shots/s, 12-round magazine, high wall penetration.
- 2Armadura Pesada1,000 credits: absorbs 66% of the damage, up to 50.
Alternativas
Ordem de habilidades
| Habilidade | 1 | 2 | 3 |
|---|---|---|---|
| C | · | · | C |
| Q | · | Q | · |
| E | E | · | · |
Skye force buy
Quando usar
When the team cannot afford a full buy but has to play the round: Stinger with light armor (1,500 credits) or Bulldog with a regen shield (2,700 credits), and your abilities before the gun.
Eco ou rodada bônus
Compra completa
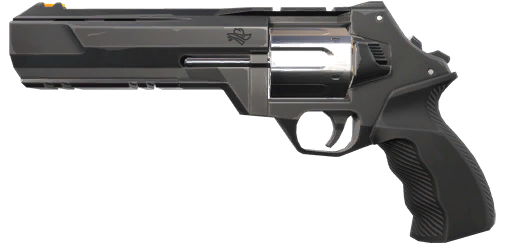
- 1Bulldog2,050 credits. 115.5 head / 35 body up to 50 m; 10 shots/s, 24-round magazine, medium wall penetration.
- 2Escudo Regenerativo650 credits: absorbs 100% of the damage, up to 50, and regenerates.
Alternativas
Ordem de habilidades
| Habilidade | 1 | 2 | 3 |
|---|---|---|---|
| C | · | · | C |
| Q | · | Q | · |
| E | E | · | · |
Habilidades
- CReflorescerEQUIPE um amuleto de cura. SEGURE O DISPARO para canalizar, curando aliados dentro do alcance e na sua linha de visão. Esta habilidade pode ser REPETIDA até a reserva de cura ser esgotada. Skye não pode curar a si mesma.Buy it third in the round. Heal between fights, not during them: an ally at full health wins the next duel.
- QPredador ExplosivoEQUIPE um amuleto de lobo-da-tasmânia. DISPARE para enviá-lo e controlar esse predador. Enquanto estiver no controle, DISPARE para saltar para a frente. O lobo gera uma explosão Concussiva no impacto e causa dano aos inimigos diretamente atingidos.Buy it second in the round. Clear corners and stop the plant or the defuse.
- ELuz DesbravadoraEQUIPE um amuleto de falcão. DISPARE para enviá-lo. SEGURE O DISPARO para guiar o falcão na direção da sua mira. REPITA a habilidade enquanto ele estiver voando para transformá-lo em um clarão que alcança a potência máxima depois de um curto período durante o voo.Buy it first in the round. Throw it so it pops as you or a teammate peek; call it before.
 XRastreadoresSupremaEQUIPE um amuleto de Rastreador. DISPARE para enviar três Rastreadores que localizarão os três inimigos mais próximos. Se um Rastreador alcançar o alvo, causará Visão Turva e Lentidão a esse inimigo. Inimigos podem destruir os Rastreadores.Ultimate (X): charged with ultimate points, not bought. Throw it so it pops as you or a teammate peek; call it before.
Estratégia
1Your job
As an initiator, your job is to open the way with information and utility: find where the enemies are, push them off their angles and set up your duelist's entry.
2Abilities
Skye's kit, key by key, and what the game says each ability does:
- C — Regrowth: healing.
- Q — Trailblazer: damage and crowd control (concuss, detain).
- E — Guiding Light: blind.
- X — Seekers (ultimate): blind and slows.
3On attack
- Guiding Light (E) clears the angle right before the entry.
- Use your information ability first, then the one that clears angles: first know where they are, then take them out of the fight.
- Coordinate your blind or concuss with the entry: call it out loud before you throw it.
- After the plant, keep part of your utility to stop the defuse.
4On defense
- Keep Guiding Light (E) for the retake.
- Regrowth (C) keeps the team alive between fights.
- Gather information early with your recon to know where the attack is going, and rotate accordingly.
- Your utility is the best retake tool on the team: save it when the site is lost.
5Economy
What to buy depending on the credits the team has:
- Pistol round: Classic + Light Armor.
- Eco or bonus: Marshal — cheap and deadly at range: keeps you useful on an eco while your utility does the work.
- Full buy: Vandal — holds long angles after your utility has pushed the enemy off: one-tap at any distance.
- Abilities in this order: E > Q > C; Seekers (X) is charged, not bought.
6Maps
On three-site maps, information decides where the defence rotates: your recon early in the round is worth more than on two-site maps. Three-site maps in the pool: Haven and Lotus.
- Abyss: sites A, B · 23 callouts.
- Ascent: sites A, B · 22 callouts.
- Bind: sites A, B · 24 callouts.
- Breeze: sites A, B · 23 callouts.
- Corrode: sites A, B · 21 callouts.
- Fracture: sites A, B · 22 callouts.
- Haven: sites A, B, C · 21 callouts.
- Icebox: sites A, B · 25 callouts.
- Lotus: sites A, B, C · 28 callouts.
- Pearl: sites A, B · 26 callouts.
- Split: sites A, B · 24 callouts.
- Summit: sites A, B · 24 callouts.
- Sunset: sites A, B · 17 callouts.
7Common mistakes
- Being the first one to enter the site: your job is to prepare the entry, not to do it.
- Using all your utility at the start of the round and having nothing for the post-plant.
Dicas
- Learn two or three lineups per map for your recon ability: they are worth more than a good aim.
- Your utility is for the team: an unused flash at the end of the round is a wasted purchase.
- Say what your ability found: an unshared reveal does nothing.
Confrontos



Mudanças
- Guide created for patch 13.06.
Ele te ajudou?
Seu voto ajuda outros jogadores a encontrar os melhores guias.