











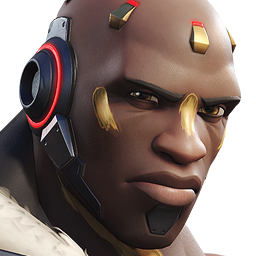
Doomfist · Tank
Safe Doomfist guide
Mais guias de Doomfist
Este guia é montado pelo site com dados de partidas e do próprio jogo: ninguém o escreveu à mão. Se houver guias oficiais ou da comunidade, eles aparecem ao lado.
Introdução
Doomfist is a initiator tank hero in Overwatch with 525 health. In competitive this season (PC, Americas, Europe and Asia averaged) it wins 51.7% of its games, is picked by 6.9% of teams and banned in 21.9% of matches: tier A on our ladder. Doomfist has 525 hit points: 525 health.
Pontos fortes
- Mobility: Seismic Slam and Meteor Strike get it in and out of fights.
Pontos fracos
- Loses strength as the level rises: −3.1 pts of win rate from Bronze–Silver to Master–Grandmaster.
- Struggles on Busan, Antarctic Peninsula and Ilios (down to 48.9% won).
- Fragile for its role: 525 hit points against an average of 632 among tank heroes.
Cola de builds
Escolha a build de acordo com o que você quer fazer na partida.
- Doomfist · survival perksDefensivoRecomendadaThe perks whose text adds the most healing, health or protection: for games where you die before your cooldowns matter.
- Doomfist · Stadium survivalDefensivoStadiumFour of the 12 Stadium powers of Doomfist, chosen by what their text adds and spread over different abilities so no single one carries the build.
- Doomfist · recommended perksEquilibradoSituacionalOne minor and one major perk, chosen by what each one's text adds to a tank hero. Blizzard doesn't publish how often each perk is picked, so this is a reading of the perks, not a pick rate.
Builds
Doomfist · survival perks
Quando usar
The perks whose text adds the most healing, health or protection: for games where you die before your cooldowns matter.
Vantagem menor
 Um DoisAcertar um inimigo numa parede com o Soco Foguete recarrega o Canhão de Mão e adiciona 2 de munição excedente.
 Sobrevivência do Mais ForteA Melhor Defesa concede 25 de vida extra por eliminação, e o máximo de vida extra é aumentado em 50.
Picked for more survival: The Best Defense grants 25 overhealth from eliminations and its max overhealth is increased by 50.
Vantagem maior
 Abalo SecundárioInimigos atingidos por Abalo Sísmico são desacelerados em 40% por 2 s.
 Matriz de PoderO Bloqueio Energético absorve projéteis durante o primeiro 0,8 s de sua duração.
Picked for more utility: Enemies hit by Seismic Slam are slowed by 40% for 2 seconds.
Doomfist · Stadium survival
Quando usar
Four of the 12 Stadium powers of Doomfist, chosen by what their text adds and spread over different abilities so no single one carries the build.
Poderes do Stadium (4)
- 1
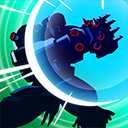 Bloqueio em GrupoPower Block: While Power Block is active, heal yourself for 8% of Max Life and all other allies within 8m for 20% of Max Life every 1s.
 - 2
 Mão AmigaPicked for more survival: The Best Defense grants bonus Overhealth equal to 10% of Bonus Max Life. Whenever you gain Overhealth from yourself, grant 25% to the nearest ally.
 - 3
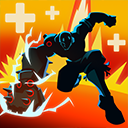 Reagrupamento SísmicoSeismic Slam: Every 1s while leaping with Seismic Slam, grant Overhealth equal to 5% of your Max Life to all allies within line of sight for 3s.
 - 4
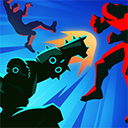 Soco EstrondosoRocket Punch: Hitting multiple enemies with Rocket Punch grants 5% Ultimate Charge and reduces the cooldown of Power Block by 0.5s for each extra enemy hit.
Doomfist · recommended perks
Quando usar
One minor and one major perk, chosen by what each one's text adds to a tank hero. Blizzard doesn't publish how often each perk is picked, so this is a reading of the perks, not a pick rate.
Vantagem menor
Um DoisAcertar um inimigo numa parede com o Soco Foguete recarrega o Canhão de Mão e adiciona 2 de munição excedente.Sobrevivência do Mais ForteA Melhor Defesa concede 25 de vida extra por eliminação, e o máximo de vida extra é aumentado em 50.Picked for more survival: The Best Defense grants 25 overhealth from eliminations and its max overhealth is increased by 50.
Vantagem maior
Abalo SecundárioInimigos atingidos por Abalo Sísmico são desacelerados em 40% por 2 s.Matriz de PoderO Bloqueio Energético absorve projéteis durante o primeiro 0,8 s de sua duração.Picked for more utility: Enemies hit by Seismic Slam are slowed by 40% for 2 seconds.
Habilidades
 LMBCanhão de MãoArma difusa de curto alcance. Recarrega automaticamente.
 RMBSoco Foguete4sSegure para carregar e depois solte para realizar uma investida e empurrar um inimigo. O dano aumenta quando o inimigo acerta uma parede.
 ShiftAbalo Sísmico6.5sPula e bate no chão.Key: Shift · cooldown 6.5 s. Perks: Aftershock
 EBloqueio Energético7sProtege-se de ataques frontais. Bloquear dano elevado fortalece o Soco Foguete.
 QImpacto MeteoroSupremaAperte Q para pular em direção aos céus. Mova o círculo de aterrissagem e aperte HABILIDADE 3 para acertar a área.Key: Q · ultimate
Estratégia
1Staying alive
The abilities that heal, protect or move you, by their own description:
- Shift · Seismic Slam · 6.5 s: Leap and smash the ground.
- Q · Meteor Strike · ultimate: Press Q to leap up into the air. Move the targeting circle, then press ABILITY 3 to strike the targeted area.
2Survival perks
During each match you unlock a minor perk and, later, a major perk: one of two options each time. ★ marks this guide's pick.
- One-Two: Hitting an enemy into a wall with Rocket Punch reloads Hand Cannon and overfills ammo by 2.
- ★ Survival of the Fittest: The Best Defense grants 25 overhealth from eliminations and its max overhealth is increased by 50.
- ★ Aftershock: Enemies hit by Seismic Slam are slowed by 40% for 2 seconds.
- Power Matrix: Power Block absorbs projectiles for the first 0.8 seconds of its duration.
3Survival Stadium powers
The four powers whose text adds the most healing, health or protection:
- Block Party
- Helping Hand
- Seismic Rally
- Boomfist
4Where to be careful
The competitive maps where it wins least:
- Busan: 48.9% won (7.9% pick rate)
- Antarctic Peninsula: 49.7% won (7.9% pick rate)
- Ilios: 50.3% won (8.6% pick rate)
5Mistakes that get you killed
- Pushing into five enemies without your team behind you.
- Taking duels far from your supports.
Dicas
- You are the only tank: dying first usually loses the fight, so back off before you have to.
- Seismic Slam (Shift) moves you: if you spend it to engage, you won't have it to escape.
Confrontos
Combina bem com
Both do better than their average on the same maps, such as Colosseo, Dorado and Suravasa: a good pairing when the map suits them.
Both do better than their average on the same maps, such as Colosseo, Suravasa and Dorado: a good pairing when the map suits them.
Both do better than their average on the same maps, such as Colosseo, Suravasa and Dorado: a good pairing when the map suits them.
Both do better than their average on the same maps, such as Colosseo, Havana and Shambali Monastery: a good pairing when the map suits them.



Mudanças
- Guide created for patch Season 4.
Ele te ajudou?
Seu voto ajuda outros jogadores a encontrar os melhores guias.