











Gragas · Top
Gragas Laning Guide
More Gragas guides
This guide is assembled by the site from match data and the game's own information — nobody wrote it by hand. Official and community guides appear alongside it when they exist.
Overview
Top is an island: few ganks, long trades and a lot of wave management. Freeze the wave near your tower when you're weaker and push it when you want to roam or recall. Early, fight for tower plates and help your jungler with Herald or grubs when your wave is pushed.
Strengths
- Sustain from Happy Hour.
- Very durable: Riot rates it 7/10 in defense.
- Crowd control: Body Slam applies a stun to set up kills.
Weaknesses
- Melee range: ranged opponents can poke it in lane.
- No dash or blink in the kit: vulnerable to ganks without vision.
Build cheat sheet
Pick the build that fits what you want to do this game.
- Lane buildBalancedRecommendedHow to open: starting items, then the components of Dusk and Dawn on your first backs, and boots when the lane allows.
- Standard buildBalancedAdvancedThe default path: Dusk and Dawn, Cosmic Drive and Morellonomicon give the health, attack speed and ability power this class relies on. Pick it when you have no reason to adapt. Built from Riot's item tags and the champion's class; Riot publishes no build statistics.
Builds
Lane build
When to use it
How to open: starting items, then the components of Dusk and Dawn on your first backs, and boots when the lane allows.

Where it's played
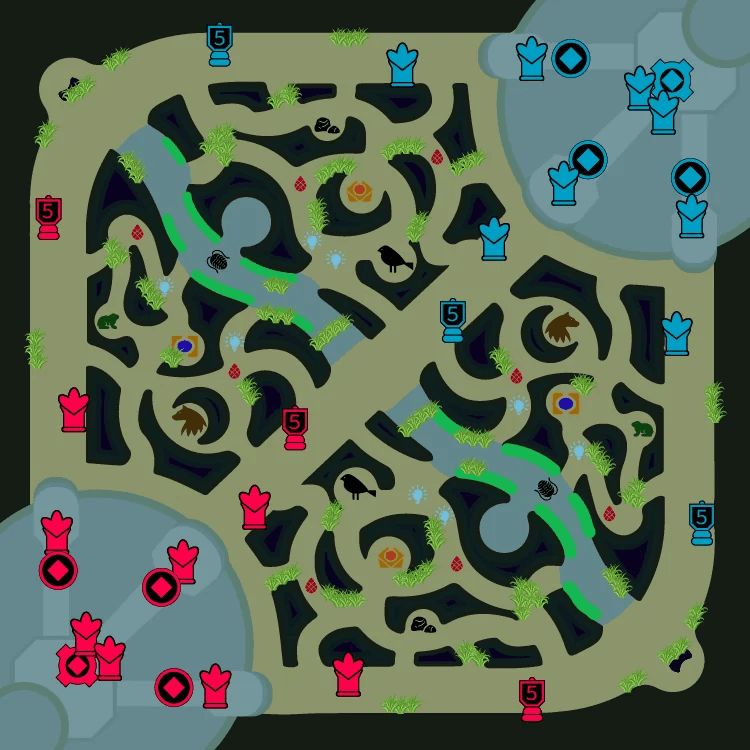
Picked before the game: the main lane first, then the alternatives.
 321100%
- TopMain100% of matches
- MidPriority 2
- JunglePriority 3
Starting items


Early game


Core items
- 1Dusk and Dawn
Boots

Runes
Primary· Precision








Secondary· Resolve





Shards


Summoner spells
 Flash
Flash Teleport
Standard build
When to use it
The default path: Dusk and Dawn, Cosmic Drive and Morellonomicon give the health, attack speed and ability power this class relies on. Pick it when you have no reason to adapt. Built from Riot's item tags and the champion's class; Riot publishes no build statistics.


Where it's played
Picked before the game: the main lane first, then the alternatives.
321100%- TopMain100% of matches
- MidPriority 2
- JunglePriority 3
Starting items
Core items
- 1Dusk and Dawn
- 2Cosmic Drive
- 3Morellonomicon
Boots
Situational


Runes
Primary· Precision
Secondary· Resolve
Shards
Summoner spells
- Flash
- Teleport
Abilities
 Happy HourPassiveGragas periodically heals upon using a skill.
 QBarrel Roll10/9/8/7/6s80 mpGragas rolls his cask to a location, which can be activated to explode or will explode on its own after 4 seconds. The potency of the explosion increases over time. Enemies struck by the blast have their Move Speed slowed.
- Cooldown
- 10·9·8·7·6
- Cost
- 80
- Range
- 850
 WDrunken Rage5s30 mpGragas samples his latest brew for 1 second. After finishing, he becomes boisterous and belligerent, dealing magic damage to all nearby enemies on his next basic attack and reducing damage received.
- Cooldown
- 5
- Cost
- 30
- Range
- 20
 EBody Slam14/13.5/13/12.5/12s50 mpGragas charges to a location and collides with the first enemy unit he comes across, dealing damage to all nearby enemy units and stunning them.
- Cooldown
- 14·13.5·13·12.5·12
- Cost
- 50
- Range
- 600
 RExplosive CaskUltimate100/85/70s100 mpGragas hurls his cask to a location, dealing damage and knocking back enemies caught in the blast radius.
- Cooldown
- 100·85·70
- Cost
- 100
- Range
- 1000
Strategy
1Starting and early items
The first items decide how comfortable the lane is. The lane build below lists them with what each one gives you.
- Key early items: Sheen and Blasting Wand.
2Trading
Short trades win lanes: hit, use one ability and step back before the enemy's full combo comes back. The kit brings crowd control (stun) with Body Slam and sustain with Happy Hour.
3Wave management
Freeze the wave near your tower when you're weaker, slow push before a back and crash the wave when you want to roam or take a plate.
4Early objectives
Early, fight for tower plates and help your jungler with Herald or grubs when your wave is pushed. Your spikes are level 6, when Explosive Cask comes online, and each completed item: Dusk and Dawn first, then Cosmic Drive.
Tips
- Short trades win lanes: hit, use one ability and step back before the enemy's full combo comes back.
- Sheen is your first purchase that changes the lane: get it early.
- Use Body Slam in lane only when your partner or jungler can follow.
- The damage reduction from Drunken Rage is applied when you start drinking, try to use it when you see damage coming your way.
- Early, fight for tower plates and help your jungler with Herald or grubs when your wave is pushed.
Matchups
Strong against
Gragas starts with 640 health and 38 armour against Gnar's 540 and 32: the early trades are already won on paper.
Body Slam (stun) lets Gragas pin Camille down before The Hextech Ultimatum gets them out.
Body Slam (stun) lets Gragas pin Fiora down before Lunge gets them out.


Weak against
Feral Scream silences Gragas, whose damage comes from abilities.
Decisive Strike silences Gragas, whose damage comes from abilities.
Heimerdinger attacks from 550 units and Gragas from 125, with no dash in the kit to close the gap.

Changelog
- Guide created for patch 16.19.1.
Was this helpful?
Your vote helps other players find the best guides.