











Zed · Mid
Zed Safe Play Guide
Mais guias de Zed
Este guia é montado pelo site com dados de partidas e do próprio jogo: ninguém o escreveu à mão. Se houver guias oficiais ou da comunidade, eles aparecem ao lado.
Introdução
This guide is about playing Zed safely and consistently. Safe mid means farming under your tower, waiting for your items and only following your jungler when the enemy jungler is seen elsewhere. The kit brings mobility with Living Shadow.
Pontos fortes
- Mobility: Living Shadow lets you reposition, engage or escape.
- High physical damage: Riot rates it 9/10 in attack.
- Clear job in the team: win the central lane, roam to the side lanes and control the river.
Pontos fracos
- Fragile: Riot rates it 2/10 in defense.
- Melee range: ranged opponents can poke it in lane.
Cola de builds
Escolha a build de acordo com o que você quer fazer na partida.
- Defensive buildDefensivoRecomendadaKeeps enough damage while adding magic resist, attack damage and life steal through Mercurial Scimitar, Maw of Malmortius and Death's Dance. Choose it against dive, assassins or a lane you can't win.
- Against magic damageDefensivoSituacionalFor a team that kills with abilities: magic resist boots and a magic resist item in the core.
Builds
Defensive build
Quando usar
Keeps enough damage while adding magic resist, attack damage and life steal through Mercurial Scimitar, Maw of Malmortius and Death's Dance. Choose it against dive, assassins or a lane you can't win.


Por onde se joga
É escolhida antes da partida: primeiro a rota principal e depois as alternativas.
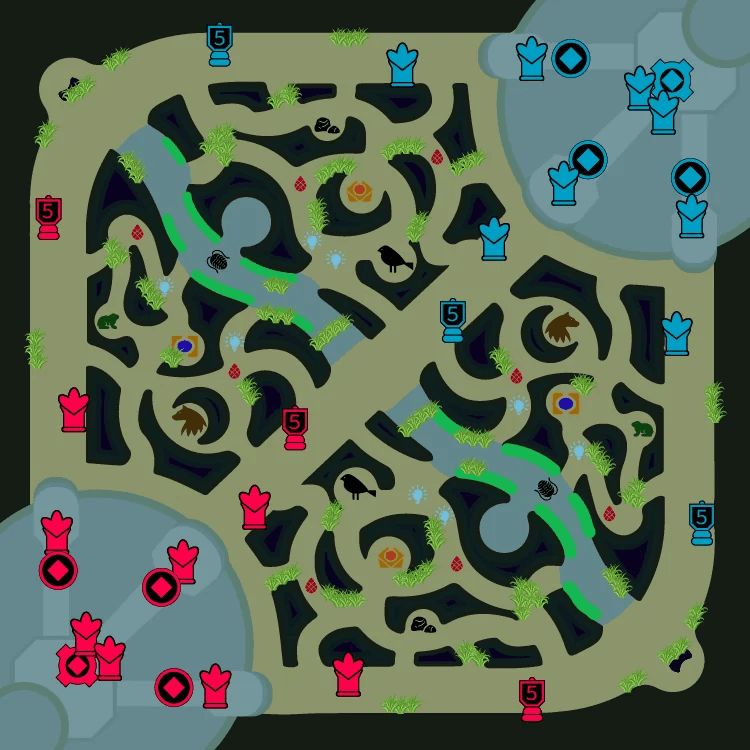
 244 %156 %
- MeioPrincipal56 % das partidas
- SelvaPrioridade 244 % das partidas
Itens iniciais


Itens principais
- 1Cimitarra Mercurial
- 2Mandíbula de Malmortius
- 3Dança da Morte
Botas

Situacionais


Runas
Primária· Precisão






Secundária· Determinação





Fragmentos


Feitiços de invocador
 Flash
Flash Teleporte
Against magic damage
Quando usar
For a team that kills with abilities: magic resist boots and a magic resist item in the core.
Por onde se joga
É escolhida antes da partida: primeiro a rota principal e depois as alternativas.
244 %156 %- MeioPrincipal56 % das partidas
- SelvaPrioridade 244 % das partidas
Itens iniciais
Itens principais
- 1Quebra-Bastião
- 2Cutelo Negro
- 3Cimitarra Mercurial


Botas

Situacionais
Runas
Primária· Precisão
Secundária· Determinação
Fragmentos
Feitiços de invocador
- Flash
 Incendiar
Habilidades
 Desprezo pelos FracosPassivaOs ataques básicos de Zed contra alvos com pouca Vida causam Dano Mágico adicional. Esse efeito pode ocorrer contra o mesmo Campeão inimigo apenas uma vez a cada poucos segundos.
 QShuriken Laminado6s75/70/65/60/55 mpZed e suas sombras arremessam seus shurikens. Cada shuriken causa dano em todos os inimigos atingidos.
- Tempo de recarga
- 6
- Custo
- 75·70·65·60·55
- Alcance
- 900
 WSombra Viva20/19/18/17/16s40/35/30/25/20 mpEfeito passivo: Zed recebe energia sempre que ele e suas sombras atingem um inimigo com a mesma habilidade. A energia só pode ser recebida uma vez a cada conjuração de habilidade. Ativo: A sombra de Zed avança e fica no mesmo lugar por alguns segundos. Quando Sombra Viva é reativada, Zed troca de posição com sua sombra.
- Tempo de recarga
- 20·19·18·17·16
- Custo
- 40·35·30·25·20
- Alcance
- 650
 ECorte Sombrio5/4.5/4/3.5/3s40 mpZed e as Sombras dele atacam, causando dano a inimigos próximos. Inimigos atingidos pelo corte de uma Sombra sofrem Lentidão.
- Tempo de recarga
- 5·4.5·4·3.5·3
- Custo
- 40
- Alcance
- 290
 RMarca FatalSuprema120/110/100sZed se torna inalvejável e avança contra um Campeão inimigo para marcá-lo. Após 3 segundos, a marca é ativada, repetindo parte de todo o dano que Zed causou ao alvo enquanto ele estava marcado.
- Tempo de recarga
- 120·110·100
- Alcance
- 625
Estratégia
1Safe laning
Safe mid means farming under your tower, waiting for your items and only following your jungler when the enemy jungler is seen elsewhere. Trade when the enemy uses an ability on the wave: that's the moment they can't answer.
2Surviving fights
Use Death Mark where it changes the fight, not where it's safe, and keep your distance until the enemy uses their engage. Your way out is Living Shadow: if it's on cooldown, stay further back.
3Positioning and peel
Stand where the enemy has to go through your team to reach you, and protect whoever the enemy focuses.
4Playing from behind
When the game goes badly, farm what's safe, defend with your team and wait for the enemy to make a mistake: a single won fight can turn it around.
Dicas
- Keep Living Shadow for escaping, not for chasing.
- Go back when your key abilities are down: a reset costs less than a death.
- Never be the first to show on the map in the late game.
- If enemies are missing from the map, back off before they appear.
Confrontos

Mudanças
- Guide created for patch 16.19.1.
Ele te ajudou?
Seu voto ajuda outros jogadores a encontrar os melhores guias.