











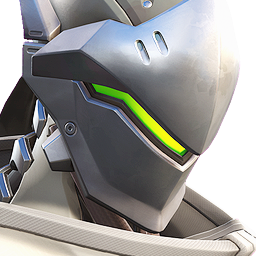
Genji · Damage
Genji: maps, ranks and pairings
Mais guias de Genji
Este guia é montado pelo site com dados de partidas e do próprio jogo: ninguém o escreveu à mão. Se houver guias oficiais ou da comunidade, eles aparecem ao lado.
Introdução
Genji is a flanker damage hero in Overwatch with 250 health. In competitive this season (PC, Americas, Europe and Asia averaged) it wins 52.0% of its games, is picked by 10.1% of teams and banned in 3.8% of matches: tier S on our ladder. Blizzard doesn't publish hero-versus-hero results, so this guide measures what it does publish: maps, divisions, regions and platforms.
Pontos fortes
- Wins 52.0% of its competitive games (PC, all regions): #2 of 24 damage heroes.
Pontos fracos
- Loses strength as the level rises: −3.1 pts of win rate from Bronze–Silver to Master–Grandmaster.
- Struggles on Antarctic Peninsula, Busan and Samoa (down to 49.7% won).
Cola de builds
Escolha a build de acordo com o que você quer fazer na partida.
- Genji · recommended perksEquilibradoRecomendadaOne minor and one major perk, chosen by what each one's text adds to a damage hero. Blizzard doesn't publish how often each perk is picked, so this is a reading of the perks, not a pick rate.
- Genji · alternative perksUtilidadeSituacionalThe other option of each perk level. Perks are chosen during the match, so switch to these when the enemy composition or the map asks for what they do.
Builds
Genji · recommended perks
Quando usar
One minor and one major perk, chosen by what each one's text adds to a damage hero. Blizzard doesn't publish how often each perk is picked, so this is a reading of the perks, not a pick rate.
Vantagem menor
 Talhos RápidosCorpo a corpo rápido reduz o tempo de recarga de Golpe Veloz em 3 s.
 Sede do DragãoOs ataques da Lâmina do Dragão ganham 30% de roubo de vida.
Picked for more utility: Quick Melee reduces the cooldown of Swift Strike by 3 seconds.
Vantagem maior
 Lâmina RetorcidaO Golpe Veloz causa 25 de dano ao longo do tempo adicional se o inimigo estiver com a vida abaixo da metade.
 MeditaçãoRegenera 50 de vida por segundo enquanto Desviar estiver ativo.
Picked for more damage: Swift Strike deals 25 additional damage over time if the enemy is below half health.
Genji · alternative perks
Quando usar
The other option of each perk level. Perks are chosen during the match, so switch to these when the enemy composition or the map asks for what they do.
Vantagem menor
Talhos RápidosCorpo a corpo rápido reduz o tempo de recarga de Golpe Veloz em 3 s.Sede do DragãoOs ataques da Lâmina do Dragão ganham 30% de roubo de vida.When the situation calls for it: Dragonblade swings gain 30% lifesteal.
Vantagem maior
Lâmina RetorcidaO Golpe Veloz causa 25 de dano ao longo do tempo adicional se o inimigo estiver com a vida abaixo da metade.MeditaçãoRegenera 50 de vida por segundo enquanto Desviar estiver ativo.When the situation calls for it: Regenerate 50 health per second while Deflect is active.
Habilidades
 LMBShurikenLança uma rajada precisa de três projéteis Lança um leque de 3 projéteis em um arco.
 EDesviar8sDesvia os projéteis disparados contra você na direção da sua mira e evita ataques corpo a corpo.
 ShiftGolpe Veloz8sAvança para frente rapidamente e inflige dano aos inimigos. Eliminações reiniciam o tempo de recarga.
 QLâmina do DragãoSupremaLibera o poder de uma devastadora arma de combate corpo-a-corpo.
 CiberagilidadePassivaEscala paredes e realiza um pulo duplo.
Estratégia
1Every competitive map
From best to worst win rate (PC, the three regions averaged):
- Colosseo: 53.6% won (11.5% pick rate)
- Dorado: 53.5% won (10.6% pick rate)
- Route 66: 53.4% won (9.4% pick rate)
- Watchpoint: Gibraltar: 53.4% won (10.8% pick rate)
- Rialto: 52.7% won (9.5% pick rate)
- Shambali Monastery: 52.6% won (9.3% pick rate)
- Eichenwalde: 52.4% won (9.1% pick rate)
- New Queen Street: 52.4% won (11.6% pick rate)
- Ilios: 52.4% won (11.5% pick rate)
- Havana: 52.4% won (8.9% pick rate)
- Aatlis: 52.3% won (12.3% pick rate)
- Esperança: 52.2% won (12.0% pick rate)
- Suravasa: 52.1% won (12.7% pick rate)
- New Junk City: 52.1% won (12.1% pick rate)
- Hollywood: 52.0% won (9.5% pick rate)
- Midtown: 52.0% won (8.5% pick rate)
- Neon Junction: 52.0% won (8.7% pick rate)
- King’s Row: 51.8% won (9.6% pick rate)
- Junkertown: 51.8% won (9.1% pick rate)
- Lijiang Tower: 51.7% won (11.4% pick rate)
- Circuit Royal: 51.6% won (9.4% pick rate)
- Numbani: 51.3% won (10.1% pick rate)
- Paraíso: 51.2% won (9.3% pick rate)
- Blizzard World: 51.2% won (9.1% pick rate)
- Nepal: 51.2% won (11.5% pick rate)
- Oasis: 51.1% won (11.8% pick rate)
- Runasapi: 51.0% won (11.1% pick rate)
- Samoa: 50.8% won (11.0% pick rate)
- Busan: 50.8% won (11.0% pick rate)
- Antarctic Peninsula: 49.7% won (10.8% pick rate)
2In competitive
Blizzard's official stats for this season, division by division (PC, the three regions averaged).
- Bronze: 52.3% won, picked by 6.9% of teams
- Silver: 52.0% won, picked by 7.0% of teams
- Gold: 52.5% won, picked by 8.5% of teams
- Platinum: 52.3% won, picked by 10.8% of teams
- Emerald: 51.7% won, picked by 13.3% of teams
- Diamond: 51.1% won, picked by 14.6% of teams
- Master: 50.2% won, picked by 14.4% of teams
- Grandmaster: 48.0% won, picked by 11.1% of teams
3Regions and platforms
Competitive unless stated otherwise:
- Asia (PC): 51.0% won, 9.1% pick rate
- Europe (PC): 52.5% won, 10.9% pick rate
- Americas (PC): 52.5% won, 10.4% pick rate
- Console: 50.9% won, 7.5% pick rate
- Quick Play (PC): 50.6% won, 10.6% pick rate
Dicas
- On maps that suit you, Doomfist, Mercy, Wrecking Ball and Wuyang tend to be doing well too.



Confrontos
Combina bem com
Both do better than their average on the same maps, such as Colosseo, Dorado and Suravasa: a good pairing when the map suits them.
Both do better than their average on the same maps, such as Dorado, Route 66 and Colosseo: a good pairing when the map suits them.
Both do better than their average on the same maps, such as Colosseo, Dorado and Watchpoint: Gibraltar: a good pairing when the map suits them.
Both do better than their average on the same maps, such as Colosseo, Watchpoint: Gibraltar and New Queen Street: a good pairing when the map suits them.
Mudanças
- Guide created for patch Season 4.
Ele te ajudou?
Seu voto ajuda outros jogadores a encontrar os melhores guias.