











Samira · ADC
Samira Safe Play Guide
Mais guias de Samira
Este guia é montado pelo site com dados de partidas e do próprio jogo: ninguém o escreveu à mão. Se houver guias oficiais ou da comunidade, eles aparecem ao lado.
Introdução
This guide is about playing Samira safely and consistently. Safe bot means last hitting with minimal risk, standing behind your minions and waiting for your two-item spike. The kit brings crowd control (knock-up) with Daredevil Impulse and mobility with Daredevil Impulse.
Pontos fortes
- Mobility: Daredevil Impulse lets you reposition, engage or escape.
- High physical damage: Riot rates it 8/10 in attack.
- Crowd control: Daredevil Impulse applies a knock-up to set up kills.
Pontos fracos
- Needs protection from the team in fights.
- Predictable if you always play it the same way: adapt your build to the enemy team.
Cola de builds
Escolha a build de acordo com o que você quer fazer na partida.
- Defensive buildDefensivoRecomendadaKeeps enough damage while adding magic resist, attack damage and life steal through Mercurial Scimitar, Maw of Malmortius and Bandlepipes. Choose it against dive, assassins or a lane you can't win.
- Against magic damageDefensivoSituacionalFor a team that kills with abilities: magic resist boots and a magic resist item in the core.
Builds
Defensive build
Quando usar
Keeps enough damage while adding magic resist, attack damage and life steal through Mercurial Scimitar, Maw of Malmortius and Bandlepipes. Choose it against dive, assassins or a lane you can't win.


Por onde se joga
É escolhida antes da partida: primeiro a rota principal e depois as alternativas.
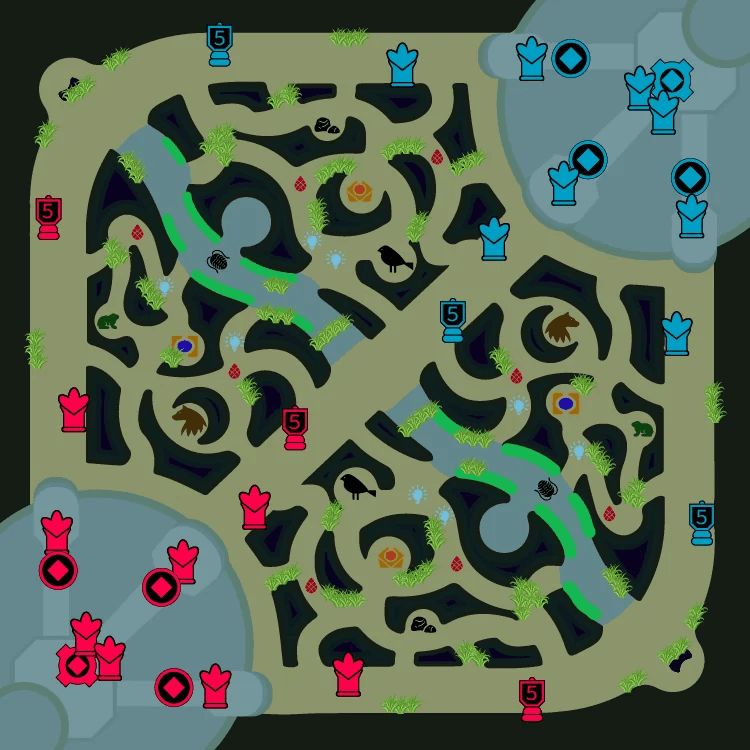
 1100 %
- Rota Inferior (ADC)Principal100 % das partidas
Itens iniciais


Itens principais
- 1Cimitarra Mercurial
- 2Mandíbula de Malmortius
- 3Bandocanos
Botas

Situacionais


Runas
Primária· Precisão








Secundária· Determinação





Fragmentos


Feitiços de invocador
 Flash
Flash Curar
Curar
Against magic damage
Quando usar
For a team that kills with abilities: magic resist boots and a magic resist item in the core.
Por onde se joga
É escolhida antes da partida: primeiro a rota principal e depois as alternativas.
1100 %- Rota Inferior (ADC)Principal100 % das partidas
Itens iniciais
Itens principais
- 1Chuva de Canivete
- 2Flechatroz de Yun Tal
- 3Cimitarra Mercurial


Botas

Situacionais
Runas
Primária· Precisão
Secundária· Determinação
Fragmentos
Feitiços de invocador
- Flash
- Curar
Habilidades
 Impulso AudaciosoPassivaSamira gera um combo conforme Ataca ou conjura habilidades de forma alternada. Seus Ataques corpo a corpo causam Dano Mágico adicional. Os Ataques de Samira contra inimigos sob efeitos Imobilizadores a farão avançar ao Alcance de Ataque dela. Se o inimigo estiver afetado por Arremesso ao ar , ela mantém o Arremesso ao ar por um curto período.Passive — applies a knock-up and moves you. It works on its own: play around it.
 QTalento Natural6/5/4/3/2s30 mpSamira dispara um projétil ou golpeia com a espada, causando dano. Se a habilidade for conjurada durante Ímpeto Indomável, ela atinge todos os inimigos no caminho.
- Tempo de recarga
- 6·5·4·3·2
- Custo
- 30
- Alcance
- 950
 WVoragem Afiada30/28/26/24/22s60 mpSamira gira a espada ao seu redor, causando dano e destruindo projéteis inimigos.
- Tempo de recarga
- 30·28·26·24·22
- Custo
- 60
- Alcance
- 325
 EÍmpeto Indomável20/18/16/14/12s40 mpSamira avança e atravessa um inimigo (incluindo estruturas), cortando os inimigos atravessados e recebendo Velocidade de Ataque. Abater um Campeão inimigo reinicia o Tempo de Recarga da habilidade.
- Tempo de recarga
- 20·18·16·14·12
- Custo
- 40
- Alcance
- 600
 RGatilho InfernalSuprema5sSamira dispara uma saraivada de tiros, atingindo todos os inimigos ao redor dela.
- Tempo de recarga
- 5
- Alcance
- 600
Estratégia
1Safe laning
Safe bot means last hitting with minimal risk, standing behind your minions and waiting for your two-item spike. Auto-attack the enemy when they walk up to last hit, and step back behind your minions as soon as they answer.
2Surviving fights
Hit the closest target you can hit safely, not the one you want: a marksman that stays alive wins the fight. Your way out is Daredevil Impulse: if it's on cooldown, stay further back.
3Positioning and peel
Stand where the enemy has to go through your team to reach you, and protect whoever the enemy focuses. Hold Daredevil Impulse for the enemy diver.
4Playing from behind
When the game goes badly, farm what's safe, defend with your team and wait for the enemy to make a mistake: a single won fight can turn it around.
Dicas
- Keep Daredevil Impulse for escaping, not for chasing.
- Save Daredevil Impulse for whoever jumps on your team.
- Go back when your key abilities are down: a reset costs less than a death.
- Never be the first to show on the map in the late game.
- If enemies are missing from the map, back off before they appear.
Confrontos



Mudanças
- Guide created for patch 16.19.1.
Ele te ajudou?
Seu voto ajuda outros jogadores a encontrar os melhores guias.