











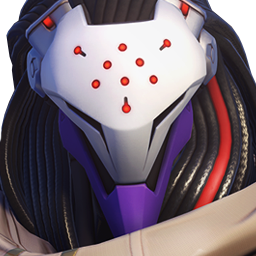
Ramattra · Tank
Ramattra guide
More Ramattra guides
This guide is assembled by the site from match data and the game's own information — nobody wrote it by hand. Official and community guides appear alongside it when they exist.
Overview
Ramattra is a stalwart tank hero in Overwatch with 425 health and 100 armor (525 in total). In competitive this season (PC, Americas, Europe and Asia averaged) it wins 48.3% of its games, is picked by 8.3% of teams and banned in 6.7% of matches: tier C on our ladder.
Strengths
- Protection: Void Barrier (Omnic Form) blocks or absorbs damage.
Weaknesses
- Only 48.3% of competitive games won (PC, all regions): #10 of 15 tank heroes.
- Loses strength as the level rises: −3.2 pts of win rate from Bronze–Silver to Master–Grandmaster.
- Fragile for its role: 525 hit points against an average of 632 among tank heroes.
Build cheat sheet
Pick the build that fits what you want to do this game.
- Ramattra · recommended perksBalancedRecommendedOne minor and one major perk, chosen by what each one's text adds to a tank hero. Blizzard doesn't publish how often each perk is picked, so this is a reading of the perks, not a pick rate.
- Ramattra · StadiumBalancedStadiumFour of the 12 Stadium powers of Ramattra, chosen by what their text adds to a tank hero and spread over different abilities so no single one carries the build.
- Ramattra · alternative perksUtilitySituationalThe other option of each perk level. Perks are chosen during the match, so switch to these when the enemy composition or the map asks for what they do.
Builds
Ramattra · recommended perks
When to use it
One minor and one major perk, chosen by what each one's text adds to a tank hero. Blizzard doesn't publish how often each perk is picked, so this is a reading of the perks, not a pick rate.
Minor perk
 Relentless FormWhile Nemesis Form is active, eliminations extend the duration by 2 seconds. Half duration gained during Annihilation.
 Prolonged BarrierVoid Barrier's duration and size is increased by 25%.
Picked for more survival: Void Barrier's duration and size is increased by 25%.
Major perk
 Void SurgeVoid Accelerator periodically releases a burst of 6 additional projectiles during continuous fire.
 Nanite RepairRamattra is healed for 100 health per second while within Ravenous Vortex.
Picked for more survival: Ramattra is healed for 100 health per second while within Ravenous Vortex.
Ramattra · Stadium
When to use it
Four of the 12 Stadium powers of Ramattra, chosen by what their text adds to a tank hero and spread over different abilities so no single one carries the build.
Stadium powers (4)
- 1
 Recursion RelayVoid Accelerator (Omnic Form): +25% Void Barrier size. Void Accelerator projectile and Pummel that passes through the Void Barrier gain 15% increased damage.
 - 2
 Ravaging VortexRavenous Vortex: When Ravenous Vortex is detonated, deal 25 damage and gain 2% Ultimate Charge per enemy hit.
 - 3
 Conversion ProtocolPicked for more damage: Block heals you for 25% of damage mitigated over 3s.
 - 4
 BreakoutPummel (Nemesis Form): While blocking in Nemesis Form, use Pummel to perform a dashing punch. (4s Cooldown).
Ramattra · alternative perks
When to use it
The other option of each perk level. Perks are chosen during the match, so switch to these when the enemy composition or the map asks for what they do.
Minor perk
Relentless FormWhile Nemesis Form is active, eliminations extend the duration by 2 seconds. Half duration gained during Annihilation.Prolonged BarrierVoid Barrier's duration and size is increased by 25%.When the situation calls for it: While Nemesis Form is active, eliminations extend the duration by 2 seconds. Half duration gained during Annihilation.
Major perk
Void SurgeVoid Accelerator periodically releases a burst of 6 additional projectiles during continuous fire.Nanite RepairRamattra is healed for 100 health per second while within Ravenous Vortex.When the situation calls for it: Void Accelerator periodically releases a burst of 6 additional projectiles during continuous fire.
Abilities
 LMBVoid Accelerator (Omnic Form)Fire a stream of projectiles.Key: primary fire. Perks: Void Surge
 RMBVoid Barrier (Omnic Form)12sCreate a barrier at the targeted location.Key: secondary fire · cooldown 12 s. Perks: Prolonged Barrier
 LMBPummel (Nemesis Form)Punch, creating a wave of piercing energy with every swing.Key: primary fire
 ERavenous Vortex11sFire a sphere of energy that detonates on the ground, slowing and pulling down enemies. Re-activate to detonate early.Key: E · cooldown 11 s. Perks: Nanite Repair
 QAnnihilationUltimateEnter Nemesis Form and create a deadly swarm that lashes out at nearby enemies, persisting longer when damaging enemies.Key: Q · ultimate. Perks: Relentless Form
Strategy
1Your job
In Role Queue each team fields one tank: you take space for your team, soak the damage the enemy would otherwise aim at your backline and decide when the fight starts.
2Abilities
- primary fire · Void Accelerator (Omnic Form): Fire a stream of projectiles.
- secondary fire · Void Barrier (Omnic Form) · 12 s: Create a barrier at the targeted location.
- primary fire · Pummel (Nemesis Form): Punch, creating a wave of piercing energy with every swing.
- E · Ravenous Vortex · 11 s: Fire a sphere of energy that detonates on the ground, slowing and pulling down enemies. Re-activate to detonate early.
- Q · Annihilation · ultimate: Enter Nemesis Form and create a deadly swarm that lashes out at nearby enemies, persisting longer when damaging enemies.
3Perks
During each match you unlock a minor perk and, later, a major perk: one of two options each time. ★ marks this guide's pick.
- ★ Prolonged Barrier: Void Barrier's duration and size is increased by 25%.
- Relentless Form: While Nemesis Form is active, eliminations extend the duration by 2 seconds. Half duration gained during Annihilation.
- ★ Nanite Repair: Ramattra is healed for 100 health per second while within Ravenous Vortex.
- Void Surge: Void Accelerator periodically releases a burst of 6 additional projectiles during continuous fire.
4Stadium powers
In Stadium you pick up to four powers over the match. These four fit Ramattra best by what their text does:
- Recursion Relay: +25% Void Barrier size. Void Accelerator projectile and Pummel that passes through the Void Barrier gain 15% increased damage.
- Ravaging Vortex: When Ravenous Vortex is detonated, deal 25 damage and gain 2% Ultimate Charge per enemy hit.
- Conversion Protocol: Block heals you for 25% of damage mitigated over 3s.
- Breakout: While blocking in Nemesis Form, use Pummel to perform a dashing punch. (4s Cooldown).
5In competitive
Blizzard's official stats for this season, division by division (PC, the three regions averaged).
- Bronze: 50.2% won, picked by 10.8% of teams
- Silver: 49.5% won, picked by 10.6% of teams
- Gold: 48.4% won, picked by 9.6% of teams
- Platinum: 47.8% won, picked by 8.0% of teams
- Emerald: 46.9% won, picked by 6.0% of teams
- Diamond: 46.8% won, picked by 4.4% of teams
- Master: 47.5% won, picked by 3.4% of teams
- Grandmaster: 45.7% won, picked by 3.4% of teams
6Best and worst maps
Win rate of Ramattra on each competitive map compared with its 48.3% overall.
- Nepal: 49.9% won (7.4% pick rate)
- Shambali Monastery: 49.7% won (9.8% pick rate)
- Antarctic Peninsula: 49.7% won (7.3% pick rate)
- Numbani: 46.5% won (7.9% pick rate)
- Hollywood: 46.8% won (9.0% pick rate)
- Colosseo: 47.0% won (7.1% pick rate)
7Common mistakes
- Pushing into five enemies without your team behind you.
- Taking duels far from your supports.
Tips
- Void Barrier (Omnic Form) (secondary fire) protects: time it for the enemy's burst, not for chip damage.
- Annihilation (Q) is your ultimate: plan it with your team's ultimates instead of using it as soon as it's ready.
- Walk ahead of your team but not so far that your supports lose line of sight.
- Spend your defensive cooldowns on the damage that would kill you, not on chip damage.
Matchups
Works well with
Both do better than their average on the same maps, such as Antarctic Peninsula, Nepal and Rialto: a good pairing when the map suits them.
Both do better than their average on the same maps, such as Antarctic Peninsula, Nepal and Busan: a good pairing when the map suits them.
Both do better than their average on the same maps, such as Antarctic Peninsula, Busan and Oasis: a good pairing when the map suits them.
Both do better than their average on the same maps, such as Antarctic Peninsula, Busan and Samoa: a good pairing when the map suits them.



Changelog
- Guide created for patch Season 4.
Was this helpful?
Your vote helps other players find the best guides.