











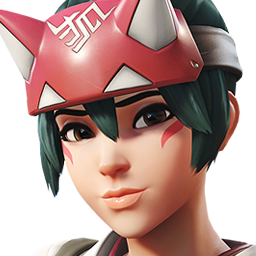
Kiriko · Support
Kiriko guide
More Kiriko guides
This guide is assembled by the site from match data and the game's own information — nobody wrote it by hand. Official and community guides appear alongside it when they exist.
Overview
Kiriko is a medic support hero in Overwatch with 225 health. In competitive this season (PC, Americas, Europe and Asia averaged) it wins 44.8% of its games, is picked by 31.7% of teams and banned in 2.7% of matches: tier D on our ladder.
Strengths
- Mobility: Swift Step gets it in and out of fights.
- Crowd control: Protection Suzu stops enemies in their tracks.
- Healing: Healing Ofuda keeps allies (or itself) alive.
Weaknesses
- Only 44.8% of competitive games won (PC, all regions): #14 of 14 support heroes.
Build cheat sheet
Pick the build that fits what you want to do this game.
- Kiriko · recommended perksBalancedRecommendedOne minor and one major perk, chosen by what each one's text adds to a support hero. Blizzard doesn't publish how often each perk is picked, so this is a reading of the perks, not a pick rate.
- Kiriko · StadiumBalancedStadiumFour of the 12 Stadium powers of Kiriko, chosen by what their text adds to a support hero and spread over different abilities so no single one carries the build.
- Kiriko · alternative perksUtilitySituationalThe other option of each perk level. Perks are chosen during the match, so switch to these when the enemy composition or the map asks for what they do.
Builds
Kiriko · recommended perks
When to use it
One minor and one major perk, chosen by what each one's text adds to a support hero. Blizzard doesn't publish how often each perk is picked, so this is a reading of the perks, not a pick rate.
Minor perk
 Urgent CareHealing Ofuda projectile speed is increased by 50% when seeking allies below half health.
 Fortune TellerKunai hits launch 2 Healing Ofuda to an ally in front of you.
Picked for more survival: Healing Ofuda projectile speed is increased by 50% when seeking allies below half health.
Major perk
 Ready StepSwift Step grants Kiriko 40% increased attack and reload speed for 3 seconds.
 FoxtrotProtection Suzu grants allies 30% increased movement speed for 4 seconds.
Picked for more damage: Swift Step grants Kiriko 40% increased attack and reload speed for 3 seconds.
Kiriko · Stadium
When to use it
Four of the 12 Stadium powers of Kiriko, chosen by what their text adds to a support hero and spread over different abilities so no single one carries the build.
Stadium powers (4)
- 1
 Supported ShootingHealing Ofuda: +100% Healing Ofuda Seek Radius When Healing Ofuda heals allies, grant them 20% increased Attack Speed for 3s.
 - 2
 Self-CareHealing Ofuda: When you use Healing Ofuda, each Healing Ofuda thrown heals you for 2% of your max Life.
 - 3
 Cleansing ChargeProtection Suzu: When you cleanse negative effects with Protection Suzu, gain 5% Ultimate Charge for each hero cleansed.
 - 4
 Donut DeliverySwift Step: Swift Step heals nearby allies by 80 Life over 2s.
Kiriko · alternative perks
When to use it
The other option of each perk level. Perks are chosen during the match, so switch to these when the enemy composition or the map asks for what they do.
Minor perk
Urgent CareHealing Ofuda projectile speed is increased by 50% when seeking allies below half health.Fortune TellerKunai hits launch 2 Healing Ofuda to an ally in front of you.When the situation calls for it: Kunai hits launch 2 Healing Ofuda to an ally in front of you.
Major perk
Ready StepSwift Step grants Kiriko 40% increased attack and reload speed for 3 seconds.FoxtrotProtection Suzu grants allies 30% increased movement speed for 4 seconds.When the situation calls for it: Protection Suzu grants allies 30% increased movement speed for 4 seconds.
Abilities
 LMBHealing OfudaChannel a burst of healing talismans that can seek targeted allies.Key: primary fire. Perks: Fortune Teller, Urgent Care
 RMBKunaiThrown long-ranged projectile.Key: secondary fire
 ShiftSwift Step7sTeleport directly to an ally.Key: Shift · cooldown 7 s. Perks: Ready Step
 EProtection Suzu14sThrow a protective charm to make allies become briefly invulnerable and cleansed of most negative effects.Key: E · cooldown 14 s. Perks: Foxtrot
 QKitsune RushUltimateSummon a fox spirit that rushes forward, accelerating the movement, attack speed, and cooldowns of allies that follow in its path.Key: Q · ultimate
Strategy
1Your job
In Role Queue each team fields two supports: you keep your team alive, enable fights with your utility and add damage whenever your allies are safe.
2Abilities
- primary fire · Healing Ofuda: Channel a burst of healing talismans that can seek targeted allies.
- secondary fire · Kunai: Thrown long-ranged projectile.
- Shift · Swift Step · 7 s: Teleport directly to an ally.
- E · Protection Suzu · 14 s: Throw a protective charm to make allies become briefly invulnerable and cleansed of most negative effects.
- Q · Kitsune Rush · ultimate: Summon a fox spirit that rushes forward, accelerating the movement, attack speed, and cooldowns of allies that follow in its path.
3Perks
During each match you unlock a minor perk and, later, a major perk: one of two options each time. ★ marks this guide's pick.
- Fortune Teller: Kunai hits launch 2 Healing Ofuda to an ally in front of you.
- ★ Urgent Care: Healing Ofuda projectile speed is increased by 50% when seeking allies below half health.
- Foxtrot: Protection Suzu grants allies 30% increased movement speed for 4 seconds.
- ★ Ready Step: Swift Step grants Kiriko 40% increased attack and reload speed for 3 seconds.
4Stadium powers
In Stadium you pick up to four powers over the match. These four fit Kiriko best by what their text does:
- Supported Shooting: +100% Healing Ofuda Seek Radius When Healing Ofuda heals allies, grant them 20% increased Attack Speed for 3s.
- Self-Care: When you use Healing Ofuda, each Healing Ofuda thrown heals you for 2% of your max Life.
- Cleansing Charge: When you cleanse negative effects with Protection Suzu, gain 5% Ultimate Charge for each hero cleansed.
- Donut Delivery: Swift Step heals nearby allies by 80 Life over 2s.
5In competitive
Blizzard's official stats for this season, division by division (PC, the three regions averaged).
- Bronze: 46.8% won, picked by 31.8% of teams
- Silver: 45.7% won, picked by 31.2% of teams
- Gold: 45.0% won, picked by 31.2% of teams
- Platinum: 44.4% won, picked by 31.5% of teams
- Emerald: 44.1% won, picked by 31.3% of teams
- Diamond: 44.4% won, picked by 32.0% of teams
- Master: 45.2% won, picked by 36.0% of teams
- Grandmaster: 46.3% won, picked by 40.8% of teams
6Best and worst maps
Win rate of Kiriko on each competitive map compared with its 44.8% overall.
- Shambali Monastery: 45.9% won (31.0% pick rate)
- Watchpoint: Gibraltar: 45.8% won (33.2% pick rate)
- Antarctic Peninsula: 45.7% won (32.5% pick rate)
- Hollywood: 43.5% won (31.4% pick rate)
- Midtown: 43.9% won (31.4% pick rate)
- Eichenwalde: 43.9% won (30.8% pick rate)
7Common mistakes
- Wandering away from your team and getting picked alone.
- Using your key cooldown before the enemy commits theirs.
Tips
- Swift Step (Shift) moves you: if you spend it to engage, you won't have it to escape.
- Protection Suzu (E) applies charm: keep it for the enemy who threatens your team most, or to stop an ultimate.
- Kitsune Rush (Q) is your ultimate: plan it with your team's ultimates instead of using it as soon as it's ready.
- Stay where you can see most of your team and have cover nearby.
- Heal the ally that is about to die, not the one who is missing a little health.
Matchups
Works well with
Both do better than their average on the same maps, such as Antarctic Peninsula, Nepal and Busan: a good pairing when the map suits them.
Both do better than their average on the same maps, such as Antarctic Peninsula, Oasis and Busan: a good pairing when the map suits them.
Both do better than their average on the same maps, such as New Queen Street, Esperança and Runasapi: a good pairing when the map suits them.
Both do better than their average on the same maps, such as Shambali Monastery, Antarctic Peninsula and Nepal: a good pairing when the map suits them.
Changelog
- Guide created for patch Season 4.
Was this helpful?
Your vote helps other players find the best guides.